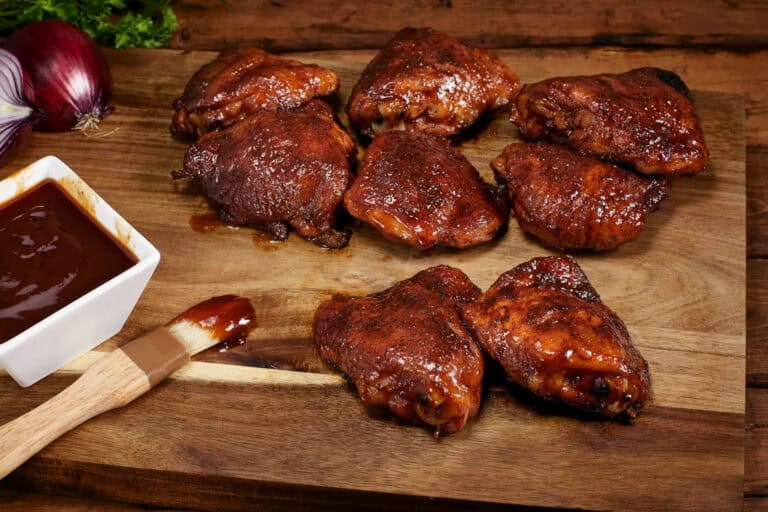
Barbecue Turkey: A Complete Guide
When it comes to barbecuing turkey, it’s all about that smoky, juicy, and tender goodness. This comprehensive guide will take you through everything you need to know about preparing a barbecue turkey, with a special emphasis on the smoked method. Whether you’re a seasoned pitmaster or a backyard barbecue enthusiast, this how to BBQ right smoked turkey guide is here to help you achieve the perfect barbecue turkey that’s sure to impress your family and friends.
From selecting the right bird and prepping it for the grill to mastering the smoking process and adding those final flavorful touches, we’ve got you covered. Get ready to transform your turkey from ordinary to extraordinary with this complete guide to barbecue turkey. Let’s dive in and get started on your journey to turkey barbecue perfection!
Why Choose Barbecue Turkey?
Barbecuing turkey, especially with the smoking method, offers a unique culinary experience that stands out from traditional cooking methods. Here’s why you should consider giving it a try:
- Unmatched Flavor: Smoking a turkey infuses it with a rich, smoky flavor that you just can’t get from roasting or frying. The slow cooking process allows the smoke to penetrate deep into the meat, resulting in a deliciously savory taste.
- Juicier Meat: Traditional methods like roasting can sometimes lead to dry meat, especially with larger birds. Smoking, on the other hand, involves cooking the turkey at a lower temperature over a longer period, which helps retain moisture and ensures the meat is tender and juicy.
- Versatility in Flavor Profiles: When you smoke a turkey, you can experiment with different wood chips (like hickory, apple, or cherry) and seasoning rubs to create a variety of flavor profiles. This customization lets you tailor the taste to your preference or the occasion.
- A Unique Experience: Barbecuing a turkey is an experience in itself. It’s a great way to bond with friends and family over the grill, sharing the anticipation of a meal that’s been carefully prepared and smoked to perfection.
- Healthier Option: Compared to deep-frying, which can add a lot of extra fat and calories, smoking is a healthier cooking method. You still get that delicious, rich flavor without the added grease.
Essential Supplies and Equipment
To smoke a turkey to perfection, you need the right supplies and equipment. Here’s a list of the essentials and why each one is important:
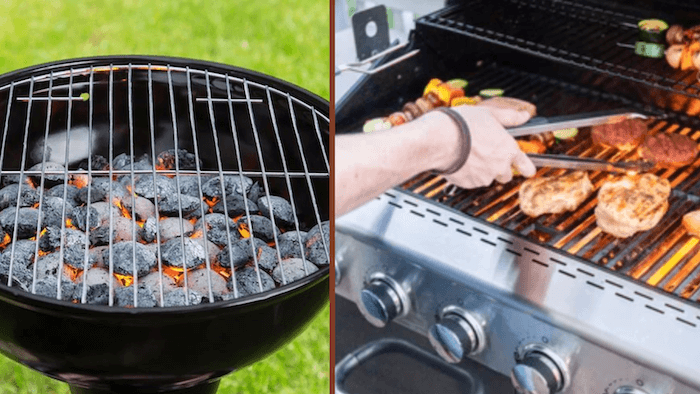
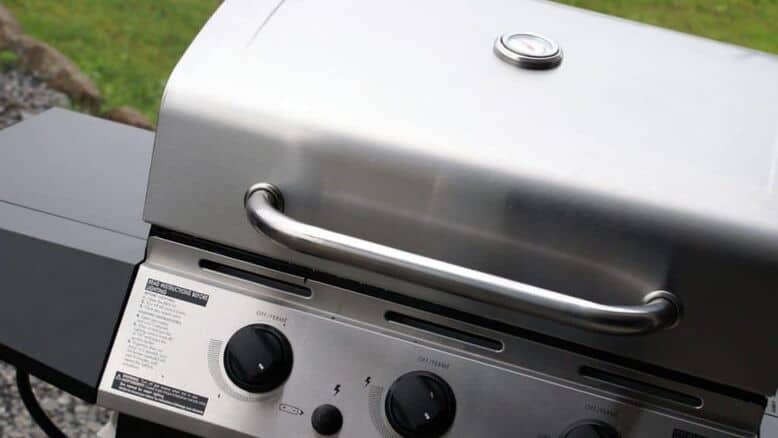
Smoker: The cornerstone of your barbecue turkey experience. You can use various types of smokers, such as:

- Offset Smokers: Great for those who love the traditional method and want to keep a close eye on the fire.
- Pellet Smokers: Ideal for a set-it-and-forget-it approach with precise temperature control.
- Electric Smokers: Convenient and user-friendly, perfect for beginners.
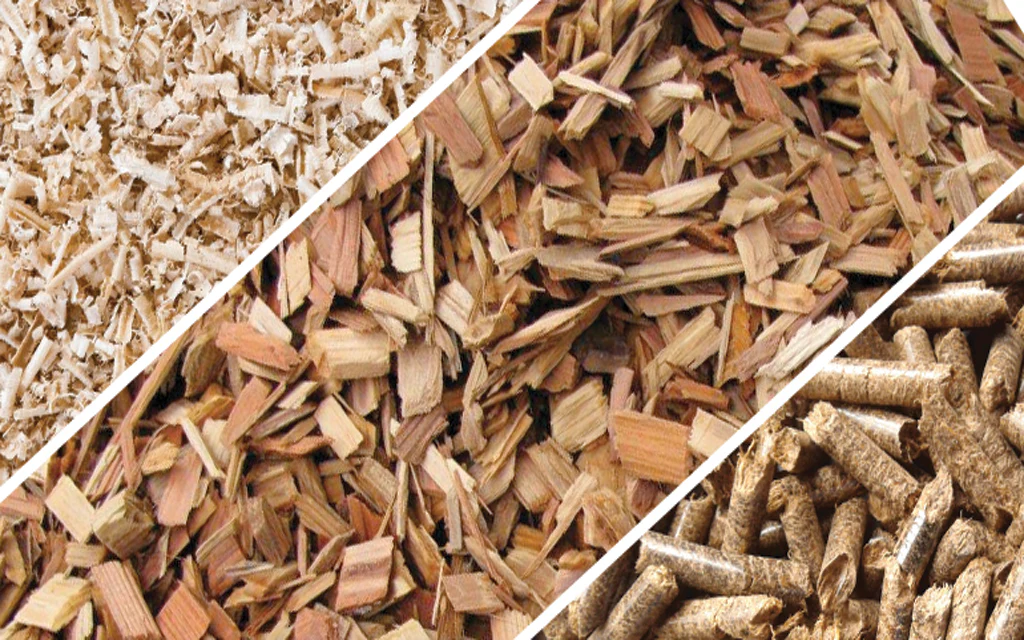
Wood Chips or Pellets: These are key to infusing that delicious smoky flavor into your turkey. Different woods impart different flavors:
- Hickory: Offers a strong, bacon-like flavor.
- Apple: Provides a sweet, mild flavor.
- Cherry: Adds a slightly sweet and fruity flavor.
- Mesquite: Gives a strong, earthy flavor, best used sparingly.
Meat Thermometer: Essential for ensuring your turkey is cooked to the right temperature. An instant-read thermometer helps you check the internal temperature quickly, ensuring your turkey is safe to eat and perfectly cooked.
Drip Pan: Placed under the turkey to catch drippings, which can be used to make gravy. It also helps keep your smoker clean.
Water Pan: Helps maintain moisture inside the smoker, preventing your turkey from drying out. It’s especially useful for longer smoking sessions.
Charcoal or Propane (for certain smokers): If you’re using a charcoal smoker, you’ll need a good supply of high-quality charcoal. For gas smokers, ensure you have enough propane to last the entire smoking process.
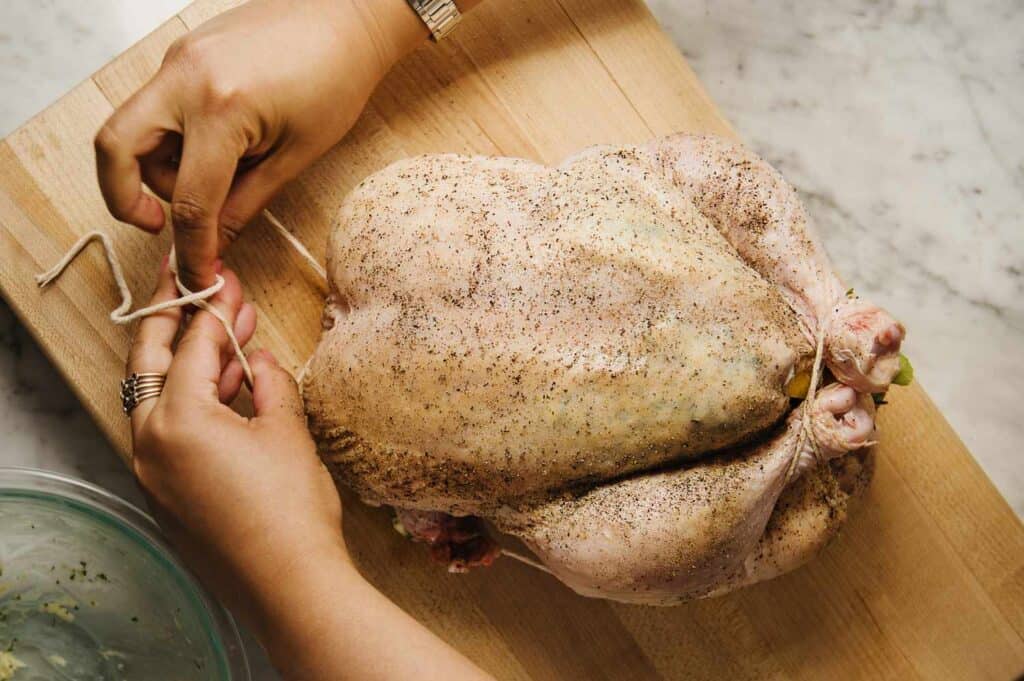
Butcher’s Twine: Useful for trussing the turkey, which helps it cook evenly by keeping the wings and legs close to the body.
Basting Brush: Handy for applying marinades or basting the turkey during smoking to keep it moist and flavorful.
Heat-Resistant Gloves: Protect your hands from the heat when handling the smoker or adjusting the turkey.
Smoker Box (if using a grill): If you’re using a regular grill, a smoker box allows you to add wood chips and achieve that smoky flavor.
Aluminum Foil: Useful for wrapping the turkey if it’s getting too dark on the outside but still needs more cooking time inside. It can also be used to tent the turkey after smoking to keep it warm and juicy.
Choosing the Right Turkey
Selecting the right turkey is crucial for a successful smoking session. Here are some guidelines to help you choose the best bird:
- Size Matters: Aim for a turkey that weighs between 12 to 16 pounds. Smaller turkeys cook more evenly and are less likely to dry out. If you need more meat, consider smoking two smaller turkeys instead of one large one.
- Fresh vs. Frozen: Fresh turkeys tend to have better texture and flavor, but frozen turkeys can be just as good if thawed properly. Ensure your turkey is fully thawed before smoking to avoid uneven cooking.
- Quality: Look for turkeys labeled “natural” or “organic” for the best quality. These turkeys are less likely to contain added solutions or preservatives, which can affect the flavor and texture.
- Self-Basting Turkeys: These birds are injected with a saline solution, which can affect the smoking process. It’s best to choose a turkey that has not been pre-basted so you have full control over the seasoning and brining.
- Check for Additives: Avoid turkeys with added sugars or artificial ingredients. These can burn during smoking and alter the flavor of your turkey.
Preparing Your Equipment
Properly preparing your equipment is essential for a smooth and successful smoking session. Follow these steps to get your smoker and tools ready:
- Clean Your Smoker: Start by cleaning your smoker to remove any residue from previous uses. This ensures a clean smoke and prevents any unwanted flavors from contaminating your turkey.
- Check Fuel Levels: Ensure you have enough charcoal, wood chips, pellets, or propane to last the entire smoking process. Running out of fuel midway can disrupt the cooking and affect the final result.
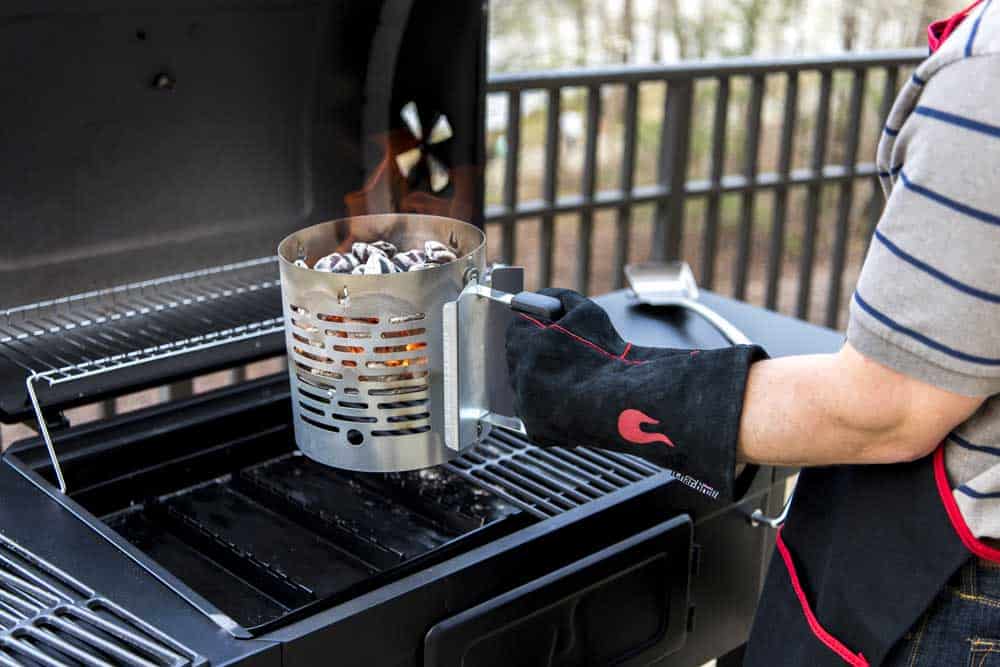
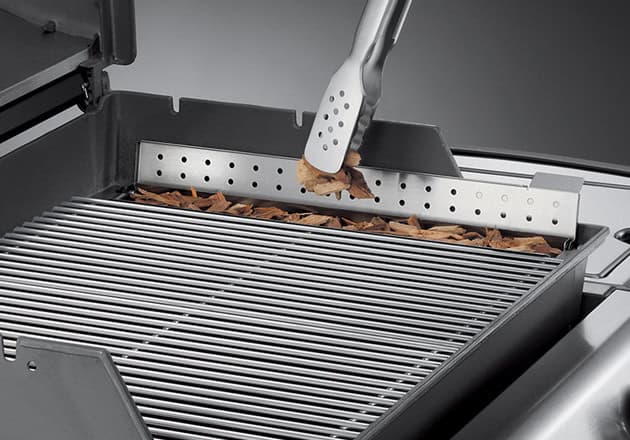
- Soak Wood Chips: If you’re using wood chips, soak them in water for at least 30 minutes before adding them to the smoker. This helps them smolder and produce smoke rather than burn quickly.
- Preheat the Smoker: Light your smoker and bring it to the desired temperature, usually between 225°F and 250°F. Preheating ensures that your turkey starts cooking right away and maintains an even temperature throughout.
- Add Water to the Pan: Fill the water pan in your smoker with water or another liquid like apple juice. This helps maintain moisture inside the smoker and keeps your turkey juicy.
- Prepare the Drip Pan: Place a drip pan under the turkey to catch the drippings. You can use these drippings to make gravy or simply discard them after cooking.
- Arrange the Coals or Pellets: If you’re using a charcoal smoker, arrange the coals for indirect cooking. For pellet smokers, ensure the hopper is full and ready to maintain a steady temperature.
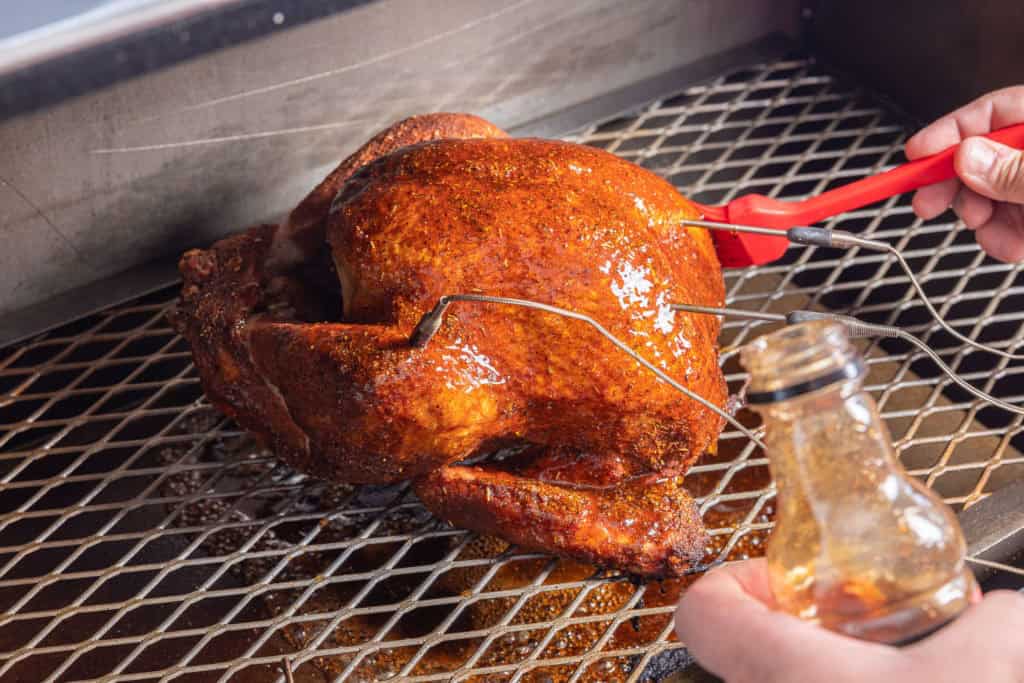
- Set Up the Thermometer: Place a meat thermometer in the thickest part of the turkey breast or thigh, avoiding bones. This helps you monitor the internal temperature and ensures the turkey is cooked to perfection.
- Check Ventilation: Adjust the vents on your smoker to control the airflow and maintain a consistent temperature. Proper ventilation is key to controlling the heat and smoke levels.
- Safety Check: Make sure your smoker is on a stable, heat-resistant surface and away from any flammable materials. Keep a fire extinguisher or water source nearby in case of emergencies.
Preparing the Turkey
Properly preparing your turkey before it goes into the smoker is crucial for achieving maximum flavor and tenderness. Here’s a detailed guide on how to get your turkey ready:
1. Thaw the Turkey
If you’re using a frozen turkey, make sure it’s fully thawed before you begin. This can take several days in the refrigerator, so plan accordingly. A good rule of thumb is to allow 24 hours of thawing time for every 4-5 pounds of turkey.
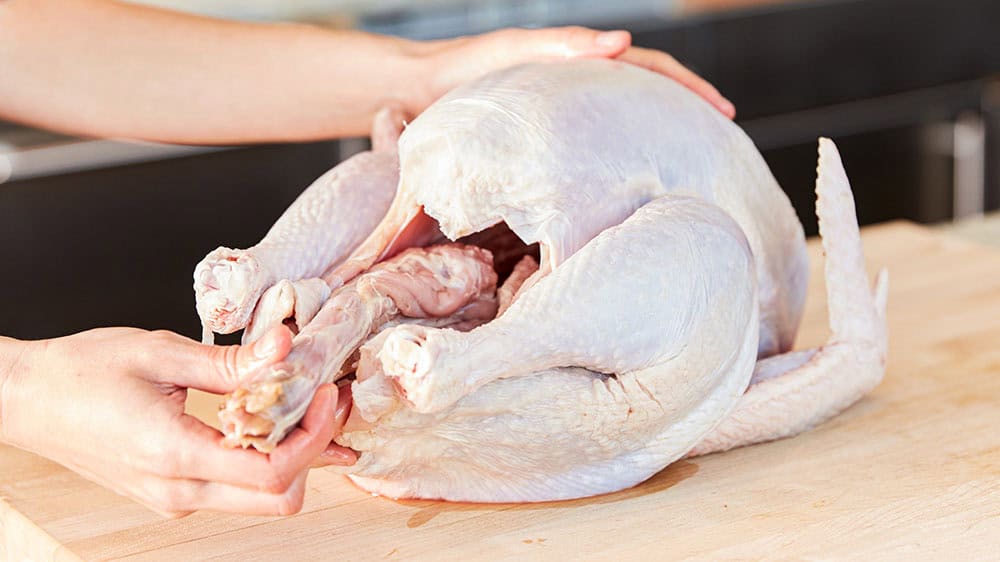
2. Clean the Turkey
Remove the turkey from its packaging and take out the giblets and neck from the cavities. Rinse the turkey inside and out under cold water, then pat it dry with paper towels.
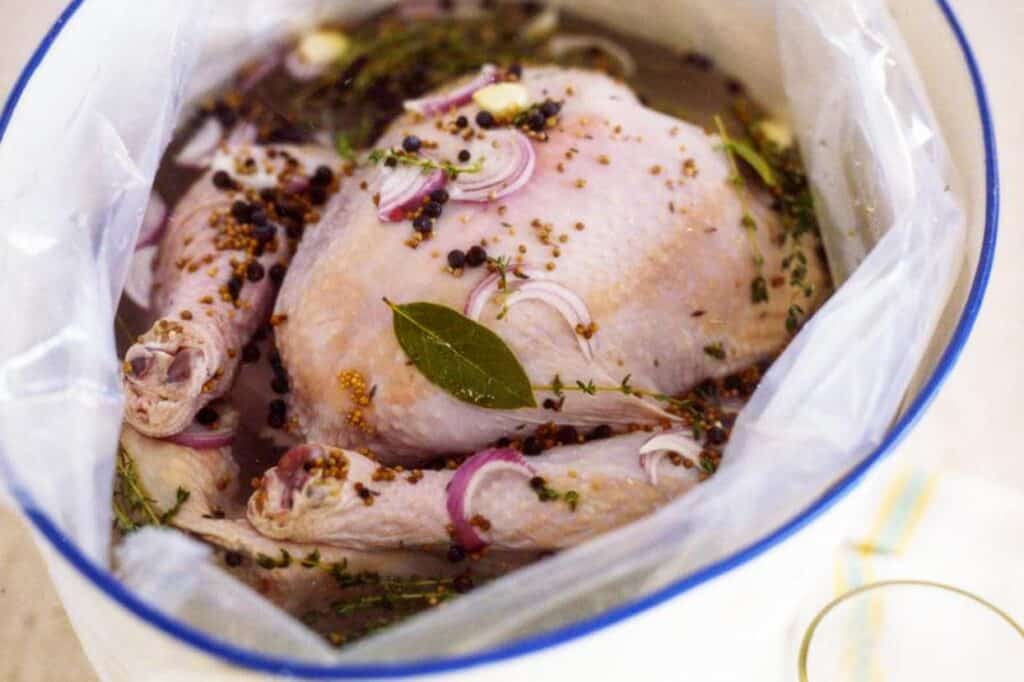
3. Brining the Turkey
Brining is a key step to ensure your turkey stays juicy and flavorful. Here’s a simple brine recipe:
Ingredients:
- 1 cup kosher salt
- 1 cup brown sugar
- 1 gallon water
- Optional: herbs (like rosemary, thyme), spices (like black peppercorns, cloves), and citrus (like orange slices, lemon slices)
Instructions:
- In a large pot, combine the salt, sugar, and water. Stir until the salt and sugar are fully dissolved.
- Add any additional herbs, spices, or citrus for extra flavor.
- Submerge the turkey in the brine. If necessary, use a heavy plate to keep it submerged.
- Refrigerate for 12-24 hours. If you don’t have enough space in your refrigerator, use a cooler with ice packs to keep the turkey at a safe temperature.
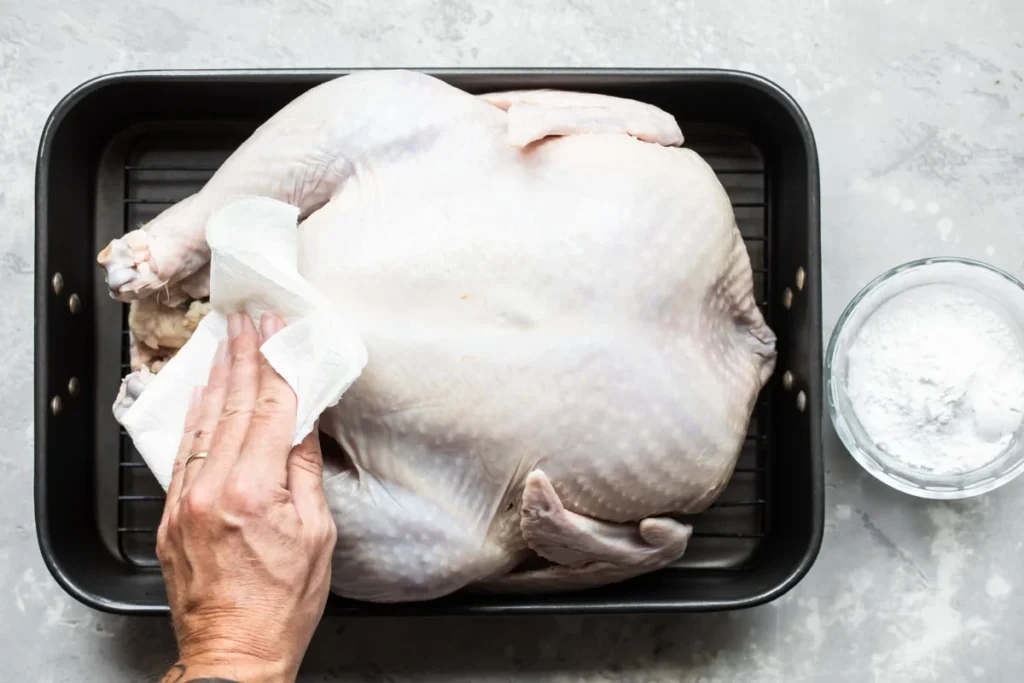
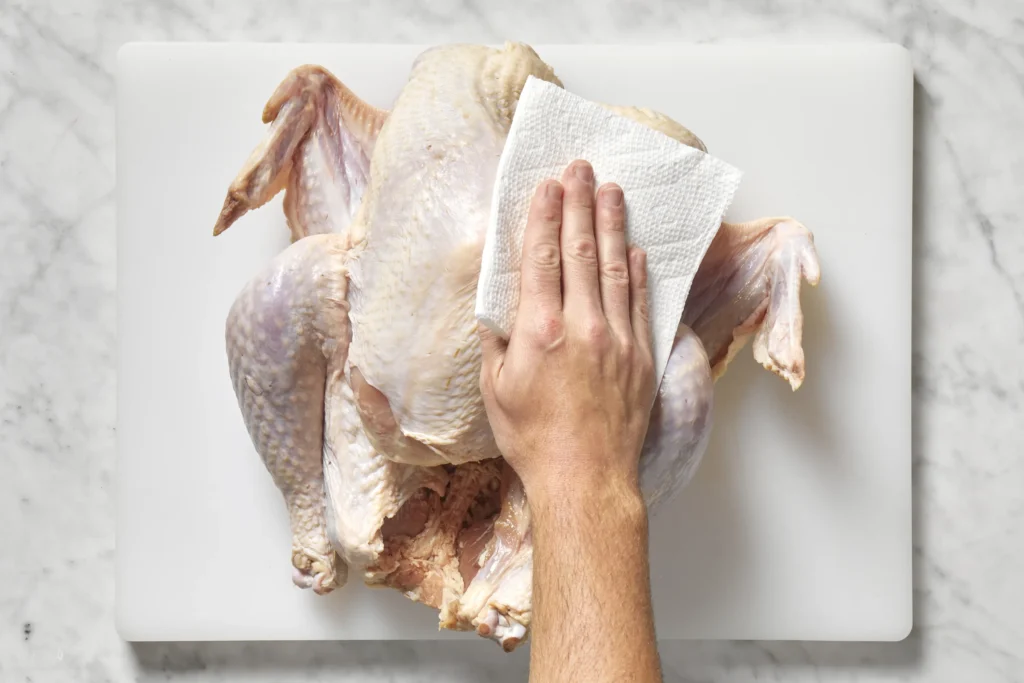
4. Rinse and Dry
- After brining, remove the turkey from the brine and rinse it thoroughly under cold water to remove excess salt. Pat the turkey dry with paper towels, ensuring the skin is as dry as possible for a crispy finish.
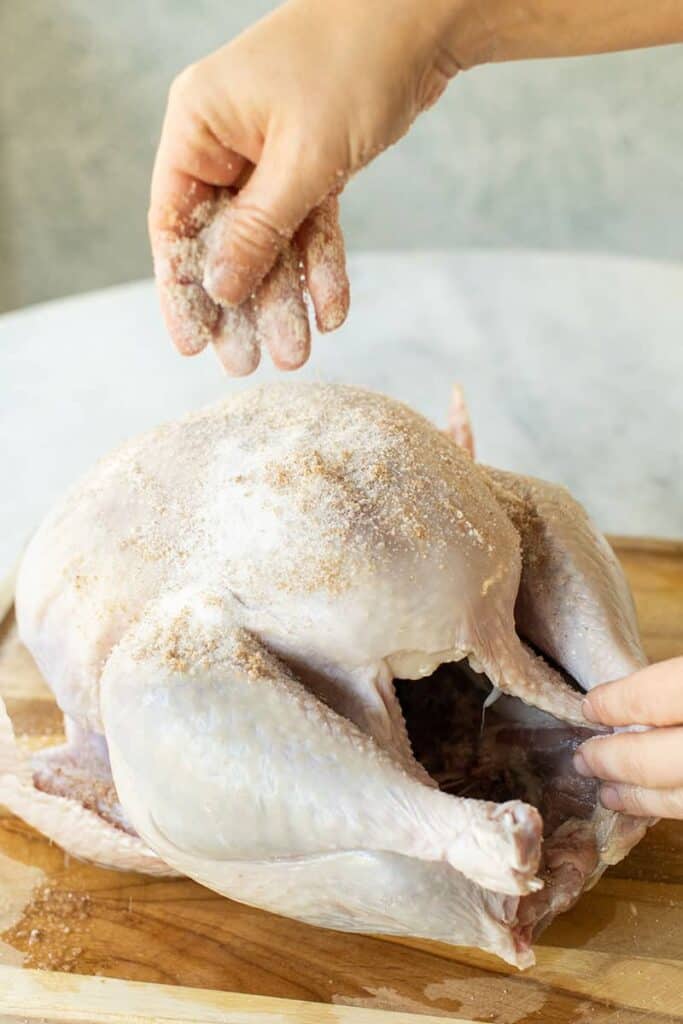
5. Season the Turkey
Now it’s time to season your turkey. You can use a pre-made poultry rub or make your own. Here’s a basic seasoning blend:
Ingredients:
- 2 tablespoons kosher salt
- 1 tablespoon black pepper
- 1 tablespoon paprika
- 1 tablespoon garlic powder
- 1 tablespoon onion powder
- 1 teaspoon dried thyme
- 1 teaspoon dried rosemary
Instructions:
- Mix all the ingredients in a small bowl.
- Rub the seasoning mix all over the turkey, including under the skin and inside the cavity.
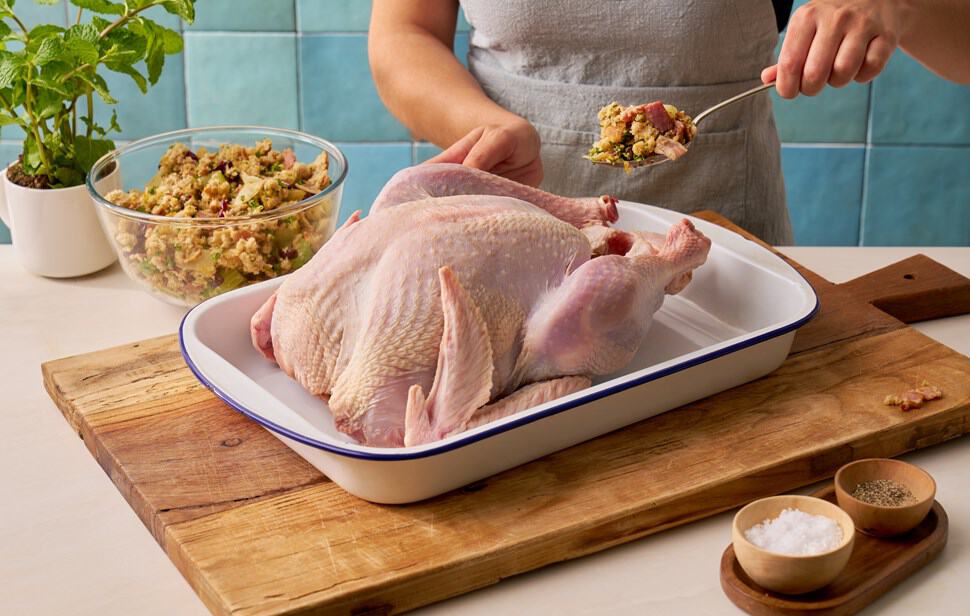
6. Stuffing Considerations
When it comes to stuffing your turkey, there are a few considerations to keep in mind:
To Stuff or Not to Stuff
- Safety Concerns: Stuffing inside the turkey can pose a food safety risk if not cooked properly. The stuffing must reach an internal temperature of 165°F to be safe, which can be challenging without overcooking the turkey.
- Even Cooking: A stuffed turkey takes longer to cook, which can result in uneven cooking and dry meat.
Alternatives to Traditional Stuffing
- Herbs and Aromatics: Instead of traditional bread stuffing, consider using a mix of fresh herbs (rosemary, thyme, sage), garlic, onions, and citrus (lemon or orange halves) inside the cavity. This infuses the turkey with flavor without the risk of undercooked stuffing.
- Cook Stuffing Separately: Prepare your stuffing in a separate dish. This allows you to ensure both the stuffing and turkey are cooked to perfection.
7. Optional: Butter or Oil Rub
- For an extra layer of flavor and moisture, you can rub softened butter or olive oil all over the turkey’s skin before applying the dry rub. This helps the skin brown and crisp up nicely.
8. Truss the Turkey
- Trussing helps the turkey cook evenly. Use butcher’s twine to tie the legs together and tuck the wings under the body.
9. Let it Rest
- After seasoning, let the turkey rest at room temperature for about 30 minutes. This helps it cook more evenly once it hits the smoker.
With your turkey properly prepared, it’s ready to go into the smoker. Follow these steps, and you’ll be on your way to achieving a perfectly smoked turkey that’s juicy, flavorful, and sure to impress your guests.
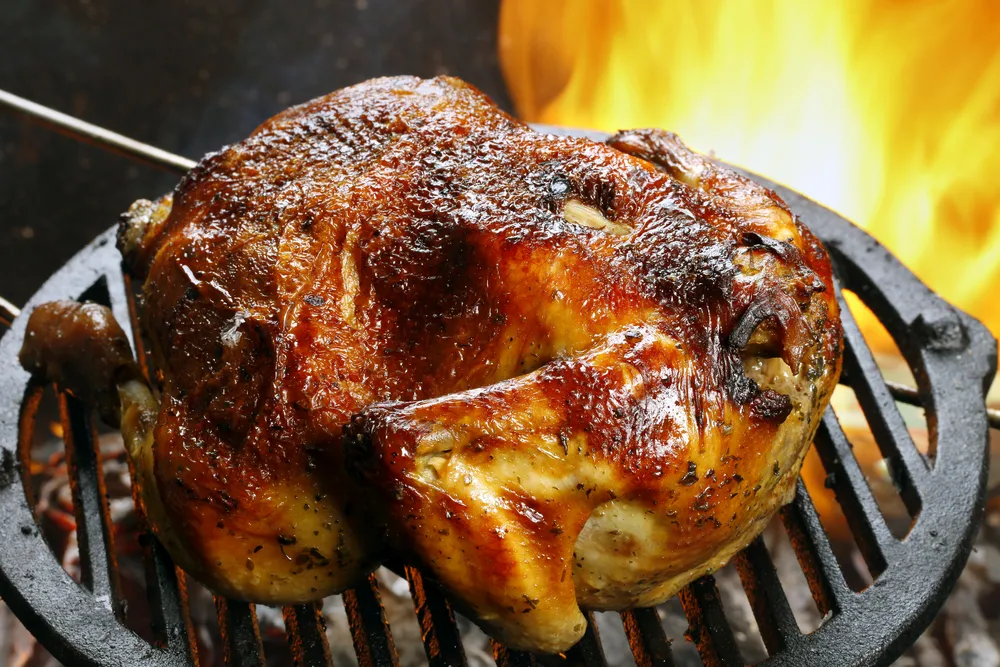
Smoking the Turkey
Smoking a turkey requires careful attention to temperature control and timing to ensure a perfectly cooked, juicy bird. Here’s a step-by-step guide to the smoking process:
1. Preheat the Smoker
- Temperature: Preheat your smoker to 225°F to 250°F. This low-and-slow cooking method helps render the turkey tender and flavorful.
- Wood Chips or Pellets: Add your choice of wood chips or pellets to the smoker. Popular options include hickory, apple, cherry, or a blend. Soak wood chips in water for about 30 minutes if using a charcoal or gas smoker to prevent them from burning too quickly.
2. Prepare the Turkey for Smoking
- Room Temperature: Let the seasoned turkey sit at room temperature for about 30 minutes before placing it in the smoker. This helps ensure even cooking.
- Trussing: Ensure the turkey is trussed to promote even cooking. Tie the legs together and tuck the wings under the body.
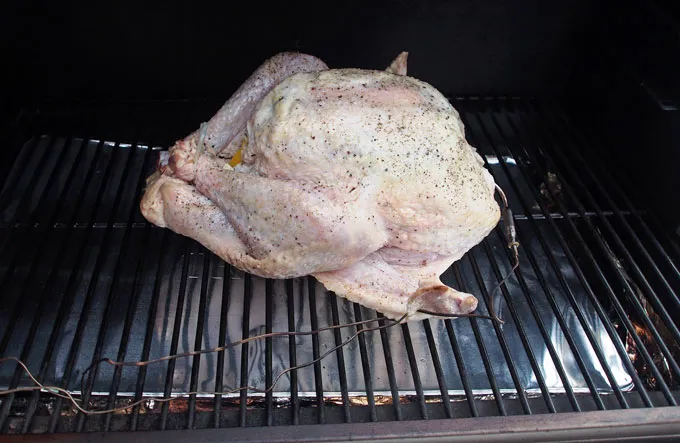
3. Place the Turkey in the Smoker
- Positioning: Place the turkey on the smoker grate, breast side up. If your smoker has multiple racks, position the turkey on the middle or lower rack for even heat distribution.
- Drip Pan: Place a drip pan beneath the turkey to catch drippings. You can add a little water or broth to the pan to create a moist environment inside the smoker.
4. Monitor Temperature
- Smoker Temperature: Maintain a consistent smoker temperature between 225°F and 250°F. Adjust the vents or dampers as needed to control airflow and temperature.
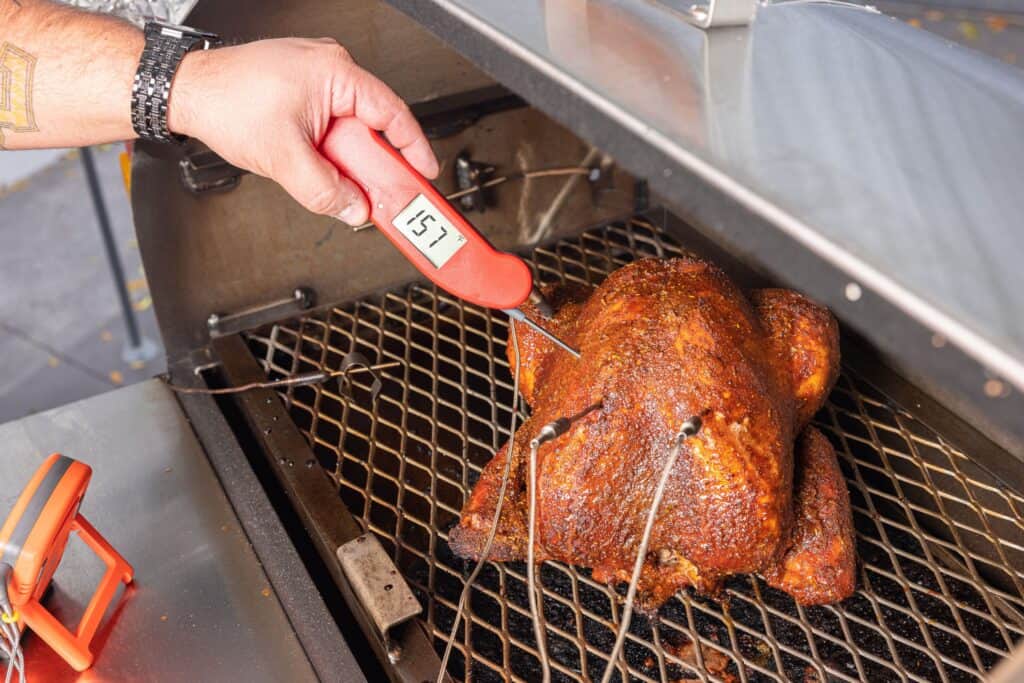
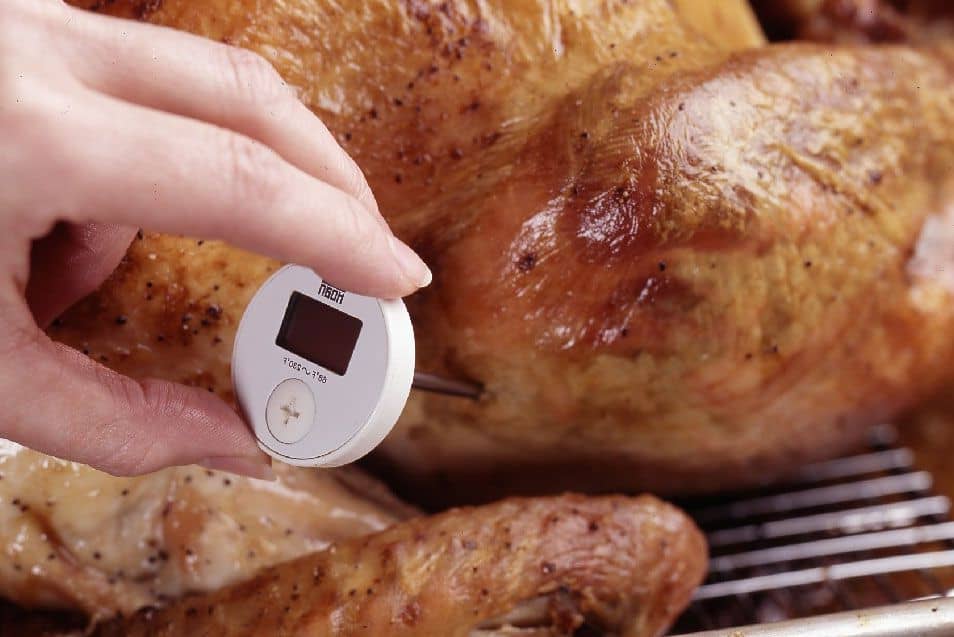
- Internal Temperature: Insert a meat thermometer into the thickest part of the turkey breast and thigh, avoiding the bone. The goal is to cook the turkey to an internal temperature of 165°F.
5. Baste the Turkey (Optional)
- Basting: Every hour or so, you can baste the turkey with a mixture of melted butter and herbs or a marinade to keep it moist and add flavor. Be quick to avoid losing too much heat from the smoker.
6. Smoking Time
- General Timing: Plan for approximately 30 minutes of smoking time per pound of turkey. For a 12-pound turkey, this equates to about 6 hours.
- Check Progress: Periodically check the smoker temperature and wood chips. Replenish wood chips and adjust the vents as needed to maintain a steady temperature.
7. Final Temperature Check
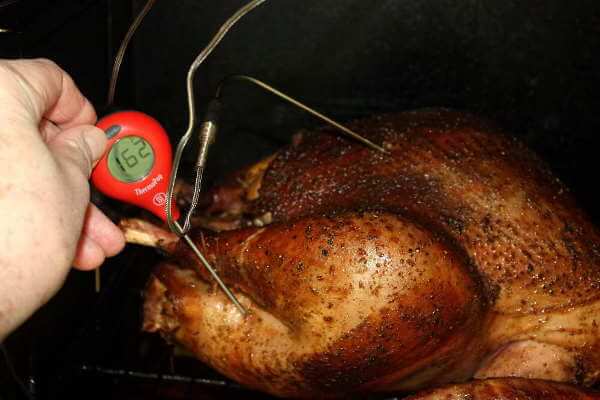
- Internal Temperature: When the turkey nears the estimated cooking time, start checking the internal temperature more frequently. The turkey is done when the breast and thigh reach 165°F.
- Crisping the Skin (Optional): If the skin isn’t as crispy as you’d like, you can increase the smoker temperature to 300°F for the last 30 minutes of cooking.
8. Rest the Turkey:
- Once the turkey reaches the desired internal temperature, remove it from the smoker. Tent it loosely with aluminum foil and let it rest for 20-30 minutes. This allows the juices to redistribute throughout the meat, ensuring a moist and flavorful turkey.

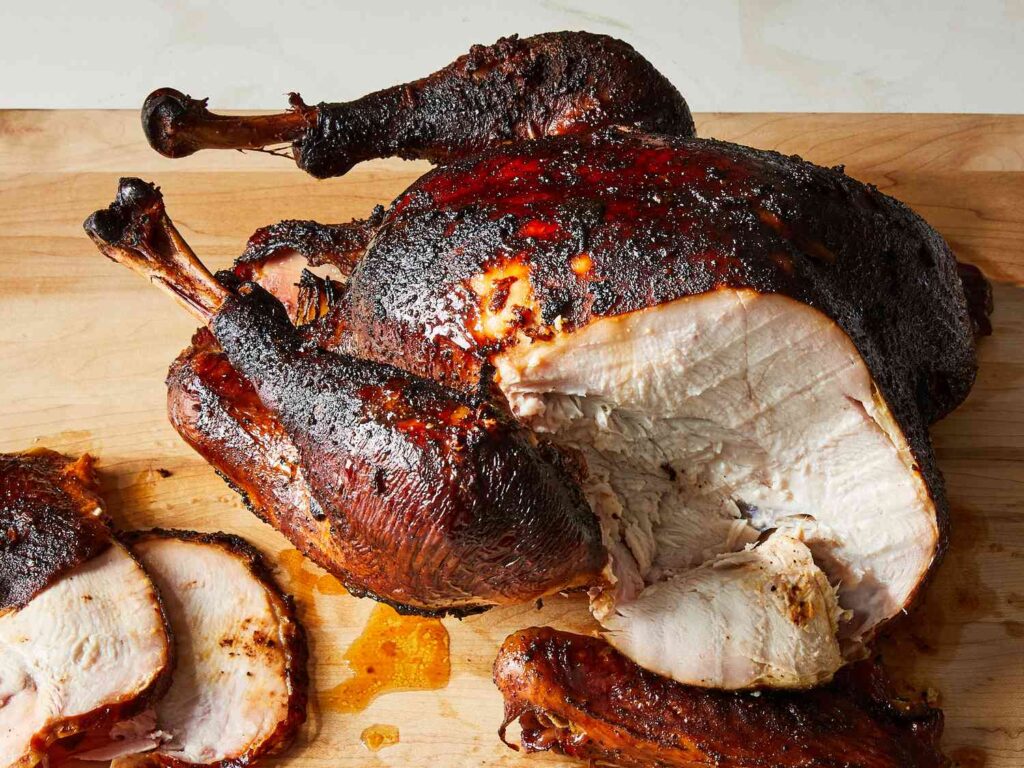
9. Carve and Serve Carving:
- After resting, carve the turkey using a sharp knife. Serve with your favorite sides and enjoy the delicious, smoky flavors of your perfectly smoked turkey.
Managing Temperature
Maintaining the correct temperature is crucial for a successful smoked turkey. Here’s how to keep your smoker steady and your turkey cooking perfectly:
1. Preheat Properly Initial Preheat: Ensure your smoker reaches the desired temperature (225°F to 250°F) before placing the turkey inside. This helps stabilize the cooking environment from the start.
2. Use a Reliable Thermometer
- Smoker Thermometer: Invest in a high-quality smoker thermometer if your smoker doesn’t have an accurate built-in one. This helps you monitor the smoker’s internal temperature.
- Dual-Probe Thermometers: Consider using a dual-probe thermometer, which allows you to monitor both the smoker temperature and the internal temperature of the turkey simultaneously.
3. Adjust Vents and Dampers
- Airflow Control: Use the vents or dampers on your smoker to control the airflow and, consequently, the temperature. Opening the vents increases the airflow and raises the temperature, while closing them decreases the airflow and lowers the temperature.
- Fine-Tuning: Make small adjustments to the vents to avoid large temperature swings. It’s easier to manage gradual changes.
4. Add Fuel and Wood Chips
- Charcoal Smokers: If using a charcoal smoker, add a handful of unlit charcoal every hour to maintain a consistent heat level. You can also add soaked wood chips or chunks for continuous smoke.
- Pellet Smokers: Ensure the pellet hopper is full and keep an eye on it throughout the smoking process to avoid running out of pellets.
- Gas and Electric Smokers: Check the fuel levels periodically. Gas smokers need propane, while electric smokers need to stay plugged in.
5. Maintain a Moist Environment
- Water Pan: Keep the water pan filled with water or another liquid (like apple juice or broth) to help regulate the temperature and keep the turkey moist. Refill as necessary during the cooking process.
- Drip Pan: Using a drip pan with a bit of liquid also helps in maintaining humidity inside the smoker.
When is the Turkey Done?
Knowing when your turkey is perfectly cooked is key to a delicious meal. Here are some tips to determine doneness:
1. Check the Internal Temperature
- Target Temperature: The turkey is done when it reaches an internal temperature of 165°F in the thickest part of the breast and thigh.
- Placement of Thermometer: Insert the thermometer into the thickest part of the turkey breast and thigh, avoiding bones. Bones can give false readings by conducting heat differently.
2. Color and Juices
- Juice Check: Pierce the turkey with a fork or knife in the thickest part of the thigh. The juices should run clear, not pink or reddish.
- Skin Color: The skin should be a deep, golden brown color. If it’s not browned to your liking, you can increase the smoker temperature to 300°F for the last 30 minutes to crisp it up.
3. Wiggle Test Leg Movement: Gently wiggle the turkey’s legs. They should move easily in their joints if the turkey is done.
4. Resting Period: After removing the turkey from the smoker, let it rest for 20-30 minutes. This allows the juices to redistribute throughout the meat, resulting in a moist and flavorful turkey.
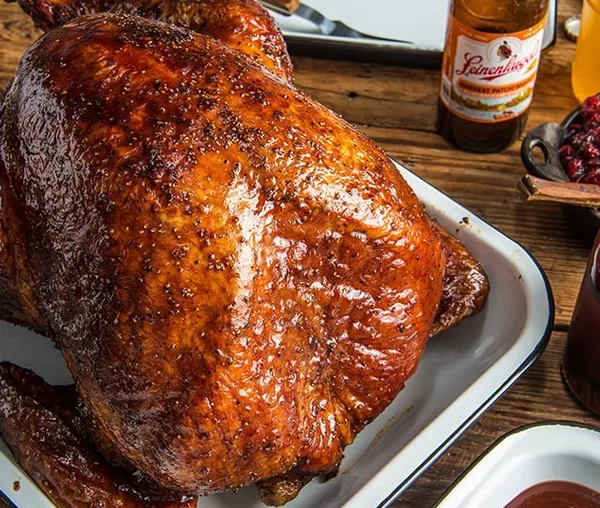
Post-Cooking Steps
Once your turkey is perfectly smoked, there are essential post-cooking steps to ensure it remains juicy, flavorful, and ready to serve. Here’s what you need to do:
Resting and Carving
Resting the Turkey: Resting the turkey is essential for retaining its juices and achieving the best texture.
- Tent with Foil: After removing the turkey from the smoker, place it on a large cutting board. Tent it loosely with aluminum foil. This helps keep the turkey warm without causing it to steam, which can make the skin soggy.
- Resting Time: Allow the turkey to rest for 20-30 minutes. This resting period lets the juices redistribute throughout the meat, making each bite more succulent and flavorful.
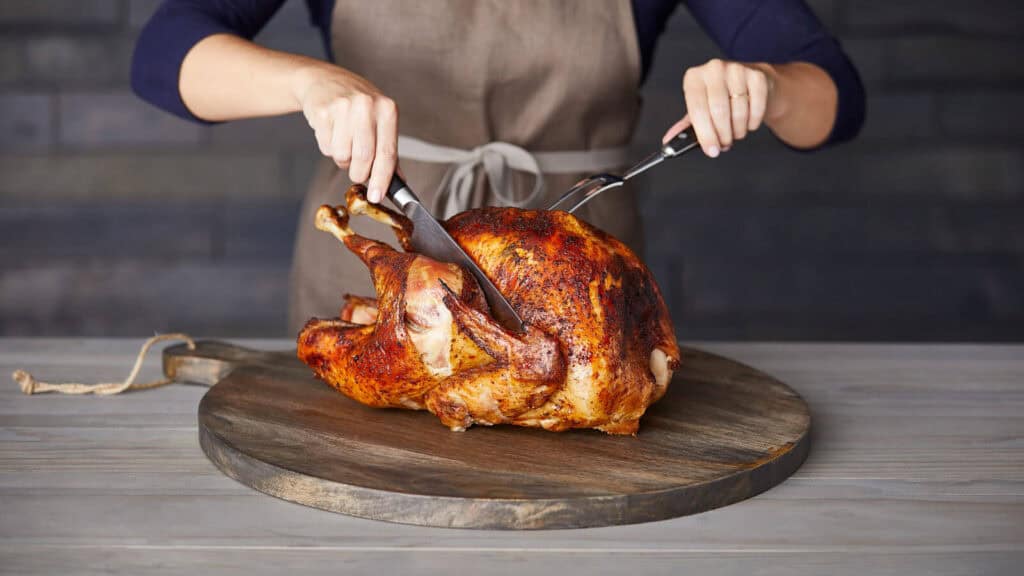
Carving the Turkey: Proper carving ensures you get the most out of your smoked turkey.
- Remove the Legs:
- Cut the Skin: Slice through the skin between the leg and the body.
- Separate the Joint: Pull the leg away from the body and cut through the joint where the thigh connects to the body. Repeat on the other side.
- Separate the Thighs and Drumsticks:
- Cut Through the Joint: Find the joint between the thigh and the drumstick and cut through it to separate them.
- Remove the Wings:
- Cut Through the Joint: Locate the joint where the wing connects to the body, cut through the joint, and remove the wing. Repeat on the other side.
- Carve the Breast:
- Find the Breastbone: Make a long, deep cut along one side of the breastbone, following the contour of the ribcage.
- Slice the Meat: Slice the breast meat into even pieces, cutting against the grain for maximum tenderness.
- Carve the Thigh Meat:
- Remove from the Bone: Slice the thigh meat off the bone and cut it into manageable pieces.
- Serve the Drumsticks: Serve the drumsticks whole or slice the meat off the bone, depending on preference.
Serving Suggestions
Presentation Tips
- Arrange on a Platter:
- Place the carved turkey pieces on a large serving platter.
- Arrange the white and dark meat attractively for easy access and visual appeal.
- Garnish:
- Add fresh herbs (such as rosemary, thyme, or parsley) and citrus slices (like lemon or orange) around the turkey pieces for a beautiful and aromatic presentation.
- Include some roasted garlic cloves or whole cranberries for additional color and flavor.
Side Dishes: Complement your smoked turkey with a variety of delicious side dishes. Here are some ideas:
- Mashed Potatoes:
- Creamy mashed potatoes are a classic side that pairs perfectly with smoked turkey. Add some roasted garlic or chives for extra flavor.
- Stuffing:
- Prepare a savory stuffing with herbs, celery, onions, and sausage. Cook it separately from the turkey to ensure it’s perfectly cooked.
- Roasted Vegetables:
- Roasted Brussels sprouts, carrots, and sweet potatoes make for colorful and healthy sides.
- Corn on the Cob: Grilled corn on the cob in foil slathered with butter and sprinkled with a bit of chili powder and lime juice.
- Gravy:
- Use the turkey drippings to make a rich, flavorful gravy. Serve it on the side or drizzled over the turkey and mashed potatoes.
Storing Leftovers
Properly storing leftovers ensures you can enjoy your smoked turkey later.
- Cool Quickly: Let the turkey cool to room temperature before storing. Do not leave it out for more than 2 hours.
- Refrigerate: Store leftovers in airtight containers or tightly wrapped in aluminum foil. Refrigerate promptly.
- Freeze: If you have a lot of leftovers, consider freezing some. Slice the turkey into portions, wrap tightly in plastic wrap, and place in freezer bags or containers. Label with the date.
Additional Tips and Troubleshooting
Smoking a turkey can come with its challenges, but with these additional tips and troubleshooting solutions, you’ll be well-prepared to handle any issues that arise and ensure a successful barbecue turkey experience.
- Choose the Right Wood:
- Use mild woods like apple, cherry, or pecan for a subtle flavor. Stronger woods like hickory or mesquite can overpower the delicate taste of turkey if used in large quantities.
- Keep the Smoker Lid Closed:
- Minimize opening the smoker lid to maintain a consistent temperature and prevent heat and smoke from escaping. Only open it when necessary to check the turkey’s internal temperature or add more fuel/wood chips.
- Rotate the Turkey:
- For even cooking, rotate the turkey halfway through the smoking process. This helps prevent any one side from getting too much direct heat.
- Use a Drip Pan:
- Place a drip pan beneath the turkey to catch drippings. You can use these drippings to make gravy. Adding some water or broth to the pan helps keep the environment moist.
- Maintain Moisture
- To keep the turkey moist, consider spritzing it with a mixture of apple juice and water every hour. This adds moisture and enhances flavor without opening the smoker for too long.
Troubleshooting Common Issues
- Temperature Fluctuations:
- Problem: The smoker temperature is inconsistent.
- Solution: Check the vents and adjust them to regulate airflow. Add more charcoal or fuel as needed. Ensure the smoker is sheltered from wind and extreme weather conditions.
- Dry Turkey:
- Problem: The turkey is dry and overcooked.
- Solution: Always brine the turkey before smoking to help retain moisture. Keep a water pan in the smoker to maintain a humid environment. Use a meat thermometer to avoid overcooking.
- Undercooked Turkey:
- Problem: The turkey is not cooking evenly or is undercooked.
- Solution: Ensure the turkey is fully thawed before smoking. Rotate the turkey during cooking for even heat distribution. Verify the internal temperature with a reliable meat thermometer; the turkey is done when it reaches 165°F in the breast and thigh.
- Bitter Smoke Flavor:
- Problem: The turkey has a bitter taste from the smoke.
- Solution: Use well-seasoned wood and avoid green or resinous woods. Soak wood chips before adding them to the smoker to prevent them from burning too quickly. Ensure proper ventilation to avoid stale smoke.
- Skin Not Crispy:
- Problem: The turkey skin is not crispy.
- Solution: Pat the turkey dry thoroughly before seasoning. Rub the skin with oil or butter before smoking. If the skin isn’t crispy enough, you can finish the turkey in a hot oven (around 375°F) for 10-15 minutes.
- Too Much Smoke:
- Problem: The turkey is overly smoky or has a harsh smoke flavor.
- Solution: Use moderate amounts of wood chips and ensure good airflow to avoid smothering the fire. Thin, blue smoke is ideal; thick, white smoke can impart a bitter taste.
FAQs
Best Smoked Turkey Legs Recipe
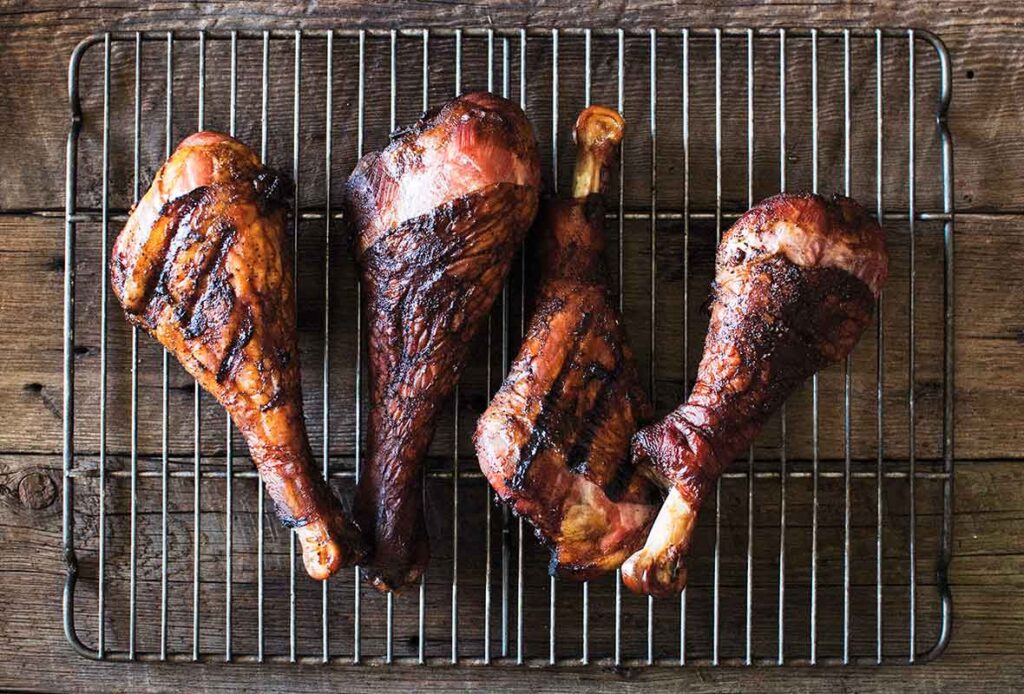
Ingredients:
- Brine: 1 cup kosher salt, 1 cup brown sugar, 1 gallon water
- Rub: 2 tablespoons kosher salt, 2 tablespoons brown sugar, 2 tablespoons paprika, 1 tablespoon garlic powder, 1 teaspoon curing salt
- Turkey legs
Instructions:
- Brine: Combine salt, sugar, and water in a pot. Submerge turkey legs and refrigerate for at least 8 hours or overnight.
- Season: Prepare the rub and apply generously to the turkey legs.
- Smoke: Preheat the smoker to 225°F-250°F. Add wood chips (hickory, apple, or cherry). Place the legs on the grill and smoke for 2-3 hours until the internal temperature reaches 165°F.
- Rest and Serve: Let the turkey legs rest before serving.
How to Make Turkey BBQ Recipe
Ingredients:
- 1 whole turkey (12-15 lbs)
- Olive oil or melted butter
- BBQ rub
- Aromatics (onion, garlic, lemons, herbs)
- BBQ sauce
- Apple juice or beer (for spraying)
Instructions:
- Prepare: Clean and pat dry the turkey. Rub with olive oil or butter and apply the BBQ rub all over.
- Set Up the Grill: Use indirect heat at 250-325°F. Add soaked wood chips for flavor.
- Cook: Place the turkey on the grill, stuff with aromatics, and spray with apple juice or beer hourly. Cook for about 13 minutes per pound.
- Baste and Finish: In the last hour, baste with BBQ sauce. Ensure the internal temperature reaches 165°F.
- Rest and Carve: Let the turkey rest for 15-20 minutes before carving.
Disclosure: Our blog contains affiliate links to products. We may receive a commission for purchases made through these links. However, this does not impact our reviews and comparisons. We try our best to keep things fair and balanced, in order to help you make the best choice for you.