Guide on How to Cut a Brisket
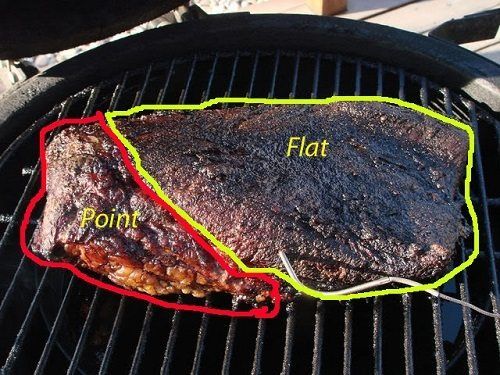
Cutting a brisket might seem like a simple task, but doing it right makes all the difference between a juicy, tender bite and a tough chew. Whether you’re preparing for a family barbecue or a competition, knowing how to cut a brisket properly ensures that all your hard work cooking it doesn’t go to waste. Brisket is composed of two main parts: the flat and the point. Each part has distinct textures and grain directions, which is why the slicing technique varies for each.
What is a Brisket?
In the realm of barbecue, brisket reigns supreme. It’s a cut of meat from the breast or lower chest of a cow, known for its rich, beefy flavor and tantalizing tenderness when smoked to perfection.
But it’s not just any meat; it’s a challenge and a triumph for pitmasters worldwide. Slicing it correctly is an art, ensuring that the long, tough muscle fibers become succulent, melt-in-your-mouth goodness.
Essential Tools
To achieve those perfect brisket slices, having the right tools is essential. Here’s a rundown of what you’ll need:
- Sharp Knife: A long, sharp slicing knife or a brisket knife with a serrated edge is crucial. A dull knife will tear the meat, making it harder to get clean, smooth cuts.
- Cutting Board: Use a large, sturdy cutting board, preferably with a groove or juice trench to catch the juices. This helps keep your workspace clean and provides a stable surface for slicing.
- Meat Fork (Optional): A meat fork can help hold the brisket steady while you slice, but your hand can also do the job if you prefer.
- Paper Towels or Fuzz-Free Kitchen Towels: These are handy for wiping the knife and the cutting board, keeping your workspace clean and safe.

How to Cut Brisket: Step By Step Instructions
Master the art of slicing brisket with our step-by-step guide. Learn how to prepare your brisket, identify the grain, and slice both the flat and point sections for maximum tenderness and flavor. From essential tools to common mistakes to avoid, this guide covers everything you need to serve perfectly sliced brisket every time.
Tools you’ll need:
- Sharp carving knife (10-12 inches long)
- Cutting board
- Heat-resistant gloves or meat claws (optional but helpful)
Prepping the Brisket
Before you start slicing, proper preparation of the brisket is key to ensuring the best results. Here’s how to get your brisket ready:
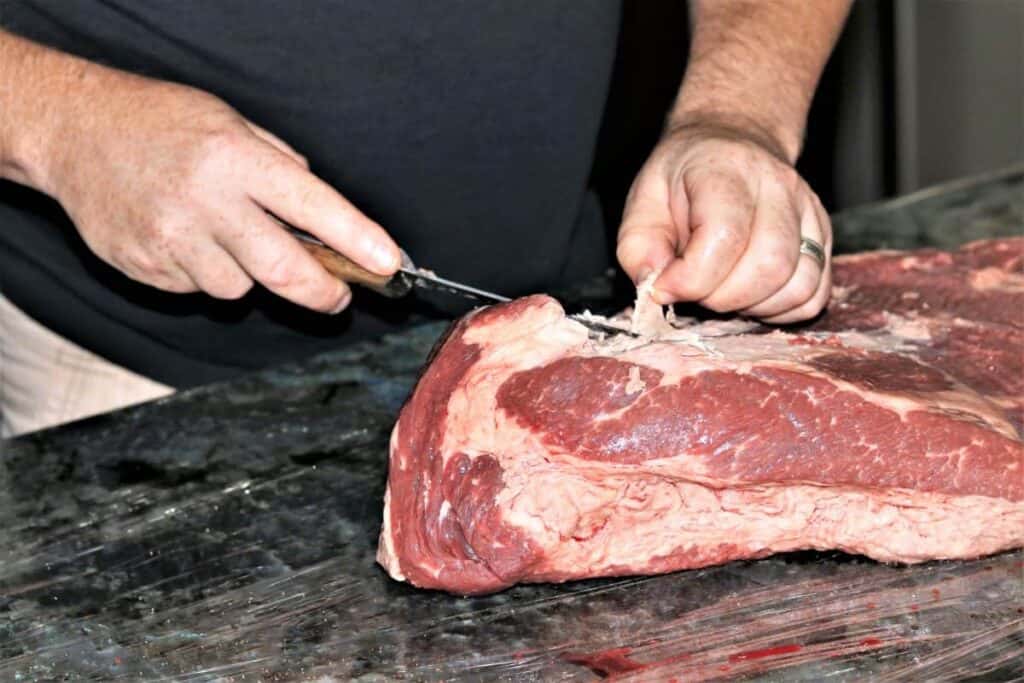
Trimming Excess Fat
- Why Trim?: Trimming the excess fat before cooking helps ensure even cooking and makes the meat easier to slice later on. Ideally, you should leave about 1/4 inch of fat on the brisket to keep it moist without making it greasy.
- How to Trim: Use a sharp knife to remove any thick layers of fat. Focus on trimming the fat cap to an even thickness and removing any hard, waxy fat from the underside of the brisket. If you’re not comfortable doing this, you can ask your butcher to help.
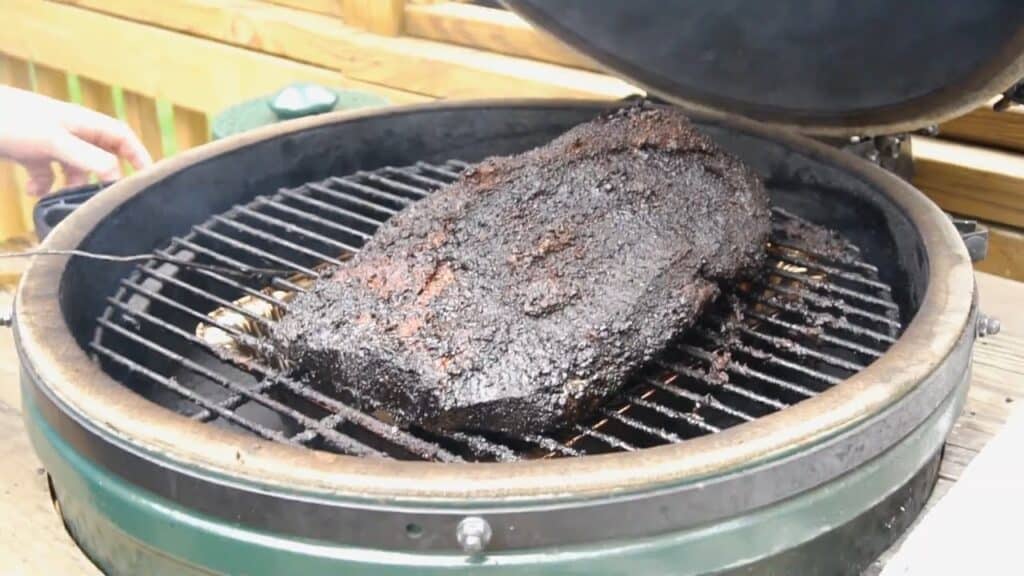
Cooking the Brisket
- Methods of Cooking: The steps for slicing brisket are consistent regardless of the cooking method, be it smoking, slow cooking, or oven roasting. Choose your preferred recipe and cook the brisket thoroughly until it reaches the desired internal temperature (usually around 195°F to 205°F).
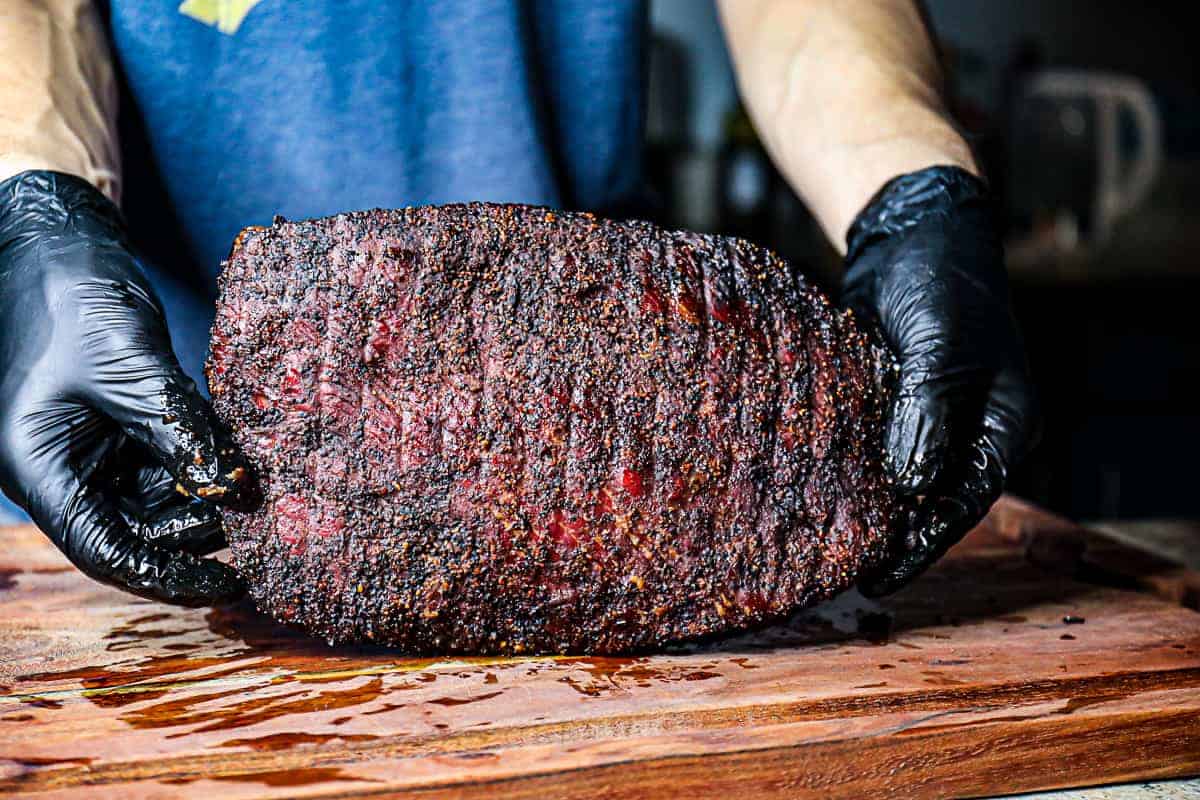
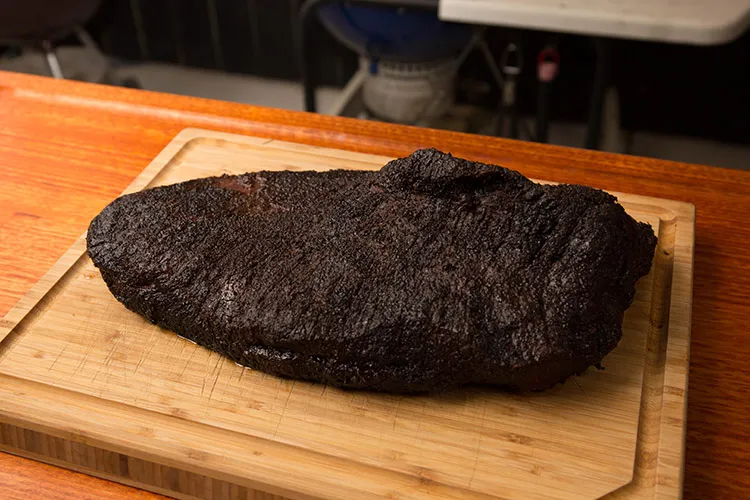
Resting the Brisket
After cooking your brisket to perfection, it’s crucial to let it rest. This step is often overlooked but is essential for retaining the meat’s juiciness and flavor.
- Juice Redistribution: Letting the brisket rest allows the juices, which are driven to the center of the meat during cooking, to redistribute evenly throughout the brisket. This prevents the juices from spilling out when you cut into it, ensuring each slice is moist and flavorful.
- Temperature Stabilization: Resting also helps the meat stabilize in temperature, making it easier to slice without it falling apart or becoming overly dry.
How Long to Rest
- General Guidelines: Allow the brisket to rest for at least 1 hour. For smaller cuts, 30-45 minutes might suffice, but for larger cuts, an hour is optimal.
- Covering the Brisket: During the resting period, loosely cover the brisket with aluminum foil. This helps retain heat without trapping too much steam, which can make the bark soggy.
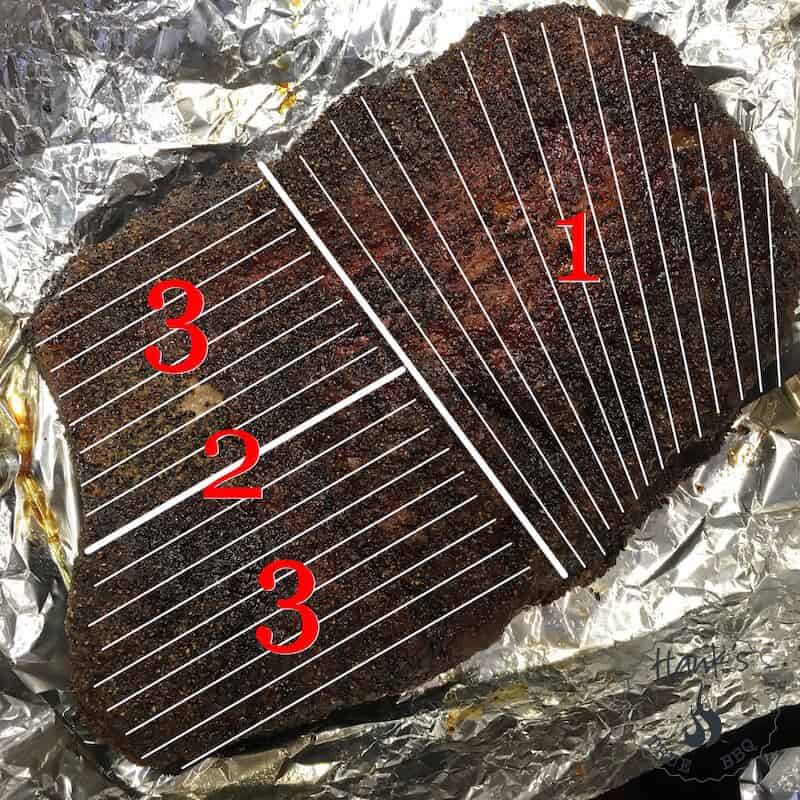
Identifying the Grain
Identifying the grain of the brisket is a critical step in ensuring your slices are tender and easy to chew. The grain refers to the direction in which the muscle fibers run through the meat.
- Visual Inspection: Before cooking, take a good look at the brisket to identify the direction of the muscle fibers. You can even make a small cut on one end of the brisket to help remember the grain’s direction after it’s cooked.
- Feeling the Grain: Run your fingers over the surface of the meat. The grain will feel like ridges or lines running in a specific direction. This texture helps guide your cuts once the brisket is cooked.
Why Cut Against the Grain?
- Tender Slices: Cutting against the grain shortens the muscle fibers, resulting in tender, easy-to-chew slices. Cutting with the grain leaves you with long, tough fibers that are harder to bite through.
- Consistent Texture: Slicing against the grain ensures each piece has a consistent texture, enhancing the overall eating experience.
Tips for Identifying the Grain
- Pre-Cook Marking: As mentioned, you can make a small cut at the end of the brisket before cooking to mark the grain’s direction. This pre-cook marking can serve as a guide after the meat is cooked.
- Post-Cook Inspection: After cooking and resting, inspect the meat again. The grain may be less visible, but the pre-cook mark and a careful feel of the meat can help you identify it.
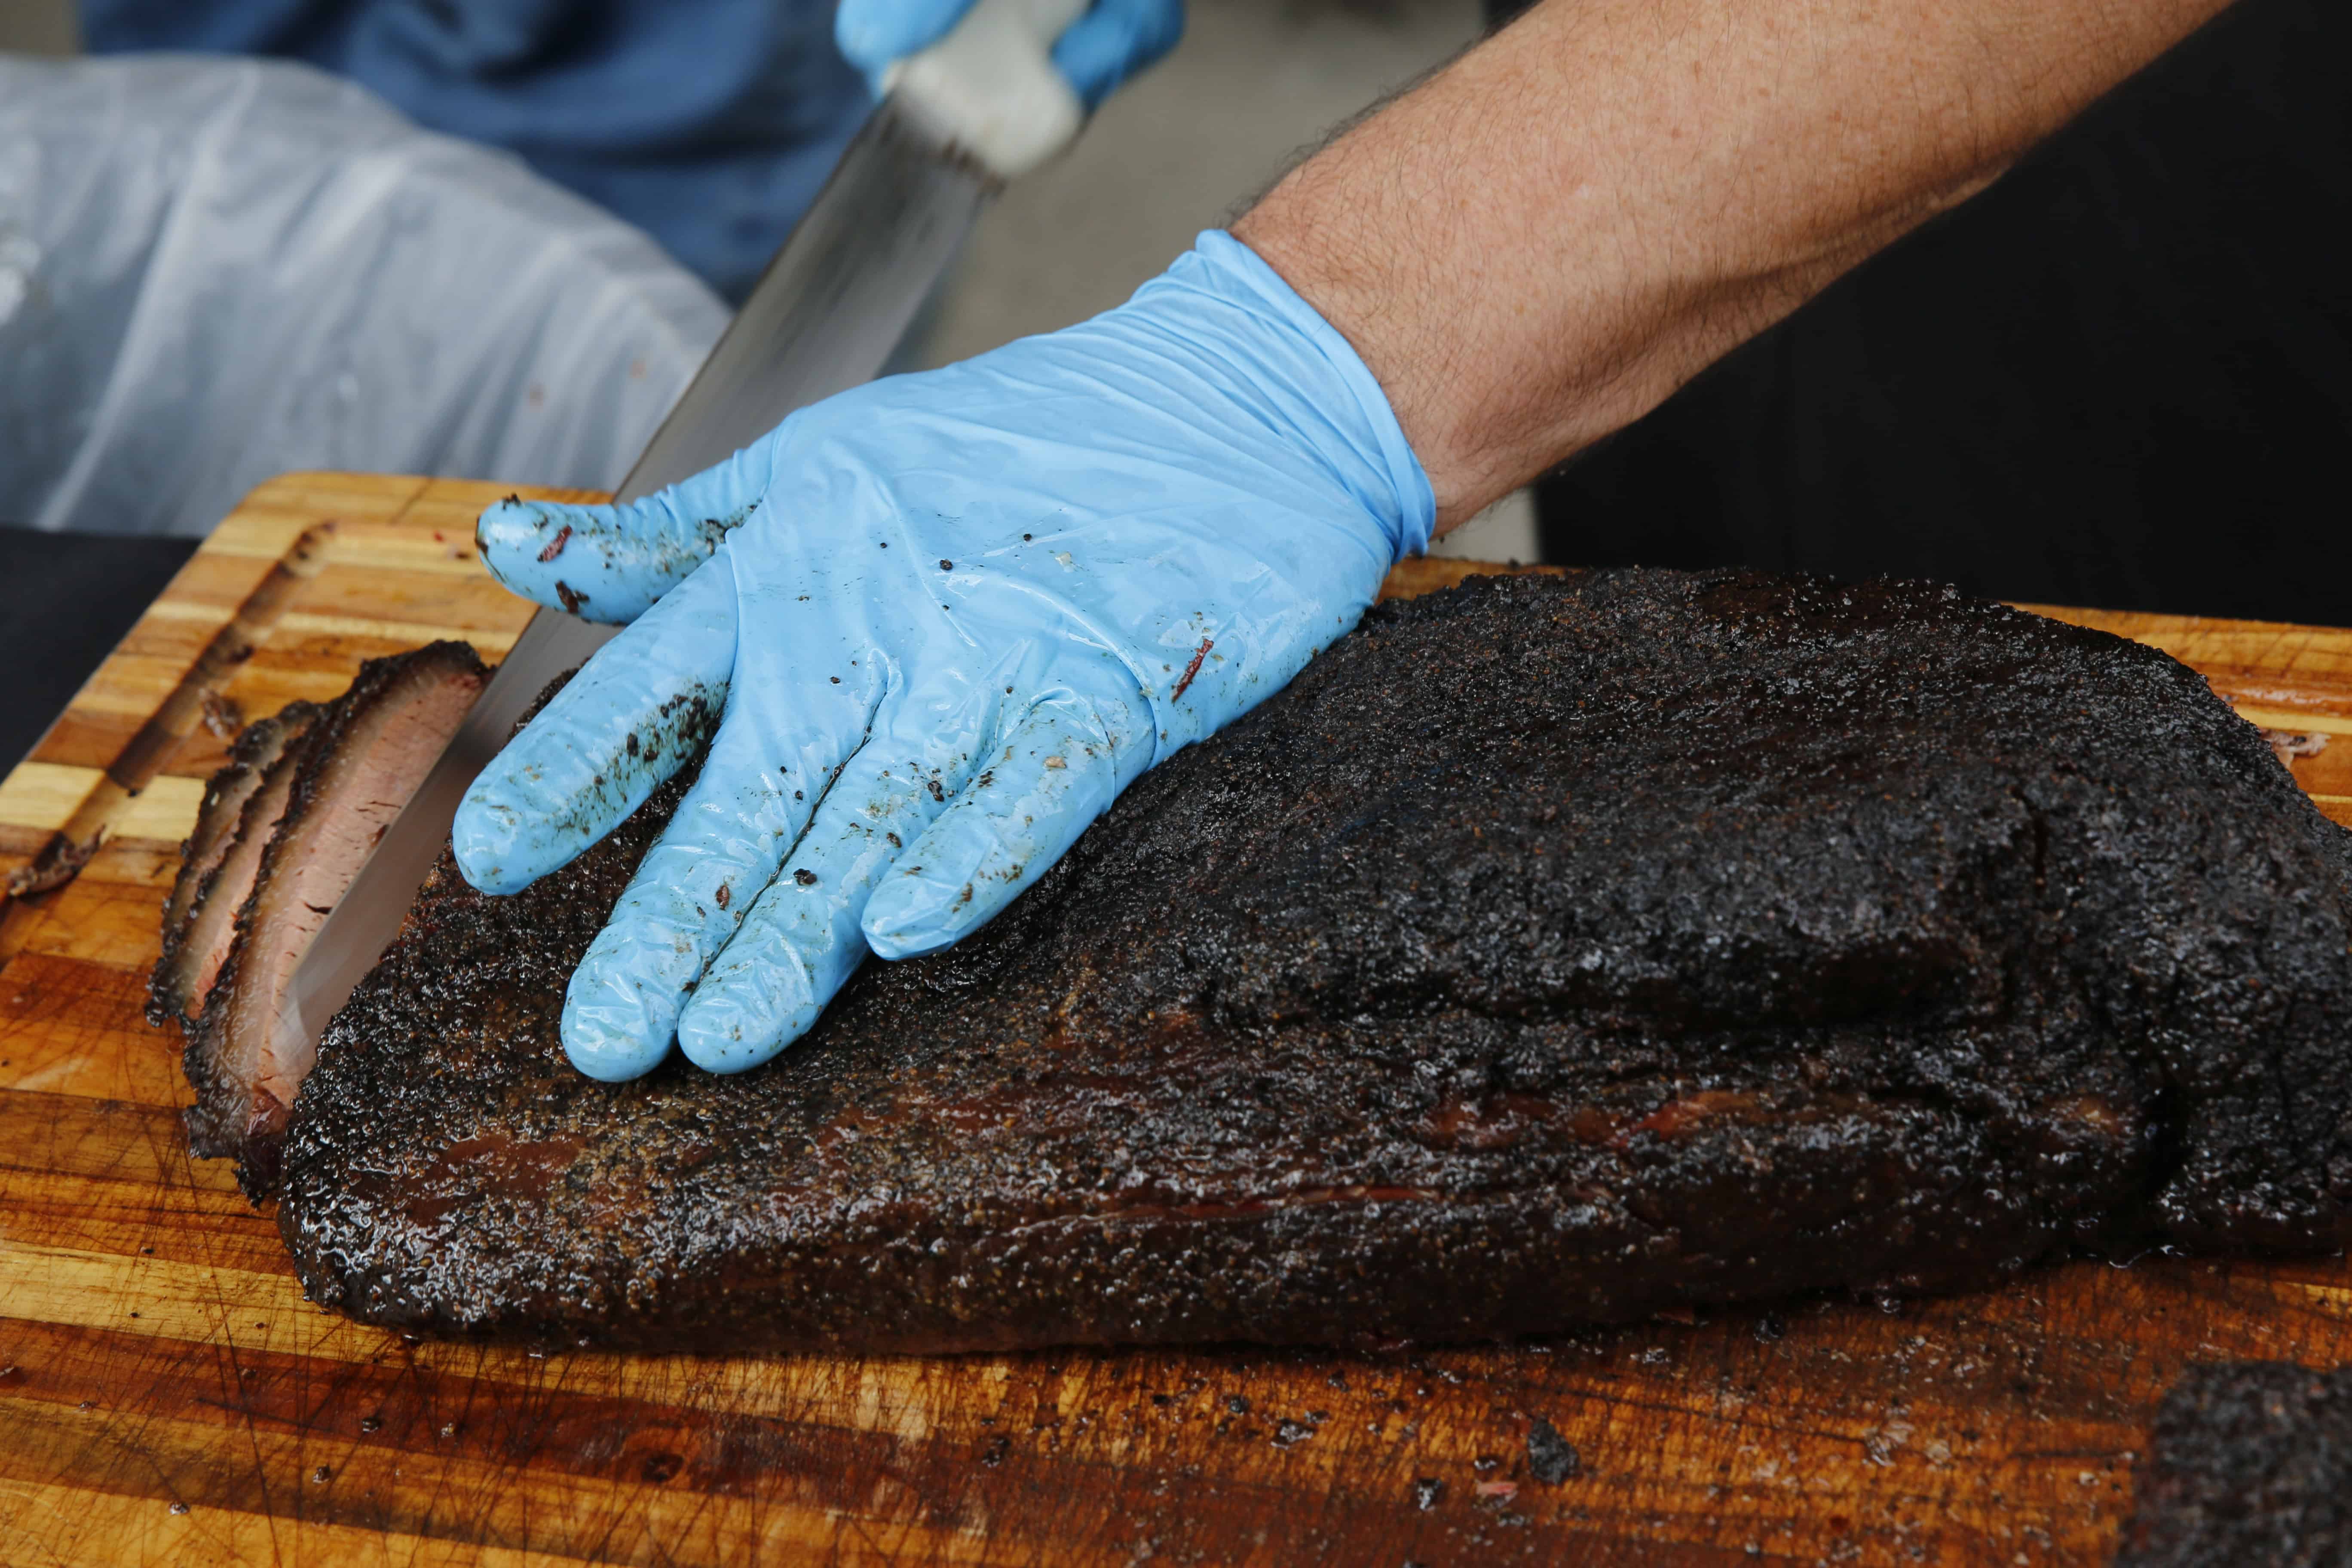
Cutting the Flat
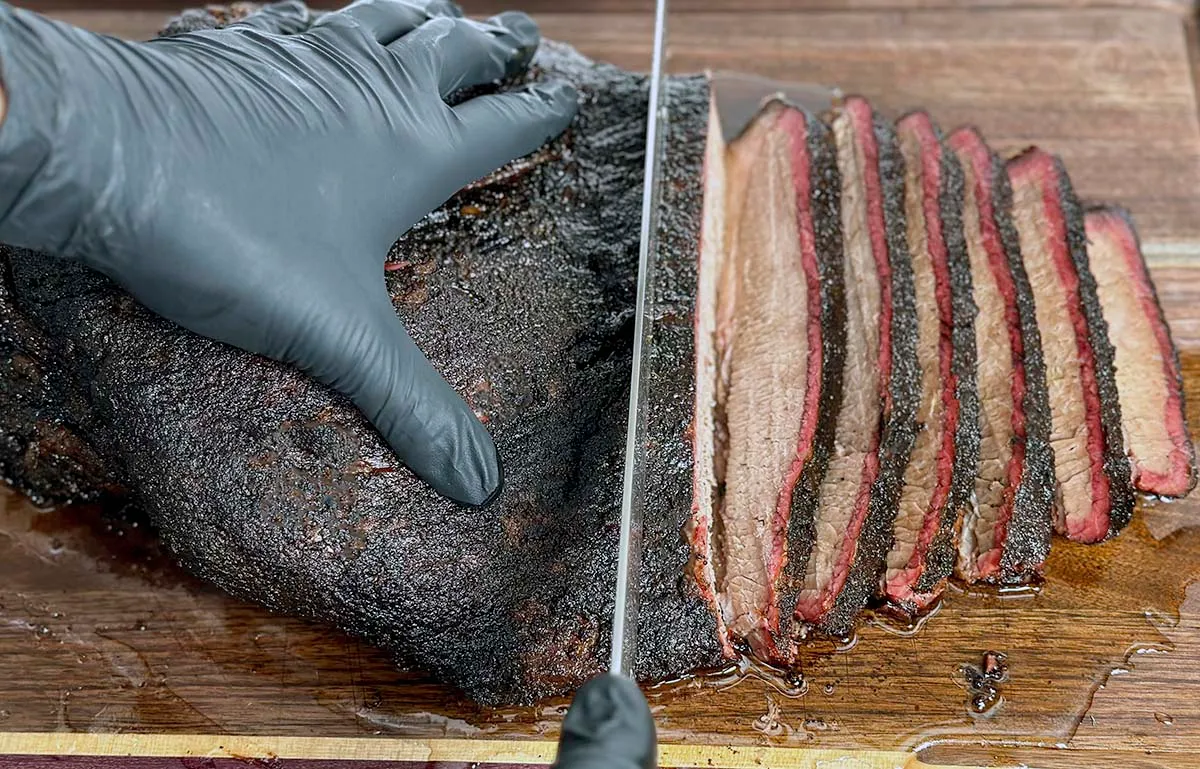
Now that your brisket is properly rested and you’ve identified the grain, it’s time to start slicing the flat part of the brisket. The flat is the leaner part of the brisket and requires careful slicing to ensure tenderness.
- Position the Brisket: Place the brisket flat on your cutting board. Make sure it’s stable, with the flat section positioned in front of you.
- First Cut: Start by making a small cut at one end of the flat to once again confirm the direction of the grain. This will help ensure that all subsequent slices are against the grain.
- Slice Thickness: Aim for slices that are about 1/4 inch thick. Thinner slices can become too fragile and break apart, while thicker slices might be tough to chew.
- Smooth Strokes: Use long, smooth strokes with your knife, slicing through the meat in one motion if possible. Avoid a sawing motion, which can tear the meat and ruin the texture.
- Maintain Consistency: Keep your slices uniform in thickness to ensure even presentation and texture. Each slice should have a bit of the seasoned bark on it, which adds flavor and visual appeal.
Tips for Cutting the Flat
- Keep the Knife Sharp: A sharp knife is crucial for clean cuts. Regularly sharpen your knife to maintain its edge.
- Cutting Angles: Hold your knife at a slight angle to maximize the surface area of each slice, which helps with tenderness and flavor distribution.
- Patience: Take your time with each cut. Rushing can lead to uneven slices and damage the meat’s texture.
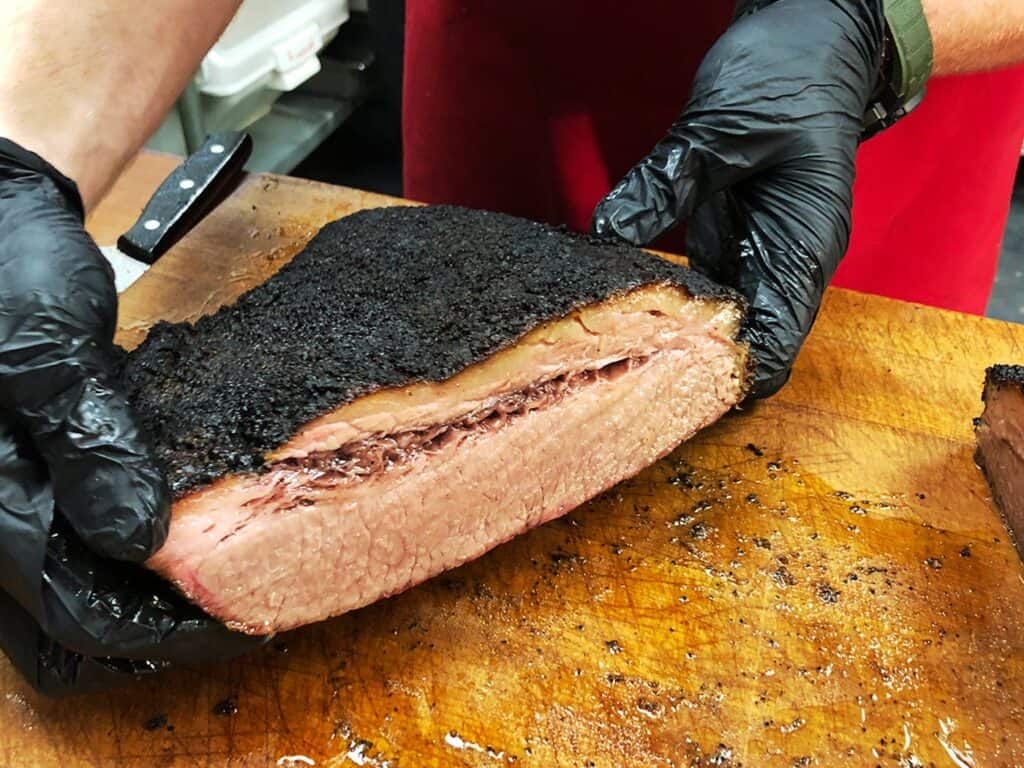
Cutting the Point
After slicing the flat part of the brisket, it’s time to move on to the point. The point is thicker, with more fat interspersed throughout the meat, and requires a different slicing approach due to the change in grain direction.
- Position the Brisket: Place the point on your cutting board. If the point was still attached to the flat, you’ll need to separate them by cutting along the natural seam of fat that divides them.
- Identify the Grain: Just like with the flat, take a moment to identify the direction of the grain in the point. This will likely be different from the grain in the flat, so it’s important to get it right.
- Initial Cut: Make an initial cut perpendicular to the grain direction. This helps you establish a baseline for your slices and ensures that you’re cutting against the grain.
- Slice Thickness: Aim for 1/4 inch thick slices, similar to the flat. This thickness strikes a good balance between tenderness and structural integrity.
- Cut in One Motion: Use long, smooth strokes with your knife, cutting through the meat in one motion if possible. This helps maintain the integrity of the slices and prevents tearing.
- Rotate as Needed: If you find that the grain direction changes again within the point, adjust your slicing angle accordingly to stay consistent with cutting against the grain.
Tips for Cutting the Point
- Sharp Knife: Ensure your knife is sharp to make clean, effortless cuts.
- Even Slices: Keep your slices even in thickness for a uniform presentation and consistent texture.
- Retain the Bark: Make sure each slice has a portion of the bark, which adds flavor and texture to the meat.
Serving Suggestions
Now that you’ve mastered slicing both the flat and point of your brisket, it’s time to think about presentation and serving. Here are some tips to ensure your beautifully sliced brisket steals the show.
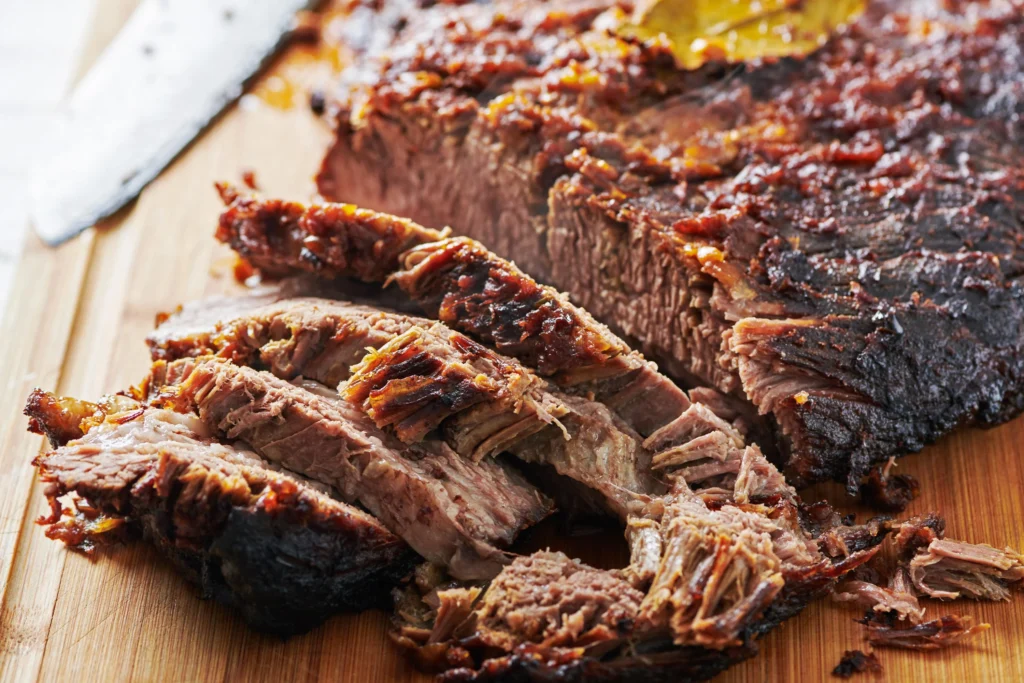
Presenting Your Brisket
- Cutting Board Display: Arrange your slices on a large cutting board. This rustic presentation not only looks appealing but also allows your guests to see the different cuts and choose their preferred pieces.
- Separate the Cuts: Keep the flat and point slices separate on the board. This makes it easier for guests to pick the type of brisket they enjoy most—leaner slices from the flat or fattier, juicier slices from the point.
- Garnish: Add some visual appeal by garnishing the board with fresh herbs like parsley or rosemary. This not only looks good but adds a fresh aroma that complements the smoky meat.
Pairing with Sides
- Classic Sides: Serve your brisket with classic BBQ sides like coleslaw, baked beans, and cornbread. These sides complement the rich flavors of the brisket and provide a balanced meal.
- Vegetables: Grilled or smoked vegetables, such as asparagus, corn on the cob, and roasted potatoes, add a healthy and colorful touch to your plate.
- Sauces: Offer a variety of BBQ sauces, from tangy vinegar-based to sweet molasses-based, allowing guests to customize their brisket to their taste.
Creative Serving Ideas
- Brisket Sandwiches: Use your brisket slices to make hearty sandwiches. Pile the meat on a toasted bun with pickles, onions, and a drizzle of your favorite BBQ sauce.
- Brisket Tacos: Thinly slice your brisket and serve it in soft tortillas with fresh salsa, avocado, and a squeeze of lime for a Tex-Mex twist.
- Brisket Salad: For a lighter option, add slices of brisket to a bed of mixed greens, cherry tomatoes, and red onions, topped with a tangy vinaigrette.
Common Mistakes to Avoid
Even seasoned pitmasters can make mistakes when slicing brisket. Here are some common pitfalls and how to avoid them to ensure your brisket is always perfectly sliced and delicious.
Cutting with the Grain
- Why It’s a Mistake: Cutting with the grain results in long muscle fibers, making the meat tough and chewy.
- How to Avoid: Always cut against the grain. Identify the direction of the muscle fibers and slice perpendicular to them to shorten the fibers and ensure tender bites.
Not Letting the Brisket Rest
- Why It’s a Mistake: Slicing the brisket immediately after cooking can cause the juices to run out, leading to dry meat.
- How to Avoid: Let the brisket rest for at least an hour. This allows the juices to redistribute throughout the meat, keeping it moist and flavorful.
Using a Dull Knife
- Why It’s a Mistake: A dull knife can tear the meat instead of making clean cuts, which affects the texture and appearance.
- How to Avoid: Regularly sharpen your slicing knife. A sharp knife will glide through the meat, making smooth, even cuts.
Leaving Too Much Fat
- Why It’s a Mistake: Too much fat can make the slices greasy and unappetizing.
- How to Avoid: Trim the fat cap to about 1/4 inch before cooking. This ensures the meat remains moist without becoming overly fatty.
Slicing Too Thick or Too Thin
- Why It’s a Mistake: Slices that are too thick can be tough to chew, while slices that are too thin can fall apart.
- How to Avoid: Aim for slices that are about 1/4 inch thick. This thickness balances tenderness with structural integrity.
Rushing the Process
- Why It’s a Mistake: Rushing can lead to uneven slices and damage the meat’s texture.
- How to Avoid: Take your time with each slice, ensuring consistency and care with each cut.
Conclusion
Perfectly slicing a brisket is an art that enhances the eating experience. By following these steps and avoiding common mistakes, you’ll ensure your brisket is tender, flavorful, and visually appealing. Remember, practice makes perfect, so don’t be discouraged if it takes a few tries to get it just right. Happy slicing and enjoy your delicious brisket!
Disclosure: Our blog contains affiliate links to products. We may receive a commission for purchases made through these links. However, this does not impact our reviews and comparisons. We try our best to keep things fair and balanced, in order to help you make the best choice for you.