How to Remove Rust from BBQ Grill
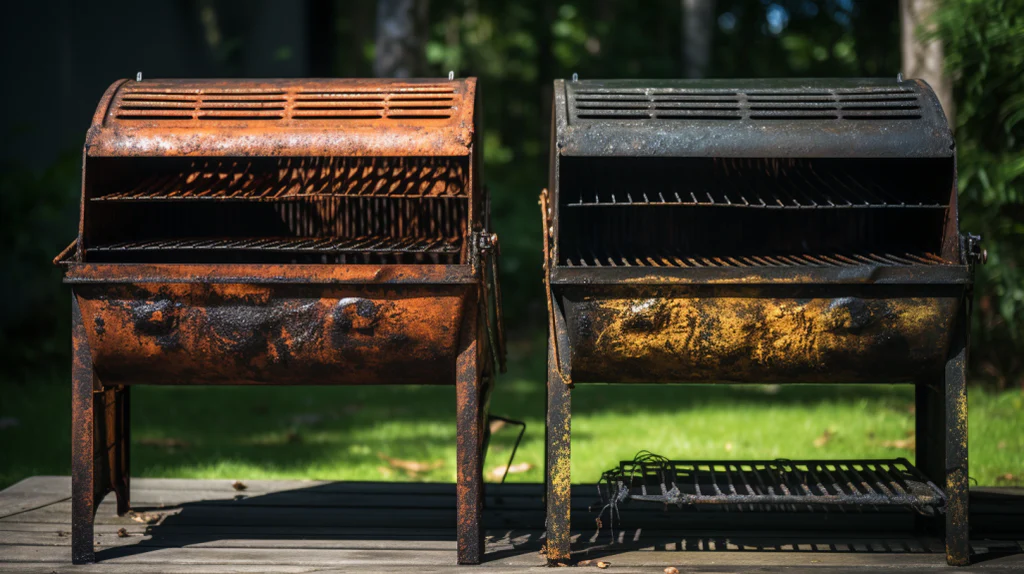
Rust on a BBQ grill isn’t just unsightly; it can also degrade the quality of your grill and potentially affect the taste of your food. Whether your grill has been left out in the rain one too many times or has just succumbed to the natural effects of humidity and time, removing rust is crucial for maintaining both the functionality and longevity of your grill.
This guide will provide a comprehensive overview of effective methods on how to remove rust from BBQ grill, ensuring your next barbecue is both delicious and safe. From simple household items to specialized cleaning tools, we’ll cover a variety of approaches to fit every grill owner’s needs and capabilities.
Understanding Rust Formation on BBQ Grills
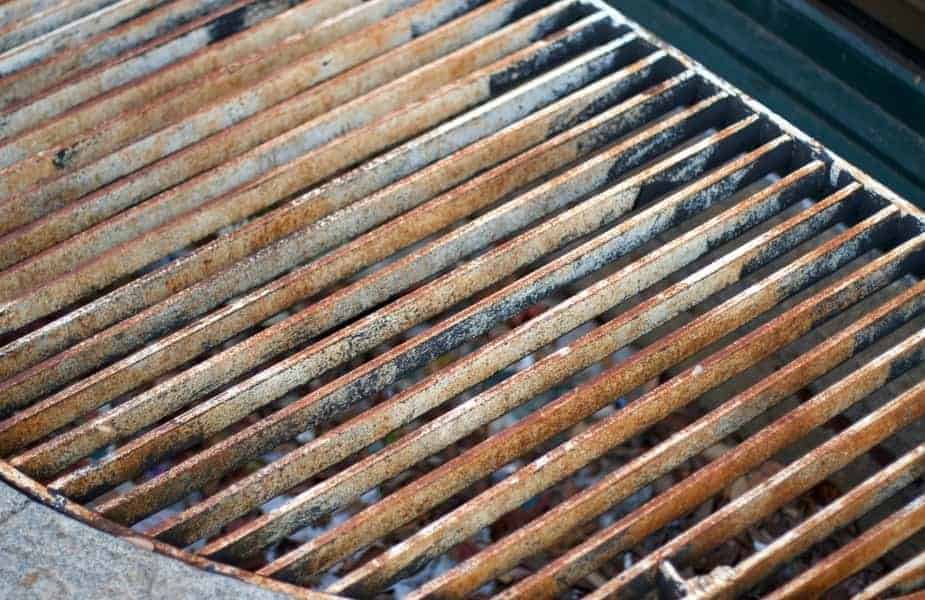
Rust formation on BBQ grills is primarily a chemical reaction between iron, oxygen, and moisture, which can be accelerated by factors such as exposure to salt, smoke, and food residues. This reaction leads to oxidation, which manifests as the reddish-brown flaky coating commonly known as rust.
Frequent usage without proper cleaning and leaving grills uncovered outdoors are key contributors that expose surfaces to moisture and accelerate the rusting process. By understanding these factors, grill owners can take preemptive steps to protect their investment and extend the life of their BBQ grill.
Materials Susceptible to Rusting
- Cast Iron:
- Heat Retention: Excellent for heat retention and even cooking.
- Rust Susceptibility: Highly prone to rust if not seasoned properly or left unprotected.
- Stainless Steel:
- Rust Resistance: Offers better resistance to rust.
- Conditions: Can still corrode under harsh conditions or if physically damaged.
- Coated Steel:
- Initial Protection: Comes with a protective coating to guard against rust.
- Coating Integrity: Susceptible to rusting quickly if the coating is scratched or chipped.
Essential Tools and Materials Needed
Removing rust from a BBQ grill requires specific tools and cleaning materials to ensure effective and safe results. Here’s what you’ll typically need:
- Wire Brush: Essential for scrubbing off large flakes of rust. Choose a brush with stiff bristles that can handle tough rust without damaging the grill.
- Sandpaper: Useful for smoothing out smaller rust spots, especially in hard-to-reach areas. A variety of grits may be needed, from coarse to fine.
- Cleaning Solution: A mix of vinegar and baking soda can be effective for rust removal. Commercial rust removers are also available for more severe cases.
- Protective Gloves and Goggles: Always protect your hands and eyes when dealing with rust and chemical cleaners.
- Rags and Sponges: For applying cleaning solutions and wiping down the grill after rust removal.
Safety Gear for Rust Removal
When removing rust, it’s crucial to protect yourself from potential hazards. Here’s the essential safety gear:
- Protective Gloves: Necessary to shield hands from sharp edges and harsh chemicals.
- Safety Goggles: Protect your eyes from flying rust particles and chemical splashes.
- Respiratory Mask: Especially important if using chemical rust removers or sanding extensively, to avoid inhaling harmful particles.
- Long-sleeved Clothing: Protects skin from irritants and rust particles during the cleaning process.
Step-by-Step Guide to Removing Rust
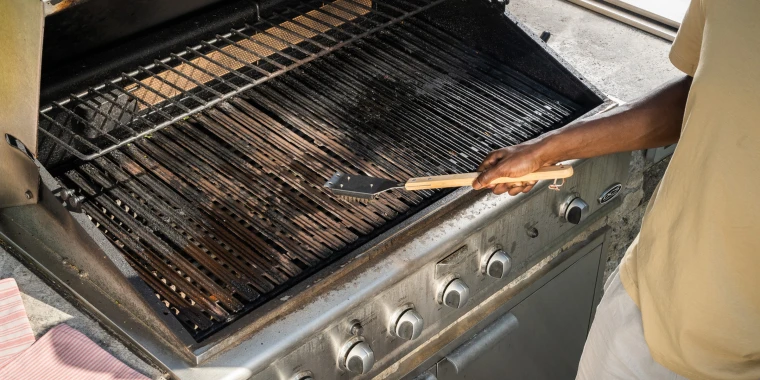
Steps to clean and remove rust from BBQ grill grates.
Step 1: Gather Your Supplies: Before diving into the rust removal process, make sure you have all the necessary supplies on hand. You’ll need:
- Rubber gloves
- Safety goggles
- A wire brush or steel wool
- Sandpaper (various grits)
- Rust remover (commercial product or homemade solution like vinegar or baking soda paste)
- Clean cloths or rags
- Protective covering (for surfaces)
- Paint or sealant (optional)
Step 2: Prepare the Area: Lay down a protective covering to catch any debris or rust flakes. This will make cleanup easier and prevent damage to the surrounding area. Wear your rubber gloves and safety goggles to protect your hands and eyes.
Step 3: Initial Cleaning: Start by wiping down the rusty area with a clean cloth to remove any loose dirt and debris. This will make the rust removal process more effective.
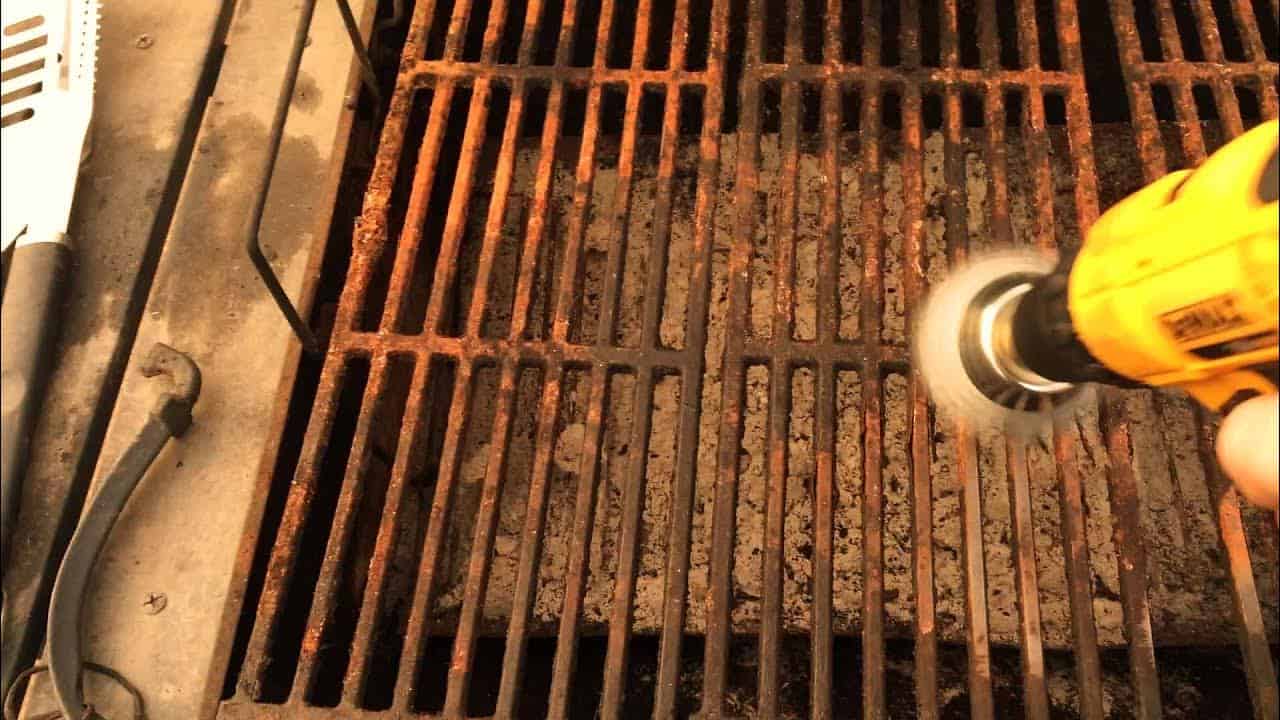
Step 4: Scrubbing the Rust: Using a wire brush or steel wool, scrub the rusted area to remove as much rust as possible. Apply firm pressure and work in circular motions. For larger areas, you might find it easier to use a power tool with a wire brush attachment.
Step 5: Sanding the Surface: Once the bulk of the rust is removed, use sandpaper to smooth the surface. Start with a coarser grit to tackle the remaining rust and then switch to a finer grit for a smoother finish. Sand until the metal is free of rust and the surface feels smooth.
Step 6: Applying Rust Remover: If there are still traces of rust, apply a rust remover. You can use a commercial product or make a homemade solution. For a DIY approach, soak a cloth in white vinegar and place it on the rusted area, letting it sit for a few hours. Alternatively, make a paste with baking soda and water, apply it to the rust, and let it sit for a couple of hours. Then, scrub and rinse thoroughly.
Step 7: Rinsing and Drying: Rinse the treated area with clean water to remove any rust remover residue. Dry the surface completely with a clean cloth. Make sure there’s no moisture left, as this can lead to more rust.
Step 8: Post-Cleanup Care: To prevent future rusting, apply a protective coating. Depending on the item, you can use paint, a rust-resistant primer, or a sealant. For smaller items, a thin layer of oil can also help protect against moisture and rust.
Step 9: Regular Maintenance: Regularly inspect and clean your metal items to catch any signs of rust early. Keeping them dry and applying protective coatings as needed will help extend their life and keep them rust-free.
Step 10: Proper Storage: Store metal items in a dry, cool place to minimize exposure to moisture. If possible, use dehumidifiers in storage areas to reduce humidity and prevent rust formation.
Pre-Cleaning the Grill
Before you tackle the rust, it’s crucial to prepare your grill properly to ensure the cleaning process is as effective as possible. Here’s how to get started:
- Disassemble the Grill: Remove all removable parts, such as grates, burners, and drip pans. This allows for easier access to all rusted areas.
- Wipe Down Surfaces: Using a damp cloth, wipe down all surfaces to remove loose debris and grease. This initial cleaning helps expose the rust, making it easier to target.
- Inspect for Damage: Check for any damaged coatings or deep corrosion which might require special attention or replacement.
Techniques for Rust Removal
Depending on the severity of the rust and the materials of your grill, you might choose one of several techniques for rust removal:

- Mechanical Removal: Use a wire brush or sandpaper to scrub off the rust physically. This method is effective for significant rusting and offers immediate results.
- Chemical Treatment: Apply a chemical rust remover or a homemade solution like vinegar or lemon juice mixed with baking soda. Allow it to sit on the rusted areas to loosen the rust before scrubbing.
- Electrolytic Method: For deep and thorough rust removal, an electrolytic process can be used, although it’s more complex and requires careful handling.
Post-Cleaning Care and Maintenance
After successfully removing the rust, it’s important to take steps to prevent future rust:
- Dry the Grill Thoroughly: Ensure all parts are completely dry before reassembling to avoid moisture, which can lead to rust.
- Apply Protective Coatings: Use oil or a specialized grill protector on metal surfaces, especially if they’re prone to rust.
- Regular Maintenance: Regularly clean and inspect your grill after use. Store it in a dry place with a protective cover to minimize exposure to moisture.
Alternative Methods and When to Use Them
Sometimes, conventional rust removal methods may not be suitable or available. Here are some alternative methods and the scenarios in which they might be more appropriate:
- Electrolysis: Ideal for deep-set rust. It uses electrical currents to remove rust without physical scrubbing, preserving the integrity of the grill.
- Heat Treatment: Applying heat with a blowtorch can loosen rust, allowing for easier mechanical removal. Best used for thick, stubborn rust patches.
- Professional Restoration: If rust is extensive and the grill holds sentimental or high monetary value, professional restoration might be warranted.
Using Natural Remedies for Rust Removal
For those who prefer environmentally friendly options, natural remedies can be surprisingly effective at removing rust:
- Vinegar: Soak the rusted parts in white vinegar for a few hours and then scrub the rust away. Vinegar’s acidic nature helps break down rust naturally.
- Baking Soda: Apply a baking soda paste (mixed with a little water) to the rusted area, let it sit for several hours, and then scrub off. This is gentle on the grill and non-toxic.
- Lemon and Salt: The combination of salt and lemon juice creates a reactive mixture that can dissolve rust. Apply the mixture, leave it for a few hours, and then scrub.
These natural methods are safe for both the user and the environment, preventing rust and keep your BBQ pristine. Planning a new build? Check out our guide on building a brick BBQ with a chimney for an upgrade.
Professional Help and When to Seek It
While many rust removal techniques can be performed at home, there are circumstances when calling in a professional is advisable:
- Extensive Damage: If rust has penetrated deeply into the grill’s structure, affecting its stability or functionality.
- High-Value Grills: For expensive or antique grills, professional restoration can preserve value and ensure longevity.
- Safety Concerns: If disassembling the grill or using harsh chemicals seems risky, professionals can handle these tasks safely and efficiently.
Professional services may offer advanced techniques like sandblasting or professional-grade chemical treatments that are not typically available to the average consumer. Expect thorough cleaning, possible replacement of parts, and advice on preventing future rust.
FAQ on Removing Rust from BBQ Grills
Preventing Rust in the Future
Preventing rust is key to extending the life of your BBQ grill and ensuring it remains safe and functional for cooking. Here are effective strategies to help keep rust at bay:
- Routine Cleaning: Regularly clean your grill after each use. Remove food particles, grease, and ash, which can trap moisture and promote rust.
- Thorough Drying: After cleaning, make sure to dry the grill completely. Moisture is a primary cause of rust, so keeping your grill dry is crucial.
- Protective Coatings: Apply a light coat of cooking oil to the grill’s surfaces after cleaning or use specialized grill protectants available in stores. These coatings create a barrier against moisture and air.
- Use a Grill Cover: Always cover and clean stainless steel BBQ grates when it’s not in use, especially if kept outdoors. Choose a cover that’s waterproof and fits well.
- Proper Storage: During off-season months, store your grill in a dry, covered area to protect it from weather conditions that could promote rust formation.
- Regular Inspections: Periodically check your grill for signs of rust or damage and address them promptly before they become major issues.
Disclosure: Our blog contains affiliate links to products. We may receive a commission for purchases made through these links. However, this does not impact our reviews and comparisons. We try our best to keep things fair and balanced, in order to help you make the best choice for you.