Building a Brick Barbecue: A DIY Guide
There’s something undeniably satisfying about cooking on a barbecue you’ve built with your own hands. Not only does it add a touch of rustic charm to your outdoor space, but it also becomes a centerpiece for gatherings and cookouts. Building a brick barbecue, especially one with a chimney, is a rewarding project that combines practicality with a sense of accomplishment.
In this guide, we’ll walk you through the steps on how to build brick BBQ with chimney. From selecting the right materials to laying the final brick, we’ve got you covered.
Whether you’re a seasoned DIY enthusiast or a beginner looking for a new challenge, this project will bring a touch of elegance and functionality to your outdoor living area. So, roll up your sleeves, grab your tools, and let’s get started on building your dream barbecue.
Why Build a Brick Barbecue?
Building a brick barbecue comes with a host of benefits that make it a worthwhile project for any DIY enthusiast. Here are some compelling reasons to consider constructing a brick barbecue in your outdoor space:
1. Durability and Longevity: Brick barbecues are built to last. Unlike portable grills that can rust, deteriorate, or need frequent replacement, a brick barbecue stands strong against the elements. Its robust construction ensures that it can withstand high temperatures and adverse weather conditions, providing you with a reliable cooking station for years to come.
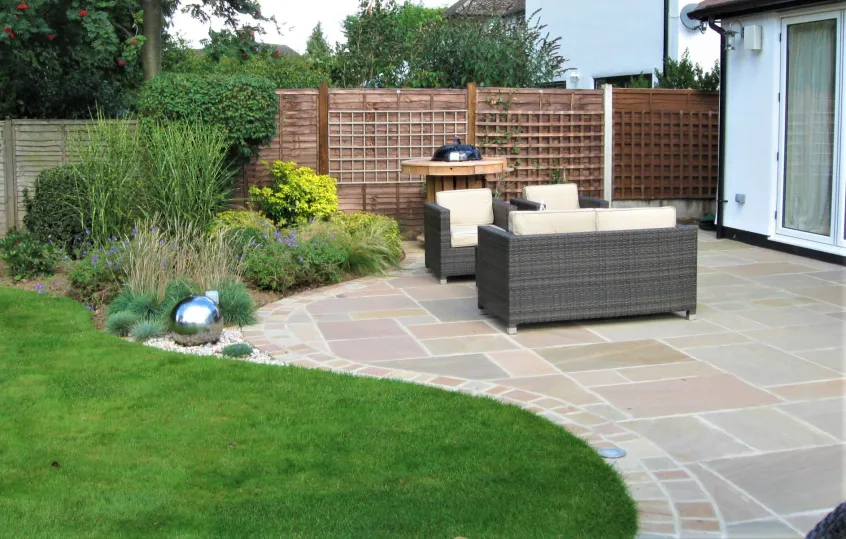
2. Aesthetic Appeal: A brick barbecue adds a touch of timeless elegance to your backyard. The natural look of bricks blends seamlessly with various landscaping styles, enhancing the overall aesthetic of your outdoor area. Whether you prefer a rustic, traditional, or modern look, a brick barbecue can be customized to suit your taste and complement your home’s exterior design.
3. Enhanced Outdoor Cooking Experience: Cooking on a brick barbecue offers a unique and enjoyable experience. The heat retention properties of bricks provide consistent cooking temperatures, allowing you to grill your favorite foods to perfection. Additionally, the inclusion of a chimney helps direct smoke away from the cooking area, creating a more pleasant environment for both the chef and guests.
4. Increased Property Value: A well-constructed brick barbecue can boost the value of your property. It is an attractive feature for potential buyers who appreciate the added functionality and charm of an outdoor cooking area. Investing in a brick barbecue can make your home more appealing and set it apart in the real estate market.
5. Social Hub for Gatherings: A brick barbecue serves as a focal point for social gatherings. It creates an inviting space for friends and family to come together, enjoy delicious meals, and make lasting memories. Whether it’s a casual weekend cookout or a special occasion, your brick barbecue will be at the heart of countless enjoyable moments.
Planning Your Brick Barbecue
Before you start stacking bricks and firing up your new barbecue, there are several key considerations to ensure your project goes smoothly and yields the best results. Proper planning is crucial for a successful and enjoyable building experience. Here are some important factors to consider:
Choosing the Right Location
When selecting the location for your brick barbecue, several factors come into play to ensure safety, convenience, and functionality:
1. Safety Considerations
- Distance from Flammable Materials: Keep your barbecue away from wooden fences, sheds, overhanging trees, and any other flammable materials.
- Wind Direction: Place your barbecue so that the prevailing wind blows smoke away from seating and dining areas, ensuring a more comfortable environment for guests.
- Level Ground: Ensure the chosen spot is on level ground to provide a stable foundation for your barbecue.
2. Convenience Factors
- Proximity to the Kitchen: A location close to your indoor kitchen can make transporting food and supplies more convenient.
- Accessibility: Make sure there’s easy access to your barbecue from the house and seating areas.
- Space for Cooking and Socializing: Ensure there’s ample space around the barbecue for safe cooking, food preparation, and socializing.
3. Aesthetic and Functional Integration
- Integration with Landscaping: Choose a spot that complements your backyard’s landscaping and overall aesthetic.
- Sun and Shade: Consider the sun’s position throughout the day to avoid placing your barbecue in an area that gets too much sun or is always shaded.
Designing Your Brick Barbecue
Designing your brick barbecue involves careful consideration of your cooking needs and available space:
1. Determining the Size
- Cooking Surface: Decide on the size of the grilling surface based on how many people you typically cook for.
- Additional Features: Think about incorporating countertops for food prep, storage areas for utensils, and even seating areas.
2. Choosing the Shape and Style
- Rectangular or L-shaped: Rectangular barbecues are straightforward to build and offer ample grilling space. L-shaped designs can provide additional countertop space and a more integrated look.
- Incorporating a Chimney: Adding a chimney helps direct smoke away from the cooking area, enhancing comfort and functionality.
3. Customizing the Design
- Personal Preferences: Customize your barbecue to fit your personal style, whether it’s rustic, modern, or traditional.
- Space Utilization: Ensure the design maximizes the use of available space without overwhelming your backyard.
Necessary Materials and Tools
Here’s a comprehensive list of materials and tools you’ll need to build your brick barbecue:
Materials
- Bricks: Fire-resistant bricks for the barbecue’s construction.
- Mortar: High-heat mortar for binding the bricks together.
- Grill Grate: A sturdy, heat-resistant grill grate for cooking.
- Chimney Flue: A chimney flue to help direct smoke upwards.
- Concrete: For the foundation slab.
- Gravel and Sand: For the base under the foundation.
- Rebar: For reinforcing the concrete slab.
Tools
- Trowel: For spreading mortar.
- Level: To ensure your structure is even.
- Tape Measure: For precise measurements.
- Brick Jointer: For finishing the mortar joints.
- Hammer and Chisel: For cutting bricks to size.
- Wheelbarrow: For mixing and transporting mortar.
- Masonry Saw: For precise brick cuts.
- Safety Gear: Gloves, goggles, and a dust mask to protect yourself during construction.
- Bucket: For water and mixing materials.
- Shovel: For digging the foundation.
Building the Foundation
A strong foundation is essential for the durability and stability of your brick barbecue. Follow these step-by-step instructions to lay a proper foundation:
1. Marking the Area
- Measure and Mark: Use a tape measure to mark the dimensions of your barbecue on the ground. Use stakes and string to outline the area, ensuring it is square and level.
- Excavate: Dig out the marked area to a depth of about 8-12 inches. This will provide space for the foundation layers.
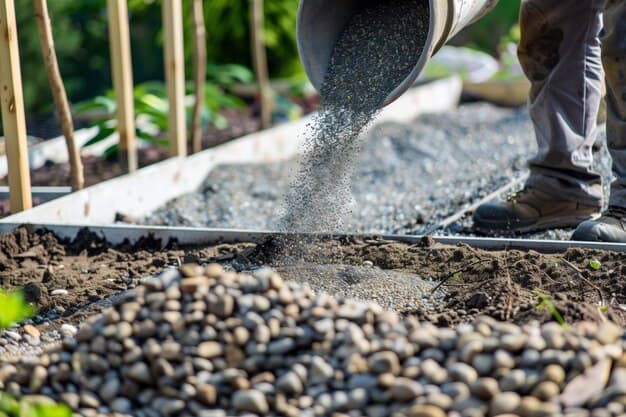
2. Preparing the Base
- Gravel Layer: Fill the excavated area with 4-6 inches of gravel. This layer helps with drainage and provides a solid base.
- Compact the Gravel: Use a tamper or a hand compactor to compact the gravel, making it as level and firm as possible.
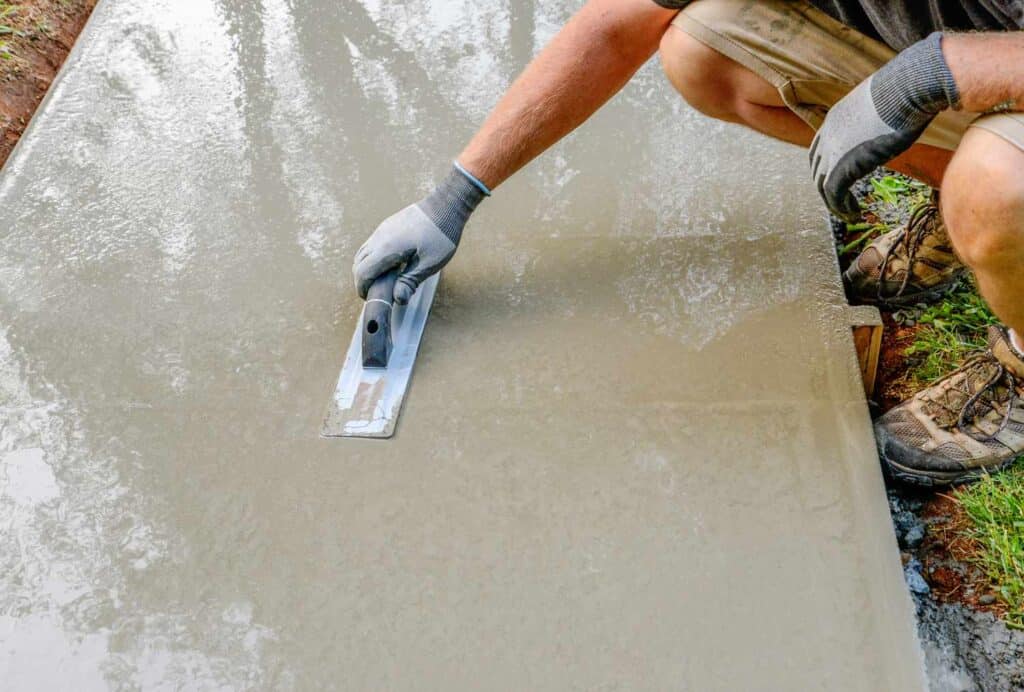
3. Pouring the Concrete Slab
- Formwork: Construct a wooden frame (formwork) around the perimeter of the excavated area to contain the concrete. Ensure the formwork is level and secure.
- Reinforcement: Place rebar within the formwork for additional strength. Position the rebar in a grid pattern and tie them together with wire.
- Mix and Pour Concrete: Mix the concrete according to the manufacturer’s instructions and pour it into the formwork. Use a shovel to spread the concrete evenly.
- Level the Concrete: Use a screed (a long, straight piece of wood or metal) to level the surface of the concrete. Smooth it out with a trowel for a clean finish.
- Cure the Concrete: Allow the concrete to cure for at least 48 hours. Keep it moist by covering it with plastic sheeting or periodically misting it with water.
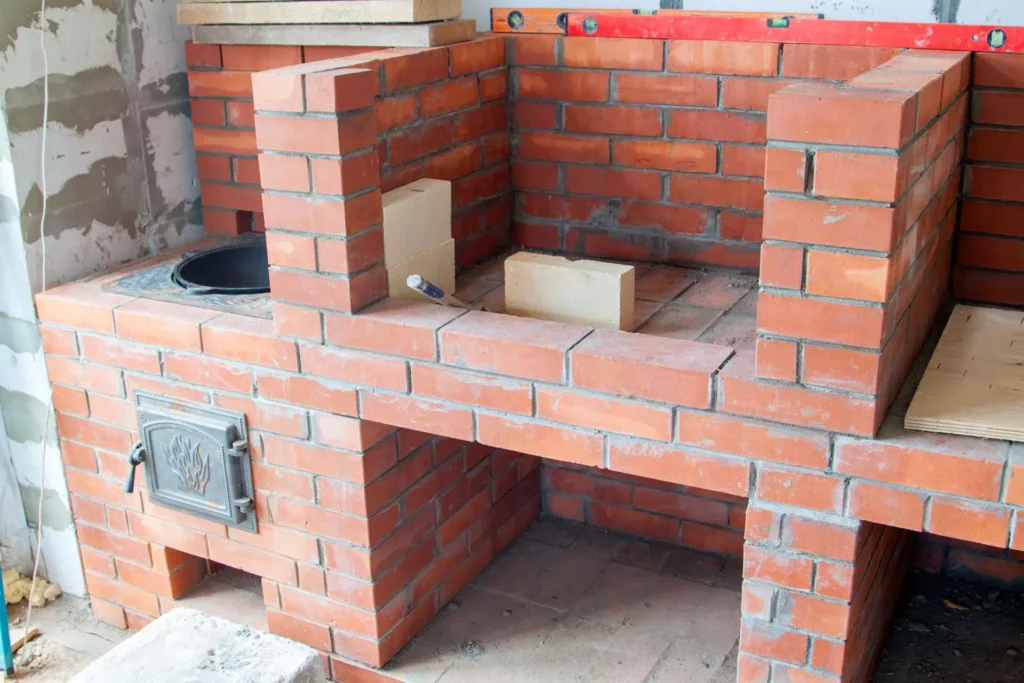
Constructing the Barbecue
Once the foundation is set, you can begin constructing the main structure of your brick barbecue. Follow these detailed steps to build a BBQ grill using bricks, complete with a chimney for smoke management:
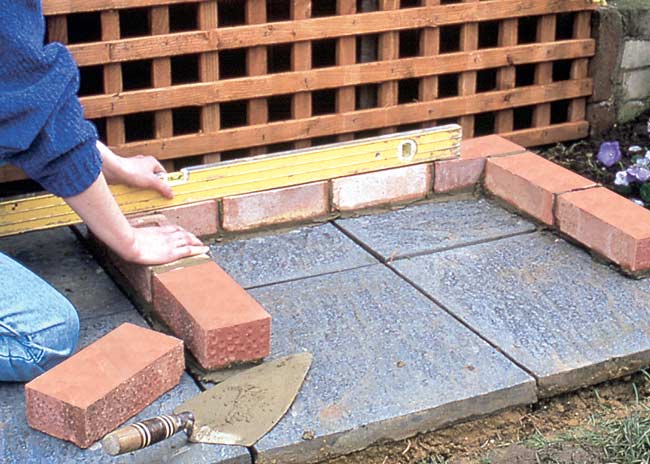
1. Laying the First Course of Bricks
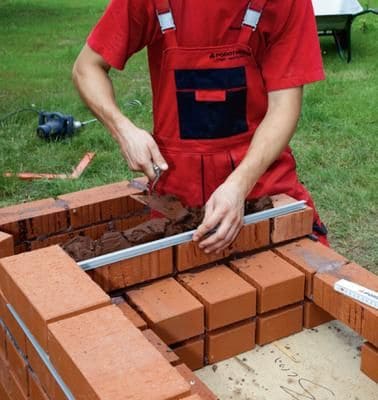
- Mix Mortar: Prepare the high-heat mortar according to the manufacturer’s instructions.
- Apply Mortar Base: Spread a layer of mortar on the concrete foundation where the first row of bricks will go.
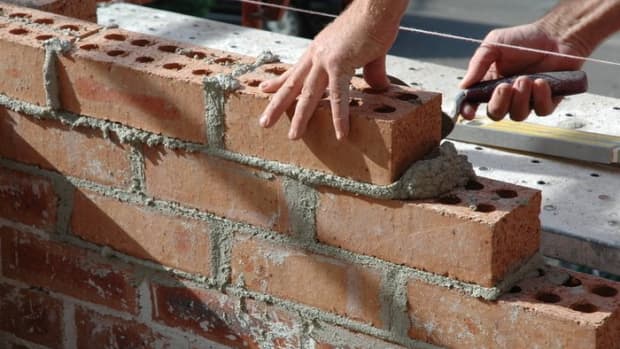
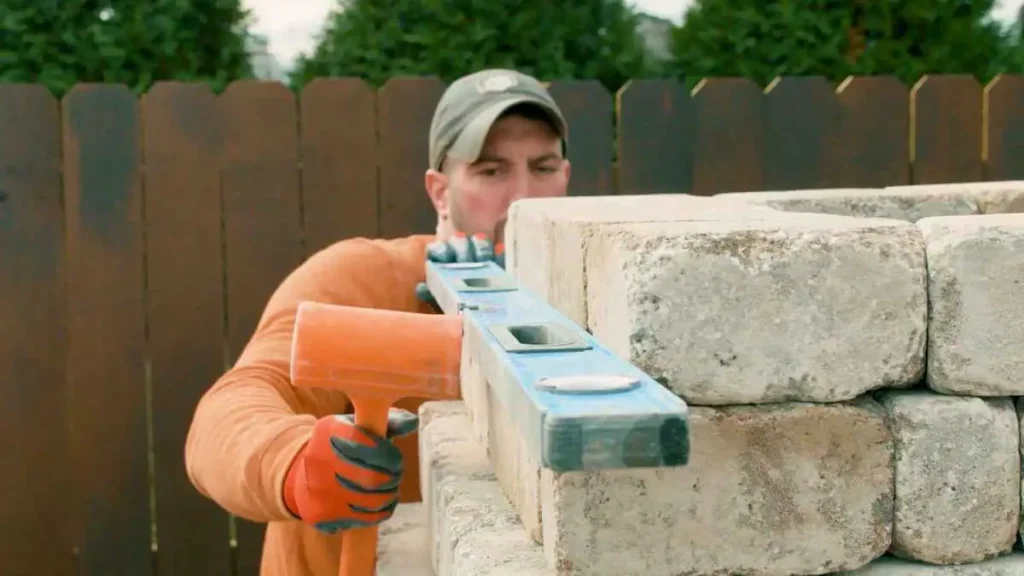
- Place the First Bricks: Position the first brick at a corner, pressing it firmly into the mortar. Use a level to ensure it is even. Continue laying the first course of bricks, leaving a small gap between each for mortar joints.
2. Building Up the Walls
- Add Mortar Between Bricks: Apply mortar to the ends of each brick before placing it next to the previous brick. This helps bond them together.
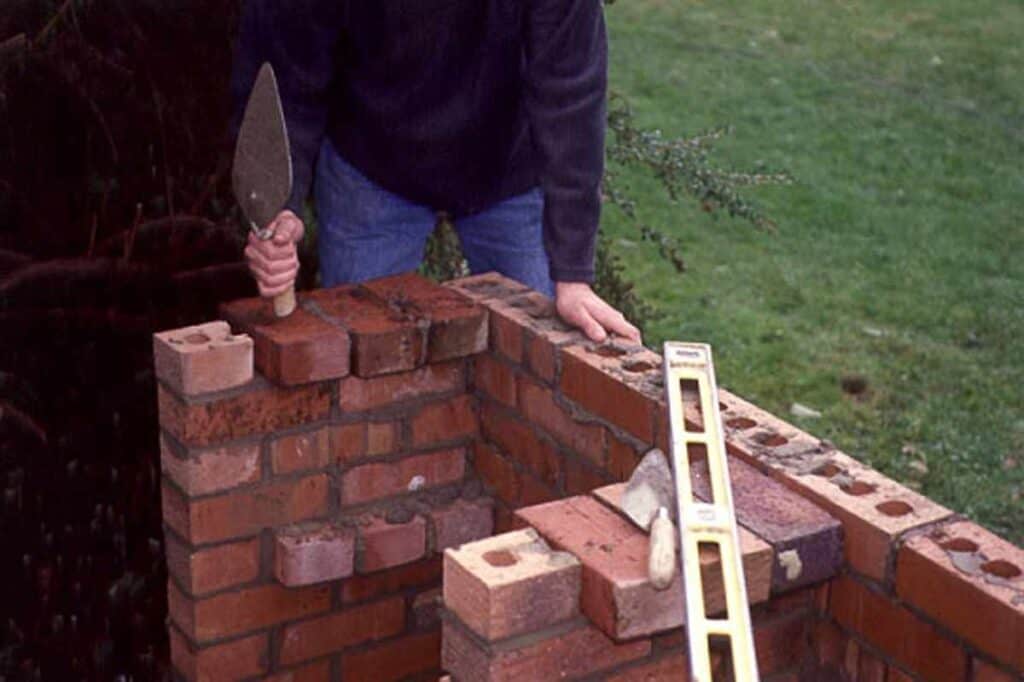
- Stagger the Joints: For added stability, stagger the joints of each new row of bricks. This is known as a running bond pattern.
- Check Alignment and Level: Regularly use a level and a string line to check that your walls are straight and level. Adjust as needed to maintain accuracy.


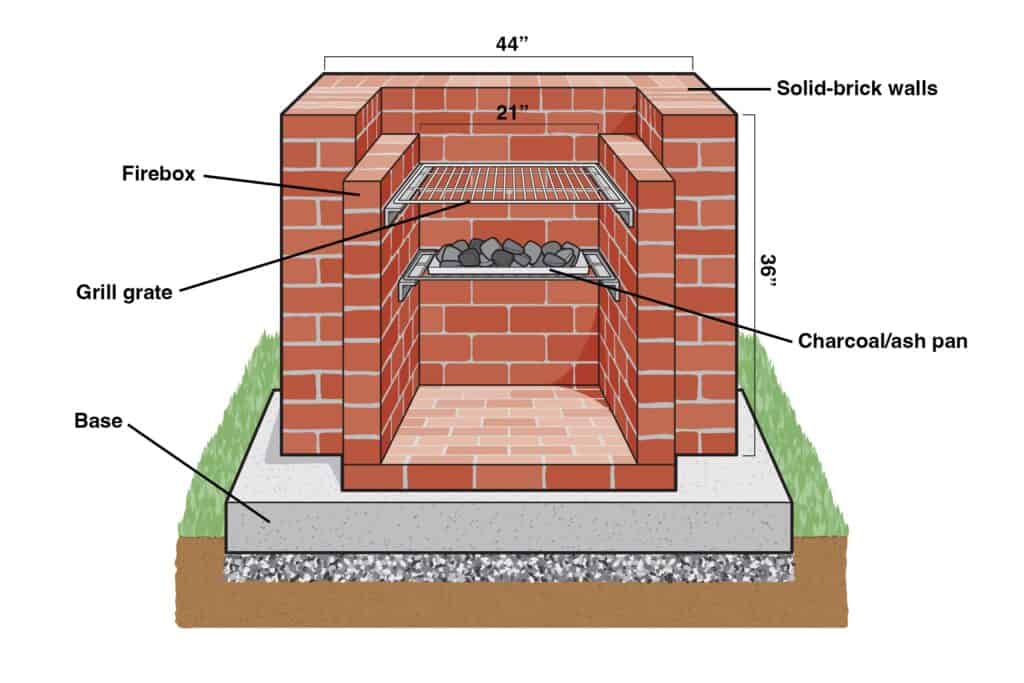
3. Creating the Firebox and Grill Area
- Design the Firebox: Determine the size of your firebox and leave an opening for it as you build up the walls. The firebox should be lined with fire bricks for better heat resistance.
- Install the Grill Supports: As you build, incorporate metal brackets or angled iron into the brickwork to support the grill grate. Ensure they are level and securely embedded in the mortar.
4. Constructing the Chimney
- Build Upwards: Continue laying bricks to create the chimney, which should be directly above the firebox to help draw smoke upwards.
- Install the Chimney Flue: Place the chimney flue liner inside the brick chimney. The flue helps channel smoke out and away from the cooking area.
- Cap the Chimney: Finish the chimney with a cap or crown to prevent water ingress and ensure proper ventilation.
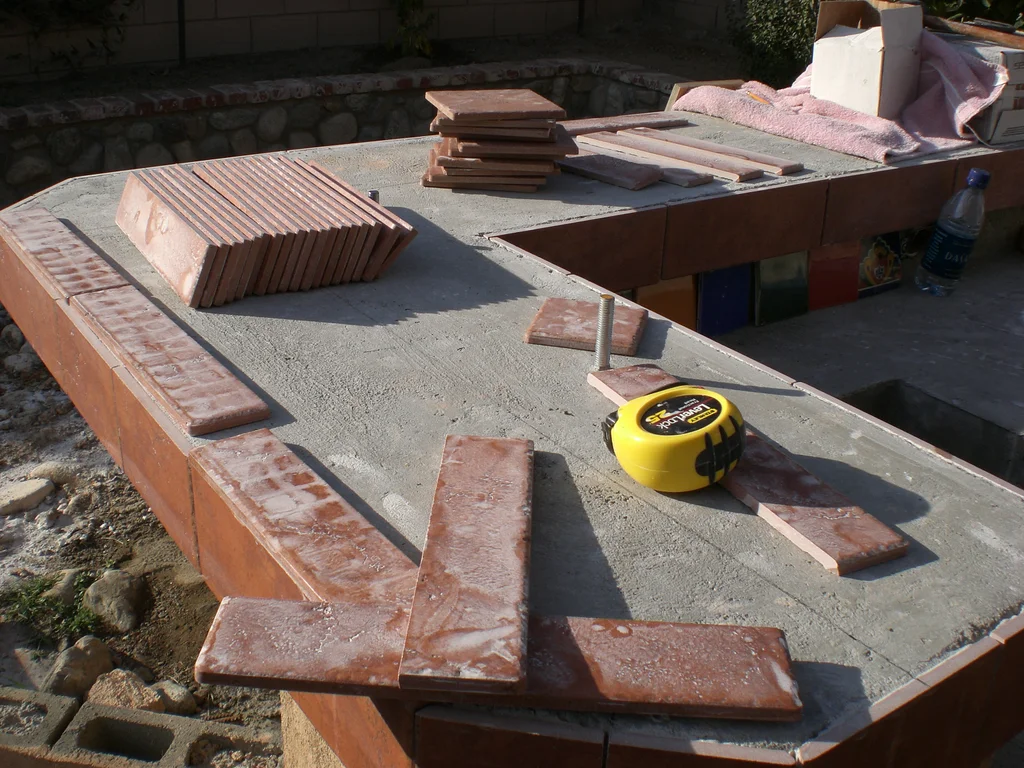
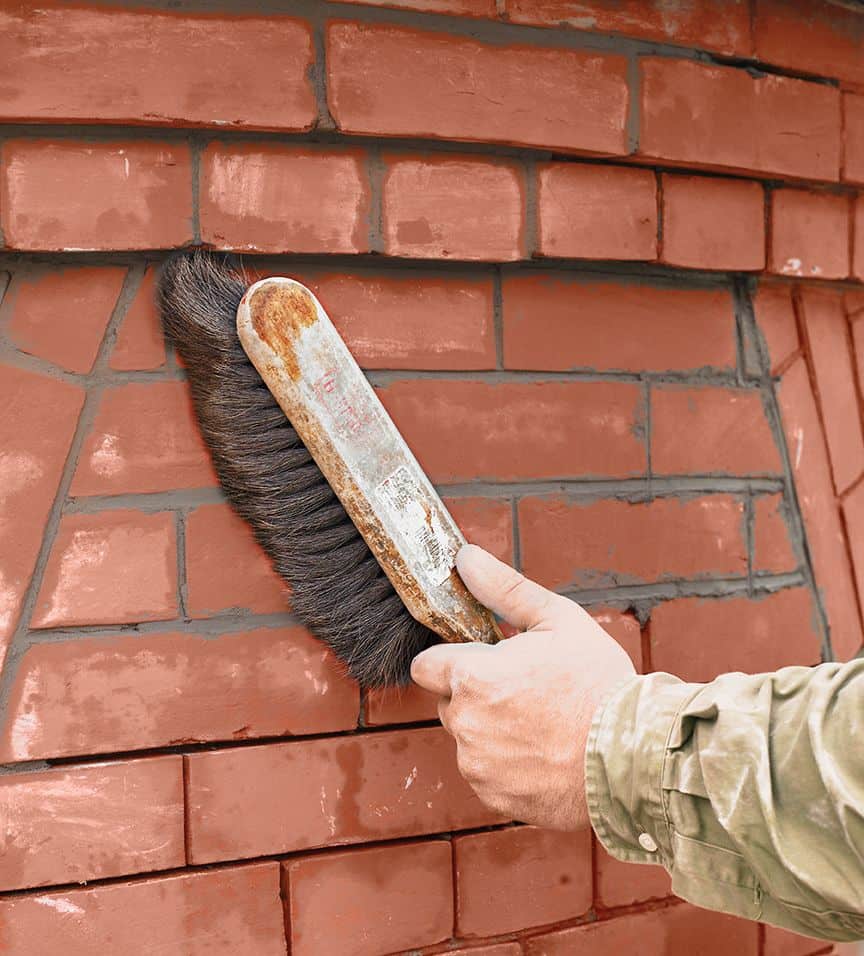
5. Finishing Touches
- Smooth Mortar Joints: Use a brick jointer to smooth and shape the mortar joints for a polished look.
- Clean Excess Mortar: Wipe away any excess mortar from the bricks with a damp sponge before it dries.
- Allow to Cure: Let the entire structure cure for several days before using it. This ensures the mortar sets properly and the barbecue is stable.
Creating the Cooking Surface
The cooking surface is the heart of your brick barbecue, and it’s crucial to build it both functionally and safely. Here’s how to create a robust and efficient cooking surface:
1. Installing the Grill Supports
- Determine Height: Decide on the height of your cooking surface. Typically, a height of around 30-36 inches from the ground is comfortable for most people.
- Position Supports: Use metal brackets, angled iron, or rebar as supports for your grill grate. Place them at the desired height, ensuring they are level and securely embedded in the brickwork.
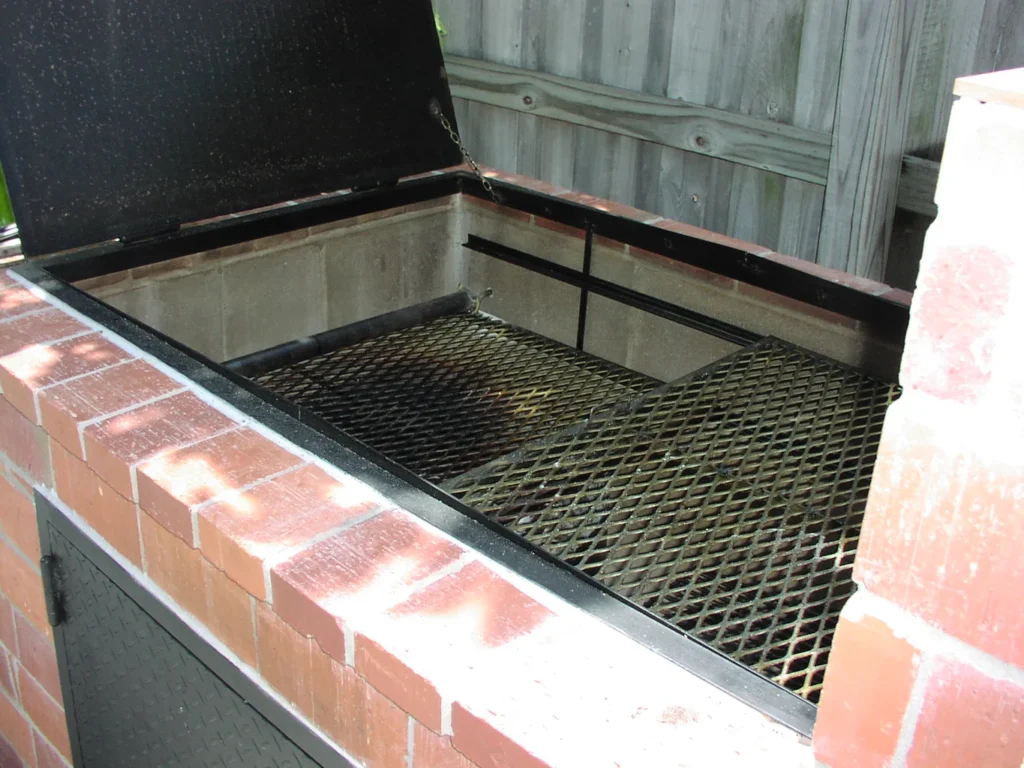
2. Placing the Grill Grate
- Choose the Right Grate: Select a grill grate that fits the dimensions of your barbecue. Stainless steel grates are durable and resistant to rust.
- Set the Grate: Place the grill grate on the supports, ensuring it sits firmly and does not wobble. If necessary, adjust the supports or add additional ones to stabilize the grate.
3. Building the Firebox
- Line with Fire Bricks: For the area directly below the grill grate where the charcoal or wood will be placed, use fire bricks. These bricks are designed to withstand high temperatures and provide better heat retention.
- Construct the Firebox: Build the firebox walls using fire bricks, ensuring they are securely mortared together. Leave space at the bottom for air circulation and easy ash removal.
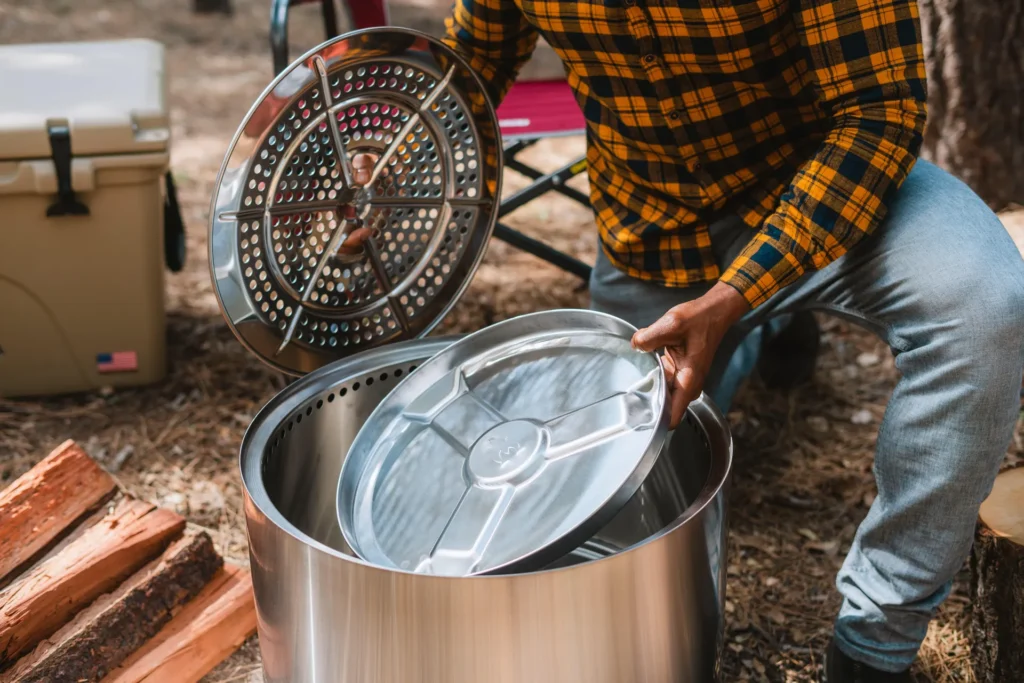
4. Adding a Removable Ash Pan
- Create an Ash Pan: To facilitate cleaning, consider incorporating a removable ash pan at the bottom of the firebox. This can be a simple metal tray that slides in and out.
- Install the Ash Pan: Ensure the ash pan fits snugly within the firebox and can be easily accessed for ash removal.
Building the Chimney
A chimney is essential for proper ventilation, drawing smoke away from the cooking area, and ensuring a more pleasant grilling experience. Follow these steps to construct an effective chimney:
1. Planning the Chimney
- Position Above Firebox: The chimney should be directly above the firebox to efficiently draw smoke upwards.
- Determine Height: A chimney height of at least 3-4 feet above the barbecue structure is recommended for adequate ventilation.
2. Building the Chimney Base
- Start with a Wide Base: Begin by building a wider base at the top of the barbecue structure, gradually narrowing as you go up. This provides stability and helps with the draft.
3. Laying Bricks for the Chimney
- First Layer: Apply mortar on top of the barbecue structure where the chimney will be placed. Lay the first layer of bricks, ensuring they form a square or rectangular shape around the smoke outlet.
- Stagger the Joints: Continue laying bricks, staggering the joints for strength. Regularly check with a level to ensure the chimney is straight.
- Tapering the Chimney: As you build upwards, slightly taper the chimney to improve the draw. This means each subsequent layer of bricks should be slightly narrower than the one below.
4. Installing the Chimney Flue
- Place the Flue Liner: Insert a chimney flue liner into the chimney structure. This liner helps channel the smoke and withstands high temperatures.
- Secure the Liner: Ensure the flue liner is centered and secured within the chimney. Use mortar to fill any gaps between the liner and the bricks.
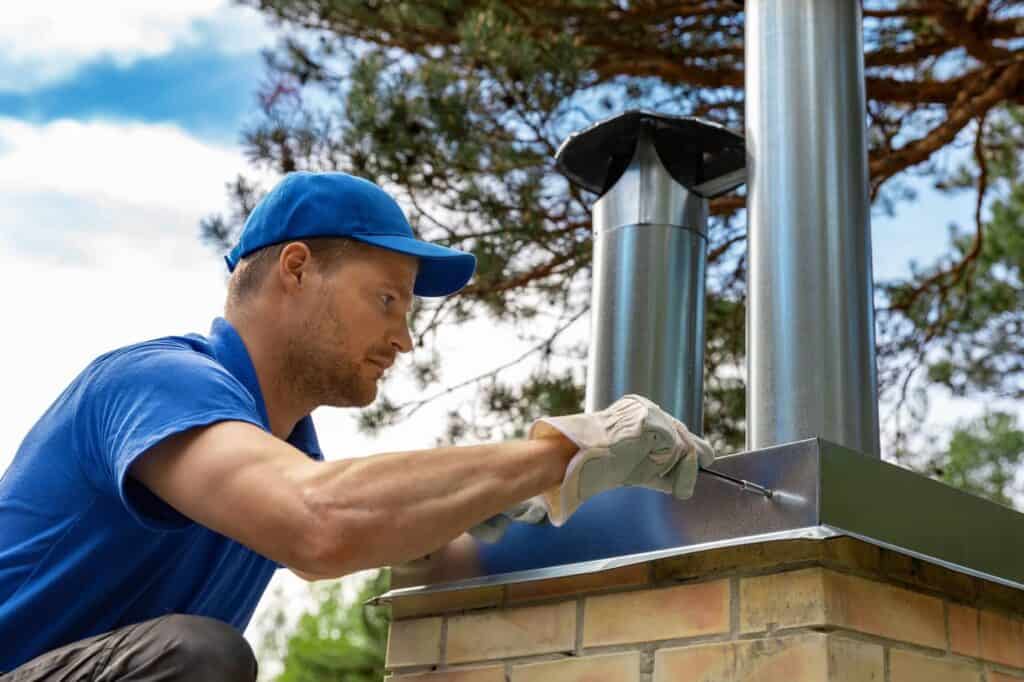
5. Finishing the Chimney
- Top Off the Chimney: Once you reach the desired height, finish the top of the chimney with a chimney cap or crown. This prevents rainwater from entering and helps improve the draft.
- Chimney Cap: Install a chimney cap to prevent debris and animals from entering the chimney while still allowing smoke to escape.
6. Final Checks and Adjustments
- Inspect for Gaps: Check for any gaps or cracks in the mortar joints. Fill them in to ensure the chimney is airtight and functions efficiently.
- Test the Draw: Light a small fire in the barbecue and observe the smoke flow. The smoke should be drawn up the chimney smoothly. Make any necessary adjustments to improve the draw.
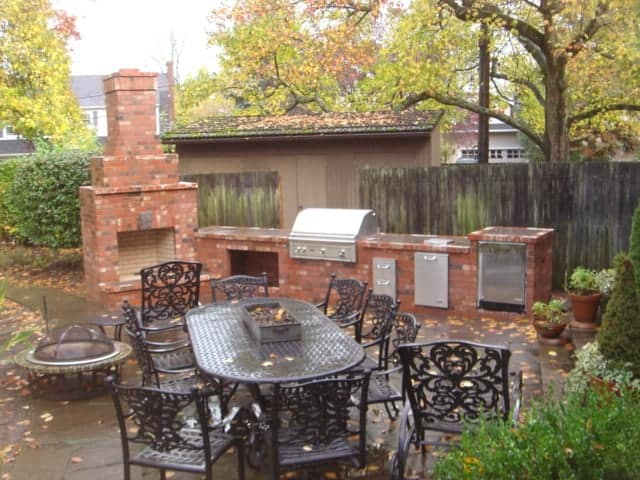
Adding Features and Finishing Touches
Enhancing your brick barbecue with additional features and finishing touches can elevate its functionality and aesthetic appeal. Here are some ideas and advice to complete your project:
1. Side Tables and Countertops
- Built-In Side Tables: Integrate side tables or countertops on either side of the barbecue for food preparation and serving. Use materials like granite or stainless steel for durability and ease of cleaning.
- Extended Countertops: Extend the countertops along the sides of the barbecue to create a seamless look. This provides extra workspace and a cohesive design.
2. Storage Areas
- Under-Counter Storage: Create storage areas beneath the countertops for storing grilling tools, charcoal, and other essentials. Incorporate doors or open shelves, depending on your preference.
- Tool Hooks and Racks: Install hooks or racks on the sides of the barbecue to keep utensils, brushes, and other tools within easy reach.
3. Seating and Dining Space
- Integrated Seating: Build benches or seating areas adjacent to the barbecue. This creates a cozy spot for guests to relax while you cook.
- Bar Counter: Add a bar counter with stools for a casual dining experience. This allows guests to interact with the cook and enjoy the ambiance.
4. Finishing Touches
- Decorative Brickwork: Use decorative bricks or patterns to add visual interest to the barbecue structure. Incorporate accents like herringbone or basket weave patterns.
- Outdoor Lighting: Install lighting around the barbecue area to enhance visibility and ambiance for evening gatherings. Consider string lights, lanterns, or built-in LED lights.
- Protective Coating: Apply a sealant to the bricks to protect against weathering and stains. This also makes cleaning easier and preserves the barbecue’s appearance.
- Painted Accents: If desired, paint certain elements of the barbecue, like the chimney cap or side tables, to add a splash of color and personalize the design.
Maintenance and Care
Once your brick BBQ is built, ensure it stays in top condition by checking out our articles on cleaning BBQ grates and removing rust or you can follow these tips to keep your barbecue in top condition:
1. Regular Cleaning
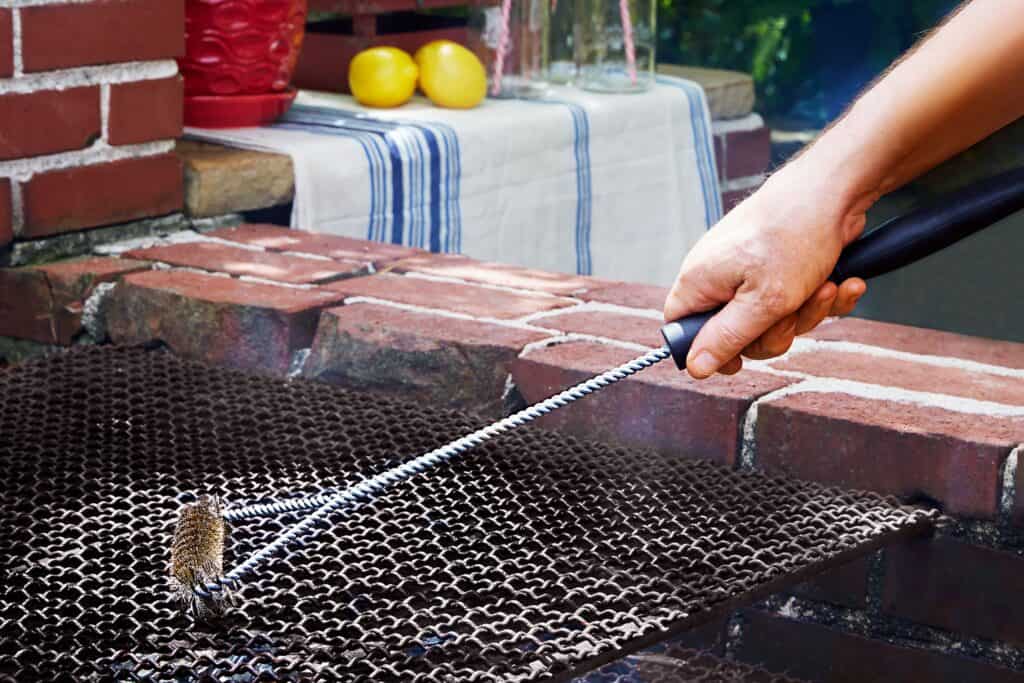
- After Each Use: Clean the grill grate and remove any food residues. Use a wire brush to scrape off any stuck-on food, and wash with warm, soapy water.
- Monthly Cleaning: Remove ashes from the firebox regularly. Wipe down the exterior bricks with a damp cloth to remove dirt and grime.
- Deep Cleaning: Periodically, give your barbecue a deep clean. Remove all grill grates, clean the firebox thoroughly, and wash down the entire structure.
2. Inspecting for Damage
- Check for Cracks: Regularly inspect the bricks and mortar joints for cracks or damage. Address any issues promptly to prevent further deterioration.
- Chimney Maintenance: Ensure the chimney flue is clear of debris and soot. Clean the flue at least once a year to maintain proper ventilation.
3. Weather Protection
- Cover During Winter: If you live in an area with harsh winters, consider covering your barbecue with a weatherproof cover to protect it from snow and ice.
- Apply Sealant: Reapply a brick sealant every few years to protect the bricks from moisture and weather damage.
4. Preventing Rust
- Protect Metal Parts: Keep metal parts like the grill grate and supports well-oiled to prevent rust. Store removable parts indoors when not in use for extended periods.
- Rust Removal: If rust appears, use a wire brush to remove it and apply a rust-resistant paint or coating.
5. General Tips
- Avoid Harsh Chemicals: Use mild cleaning agents and avoid harsh chemicals that can damage the bricks or mortar.
- Regular Use: Regularly using your barbecue can actually help maintain it, as the heat can burn off residues and prevent buildup.
Proper maintenance and care are essential to ensure the longevity and performance of your brick barbecue.
Safety Considerations
Safety should be a top priority during both the construction and use of your brick barbecue. Here are essential safety tips to keep in mind:
During Construction:
- Wear Protective Gear: Always wear gloves, safety goggles, and a dust mask to protect yourself from dust, debris, and mortar splashes.
- Use Tools Safely: Handle all tools, especially power tools, with care. Follow the manufacturer’s instructions and ensure they are in good working condition.
- Lift Properly: Bricks and bags of concrete are heavy. Lift with your legs, not your back, to avoid injury.
- Work in a Well-Ventilated Area: When mixing mortar or concrete, ensure you are in a well-ventilated area to avoid inhaling dust and fumes.
- Be Cautious with Fire Bricks: Fire bricks can be sharp. Handle them carefully to avoid cuts.
- Secure the Area: Keep the construction site clean and organized to prevent trips and falls. Ensure tools and materials are stored safely when not in use.
During Use:
- Check for Stability: Before lighting your barbecue, ensure it is stable and all bricks and mortar are secure.
- Fire Safety: Keep a fire extinguisher or a bucket of sand nearby in case of an emergency. Never leave the barbecue unattended while in use.
- Ventilation: Ensure the chimney is functioning properly to direct smoke away from the cooking area.
- Heat Protection: Use heat-resistant gloves and tools when handling the grill grate or adjusting the fire.
- Safe Distance: Keep children and pets at a safe distance from the barbecue while it is in use.
- Cool Down: Allow the barbecue to cool completely before cleaning or covering it.
Troubleshooting Common Issues
Even with careful planning, you might encounter some issues during the building process. Here are solutions to common problems:
1. Uneven Foundation
- Solution: If your foundation is not level, use additional gravel or concrete to fill in low spots. Use a level frequently to check your progress.
2. Cracked Bricks
- Solution: Replace any cracked bricks immediately to maintain the structure’s integrity. If cracks appear after construction, inspect the area for underlying issues such as shifting ground or improper mortar application.
3. Weak Mortar Joints
- Solution: If mortar joints are crumbling or weak, remove the affected mortar and reapply a fresh batch, ensuring it is mixed to the correct consistency.
4. Smoke Backdraft
- Solution: If smoke is not drawing up the chimney properly, check for blockages in the flue. Ensure the chimney is tall enough to create an adequate draft. Adjusting the height or adding a chimney cap might help.
5. Rusting Grill Grate
- Solution: Clean and oil the grill grate regularly to prevent rust. If rust has already formed, use a wire brush to remove it and apply a rust-resistant coating.
Connect and Share Your Project
Building a brick barbecue is a rewarding project, and sharing your experience can inspire and help others in the DIY community. Here’s how you can connect and share:
1. Join Online Forums and Communities
- DIY Forums: Join forums dedicated to DIY projects where you can ask questions, share progress, and get advice from experienced builders.
- Social Media Groups: Participate in social media groups focused on outdoor cooking and brickwork. Share photos and updates of your project.
2. Attend Local Workshops and Events
- DIY Workshops: Look for local workshops or events focused on masonry, outdoor cooking, or DIY projects. Networking with like-minded individuals can provide inspiration and new ideas.
Disclosure: Our blog contains affiliate links to products. We may receive a commission for purchases made through these links. However, this does not impact our reviews and comparisons. We try our best to keep things fair and balanced, in order to help you make the best choice for you.

2 Comments