BBQ Chicken On Electric Grill 2 Ways
Craving BBQ chicken but only have an electric grill? Perfect, you’re in the right spot! We’re about to turn that limitation into your secret weapon. Ditch the doubt because we’re unlocking the secrets to mouth-watering BBQ Chicken On Electric Grill. This isn’t just about cooking; it’s about mastering your electric grill to serve up some serious deliciousness. So, whether you’re aiming to impress yourself or wow a crowd, stick with me. Ready to elevate your grilling game and become the BBQ champ of your kitchen? Let’s dive in and make some magic happen.
How Long Do You Cook Chicken on Electric Grill?
Cooking chicken on an electric grill is a bit like a dance—you’ve got to get your moves just right to nail it. But don’t sweat it, I’ve got your back on this one. The key to perfectly grilled chicken lies in the thickness of the pieces and maintaining a consistent medium to medium-high heat, which on most electric grills is around 350-400°F.
Here’s a quick guide to get you grooving in the right direction:
- Boneless Chicken Breasts: These lean mean grilling machines usually need about 6-8 minutes per side. You’re aiming for a juicy center without drying them out.
- Bone-In Chicken Pieces: For thighs, drums, or wings with a bit more heft and bone to contend with, think 10-15 minutes per side. The bone adds a bit of a buffer, so they can handle the heat without turning into jerky.
- Whole Chicken: Going for the gold with a whole bird? Butterfly it to lay flat and plan for at least 45 minutes to an hour, flipping halfway through

The trick to not playing a guessing game is using a meat thermometer. Poke it into the thickest part of the chicken, avoiding bone, and look for the magic number: 165°F. That’s your ticket to juicy, safe-to-eat chicken.
How Do You Know When Chicken is Done Grill?
Knowing when your chicken is perfectly done on the grill is more art than science, but I’ll let you in on a few trade secrets to make sure you’re serving up perfection every time.
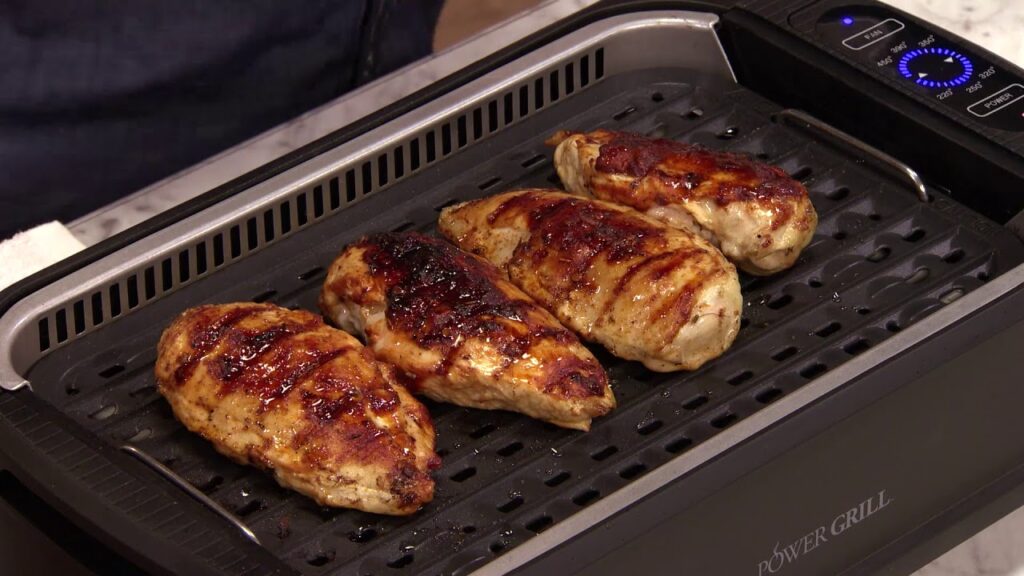
- The Look Test: First off, your chicken should be golden brown, with those lovely grill marks that scream “I’ve been grilled to perfection.” No pink should be visible on the outside.
- The Feel Test: If you’re feeling brave, you can give the chicken a gentle press with your tongs. It should feel firm but still have a bit of give. If it’s rock hard, you’ve gone too far, my friend.
- The Juice Test: Poke a small incision in the thickest part of the chicken; the juices that run out should be clear, not pink or bloody. If it’s still looking like a scene from “Vampire Diaries,” give it a bit more time.
- The Cut Test: This one’s straightforward – slice into the thickest part of the chicken (not all the way through, just a peek). You’re looking for meat that’s consistent in color all the way through, with no pink in sight.
- The Thermometer Test: The MVP of ensuring your chicken is done. Insert a meat thermometer into the thickest part of the meat, avoiding bone. A safe, done chicken will show a temperature of 165°F (74°C). This method is foolproof and doesn’t rely on subjective observation.
Cooking times can vary based on the size and cut of your chicken, as well as your grill’s temperament (yes, grills have moods, too). So, while these tests are great guidelines, the thermometer test is your best bet for getting it right every time. No more guesswork, just perfectly cooked chicken ready to steal the show.
2 Types of Electric Grill in BBQ Chicken On Electric Grill
When diving into the world of BBQ chicken using an electric grill, you’ll encounter two main types: the contact-model electric grill and the open-model electric grill. Each brings its own flair to the table, allowing for delicious outcomes but through different methods and features.
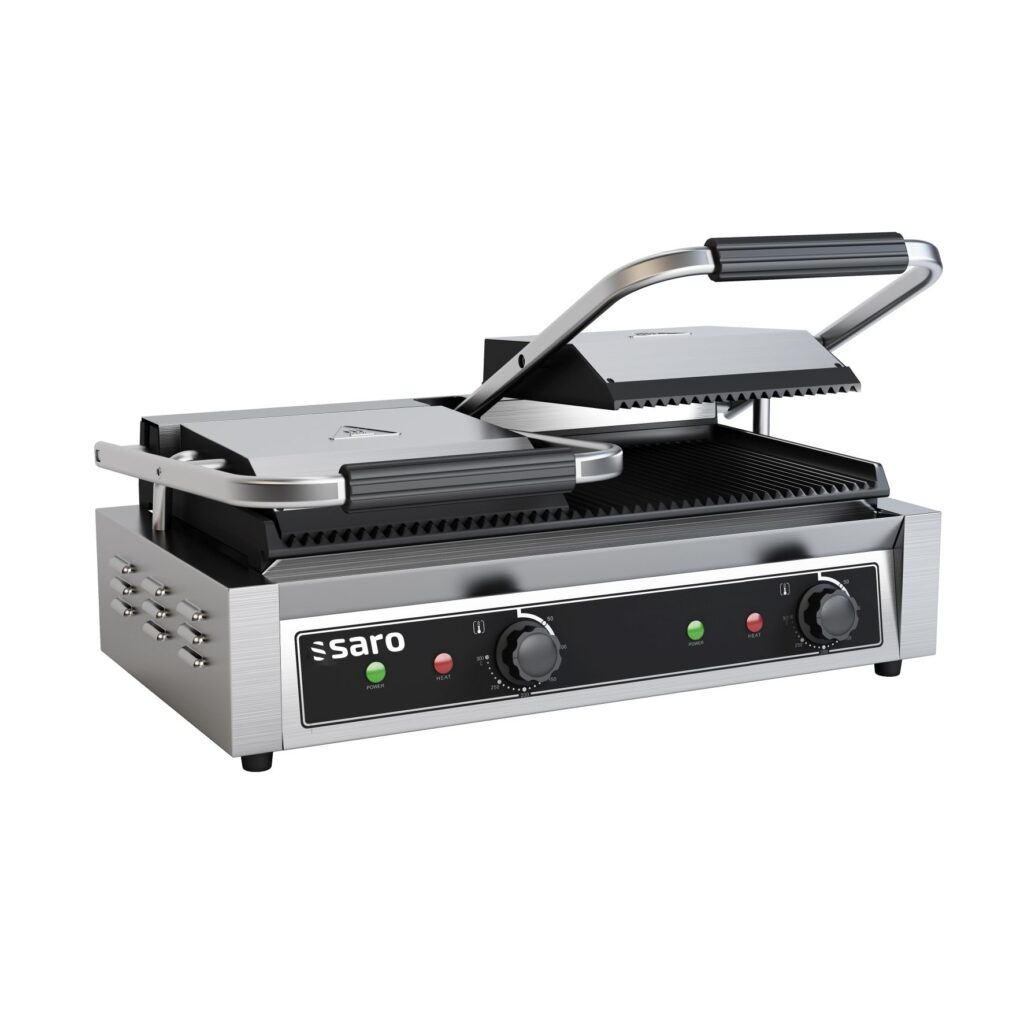
Contact-Model Electric Grill:
This type is characterized by its dual cooking surfaces that press together, allowing the chicken to cook from both sides simultaneously. The beauty of the contact grill lies in its efficiency and speed, as it significantly reduces cooking times. It’s a go-to for those seeking convenience without sacrificing the juicy tenderness of well-cooked BBQ chicken. The contact grill is perfect for smaller kitchens or for cooks who prioritize ease of use and cleanup. Since it cooks evenly and quickly, it’s ideal for boneless, skinless chicken breasts or thighs, delivering a moist and flavorful result with minimal effort.
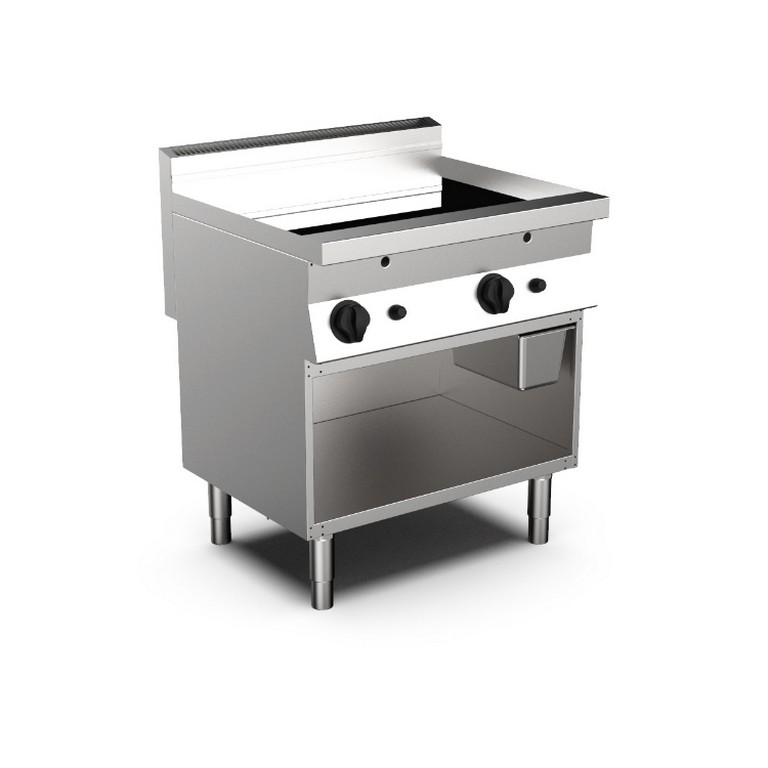
Open-Model Electric Grill:
Mimicking the traditional grilling experience, the open-model electric grill features a single, open grilling surface, requiring the chicken to be flipped halfway through cooking to ensure even doneness. This type offers more of the authentic grilling feel, complete with the ability to manage grill marks and enjoy the grilling aroma. The open grill is fantastic for those who have a bit more time to dedicate to their BBQ chicken, allowing for a more hands-on approach to achieve that perfect char and flavor. It’s versatile, catering to various cuts of chicken, from bone-in pieces to whole chickens, making it a favorite among enthusiasts who love to experiment with different BBQ styles.
Both grill types have their advantages, depending on your specific needs, preferences, and the level of convenience you desire. Whether you opt for the quick and easy contact-model or the more traditional open-model, both can produce delectably grilled BBQ chicken that’ll have you and your guests coming back for seconds.
Cooking Chicken Using a Contact-Model Electric Grill
Cooking chicken on a contact-model electric grill, like those famous George Foreman grills or similar brands, is like having a secret weapon in your kitchen arsenal. These grills are fantastic for making juicy, delicious chicken with minimal fuss and maximum flavor. Here’s how to get the most out of your contact grill chicken adventure:
1. Prep Your Chicken
- Marinate or Season: Whether it’s a few hours in a flavorful marinade or a generous rub of spices, prepping your chicken not only adds depth of flavor but also tenderizes it.
- Thickness Matters: For even cooking, ensure your chicken pieces are of uniform thickness. You might want to pound thicker pieces to an even size.
2. Heat It Up
- Preheat the Grill: Always start with a preheated grill. Most contact grills will have an indicator light to let you know when they’re ready. A hot grill ensures a good sear and locks in those juices.
3. Grill to Perfection
- Don’t Overcrowd: Place your chicken on the grill but avoid overcrowding. Contact grills cook from both sides, so there’s no need to flip, but you want every part of the chicken to have direct contact with the grill plates.
- Cooking Time: Since contact grills cook from the top and bottom simultaneously, cooking times are reduced. For boneless chicken breasts or thighs, start checking for doneness at around 4-6 minutes. Thicker cuts or bone-in pieces will take longer.
- Check for Doneness: The safest way to ensure your chicken is cooked through is to use a meat thermometer. The internal temperature should reach 165°F (74°C). If you don’t have a thermometer, the juices should run clear, and the meat should be opaque all the way through.
4. Rest Before Serving
- Let It Rest: Once cooked, let your chicken rest for a few minutes before cutting into it. This allows the juices to redistribute, making for a more tender and juicy meal.
5. Clean Up
- Easy Cleaning: One of the perks of contact grills is their ease of cleaning. Many have removable plates that can be washed in the sink or dishwasher. Always clean your grill after use to prevent build-up and ensure it’s ready for your next grilling session.
Tips for Success
- Experiment with Flavors: Contact grills are great for locking in marinades and rubs, so don’t be afraid to experiment with different flavor profiles.
- Watch Closely: Because contact grills cook relatively quickly and from both sides, it’s important to keep an eye on your chicken to prevent overcooking.
- Use for More: Remember, your contact grill isn’t just for chicken; you can grill vegetables, make paninis, or even cook fish, making it a versatile tool in your kitchen.
Cooking chicken on a contact-model electric grill is a convenient and healthy way to enjoy your favorite poultry dishes. With these tips, you’ll be serving up delicious, perfectly cooked chicken every time, with all the flavor and none of the fuss.
Cooking Chicken Using a Open-Model Electric Grill
Cooking chicken on an open-model electric grill brings a touch of that authentic grilling experience indoors, minus the charcoal or gas. It’s perfect for those who crave the grilled flavor but need the convenience of indoor cooking. Here’s how to master the art of grilling chicken on an open-model electric grill:
1. Preparation is Key
- Marinate or Season: Start with a good marinade or a hearty rub of spices. Not only does this add flavor, but it also helps keep the chicken moist during the grilling process. Whether you’re planning hours ahead or just minutes before cooking, any amount of marinating helps.
- Room Temperature: Bring your chicken to room temperature before grilling. This ensures more even cooking, preventing the outside from burning before the inside is done.
2. Get Your Grill Hot
- Preheat Your Grill: Just like its outdoor counterparts, your electric grill needs to preheat. Turn it to the desired temperature (usually medium-high for chicken), and give it at least 5-10 minutes to get hot. This step is crucial for achieving those beautiful grill marks and a seared crust.
3. Grill Like a Pro
- Oil Lightly: To prevent sticking, lightly oil the grill grates or the chicken itself. Use a high smoke point oil like canola or vegetable oil for best results.
- Placement: Place your chicken pieces on the grill. If your grill has hotter and cooler spots, use this to your advantage by placing thicker cuts in the hotter areas and thinner cuts in the cooler areas.
- Flip Judiciously: Resist the urge to constantly flip your chicken. Let it cook undisturbed for 4-6 minutes before flipping. This allows the grill marks to form and ensures a crisp exterior.
- Cook to Perfection: Cooking times will vary based on the cut of your chicken and the thickness. On average, boneless chicken breasts need about 6-8 minutes per side. Bone-in pieces like thighs or drumsticks might need 10-15 minutes per side. The goal is an internal temperature of 165°F (74°C), checked with a meat thermometer.
4. Rest and Serve
- Let It Rest: Once your chicken is cooked, let it rest for a few minutes off the grill. This allows the juices to redistribute, ensuring your chicken is moist and flavorful when you cut into it.
- Enjoy: Serve your perfectly grilled chicken with your favorite sides. From a fresh salad to grilled vegetables, the options are endless.
Additional Tips
- Cleaning: Keep your grill clean for the best performance and longevity. Brush off any residue after each use and follow the manufacturer’s instructions for deep cleaning.
- Safety First: Always use your electric grill in a well-ventilated area, even though it’s designed for indoor use. Safety should be your top priority.
- Experiment: Don’t be afraid to try different marinades, seasonings, or sauces. Grilling is as much about experimentation as it is about cooking.
Cooking chicken on an open-model electric grill can be a delightful experience, offering the joy of grilling year-round, regardless of the weather. With these tips, you’re well on your way to becoming an indoor grilling champion, ready to impress with your juicy, flavorful chicken dishes.
Does Electric Grill BBQ Chicken Good?
Absolutely, electric grills are often underestimated when it comes to BBQ chicken, but they can indeed deliver delicious results that might just surprise you. The beauty of an electric grill lies in its ability to offer consistent heat, a godsend for cooking chicken evenly without the fear of under or overdoing it. This precision allows for juicier, well-cooked BBQ chicken every time. Additionally, the convenience factor can’t be beaten, especially for those in apartments or places where traditional grills are a no-go.
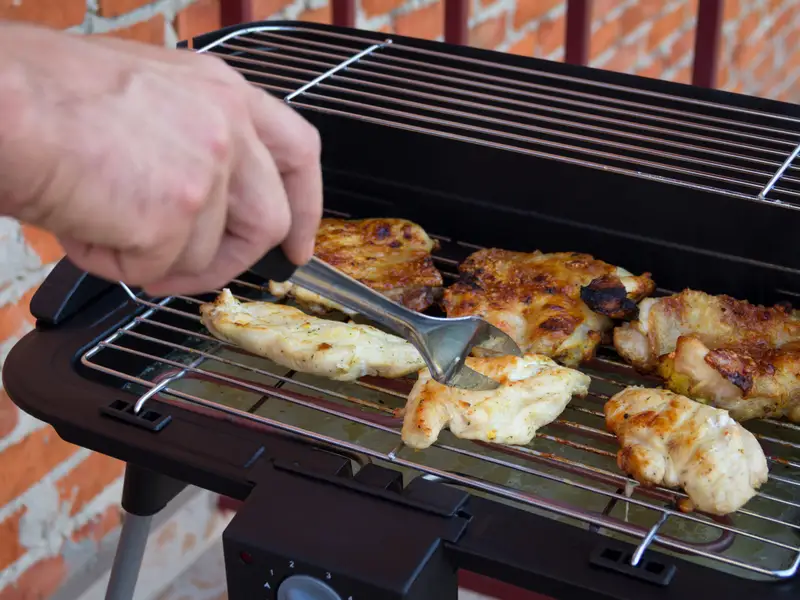
You can dodge the mess of charcoal and the hassle of gas tanks, not to mention the ability to grill come rain or shine, making BBQ chicken a year-round feast. While it’s true that you might miss the smoky flavor imparted by charcoal or wood, a little creativity with marinades, rubs, and smoky BBQ sauces can bridge that gap, making your electric grill BBQ chicken not just good, but great.
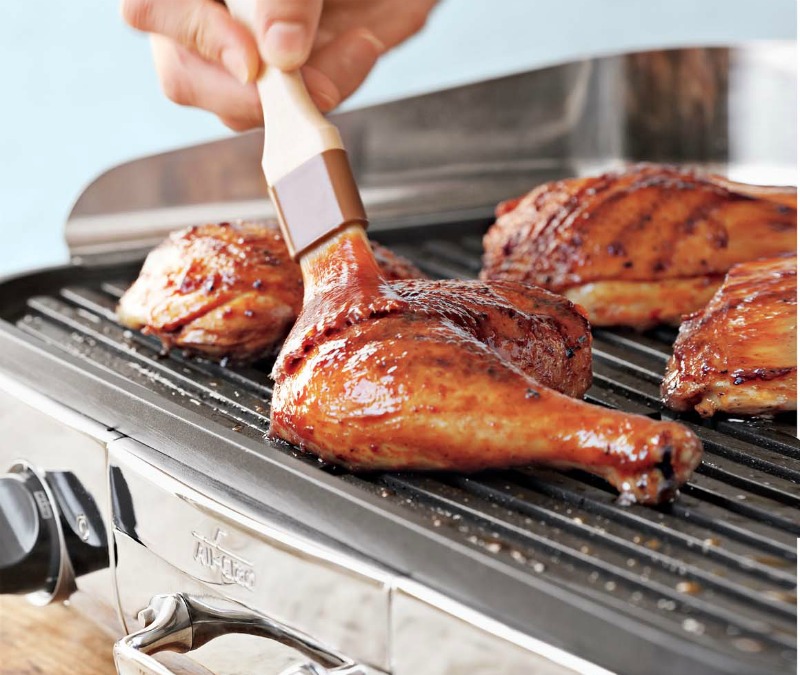
Tips for Perfect Electric Grill BBQ Chicken
- Pre-marinate your chicken for at least a few hours, if not overnight. This adds flavor and tenderness.
- Preheat your grill to ensure it’s hot and ready for those grill marks.
- Use a meat thermometer to check for doneness. Chicken is safe to eat when the internal temperature reaches 165°F (74°C).
- Let the chicken rest for a few minutes after grilling. This helps retain its juices, making your BBQ chicken moist and delicious.
Conclusion
In conclusion, electric grills offer a fantastic alternative for BBQ chicken lovers who value convenience, consistency, and cleanliness. While they might lack the traditional smoky flavor of charcoal grills, with the right marinades and a touch of creativity, you can achieve delicious, juicy BBQ chicken that will satisfy your cravings all year round.
Electric grills prove to be a versatile tool in your culinary arsenal, allowing for healthier cooking and the enjoyment of grilled dishes regardless of outdoor conditions. Embrace the benefits of electric grilling and discover the joy of effortlessly cooked BBQ chicken that doesn’t compromise on taste.

