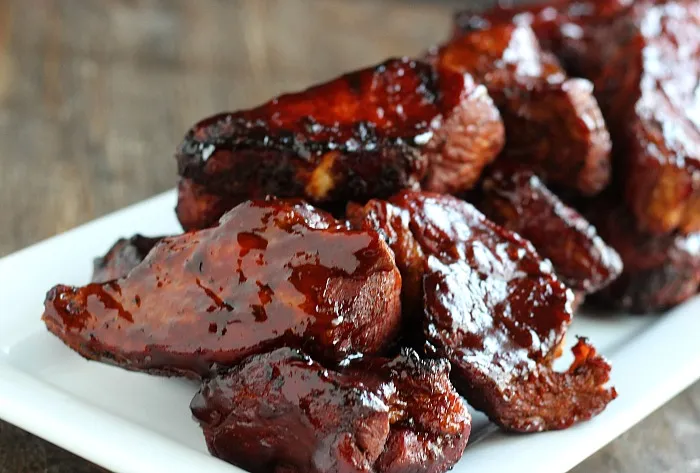
Cooking Methods for BBQ Beef Ribs
When it comes to this BBQ dish recipe, there are several cooking methods for BBQ beef ribs to achieve that mouth-watering, fall-off-the-bone perfection. Let’s dive into the most popular techniques and tips for mastering BBQ beef ribs.
The 3-2-1 Method Explained
The 3-2-1 method is a widely celebrated approach among BBQ enthusiasts for cooking beef ribs. It ensures tender meat and a deliciously caramelized crust. This method involves six hours of cooking, broken down into three distinct phases.
First 3 Hours of Smoking
The first three hours are all about smoking the ribs. Start by preheating your smoker to 225°F (107°C). While the smoker heats up, season your ribs generously with your favorite dry rub. Place the ribs in the smoker, bone side down. Use a mix of hardwoods like oak, hickory, or cherry for a balanced smoky flavor. During this period, the ribs absorb the smoke, creating a deep, rich flavor. It’s important to maintain a consistent temperature and to avoid opening the smoker too frequently, as this can cause temperature fluctuations.
- Choosing the Right Wood: Different types of wood impart different flavors to the meat. For instance, oak is a versatile wood that burns slowly and provides a medium smoky flavor. Hickory offers a stronger, more intense flavor, ideal for those who enjoy a robust smoky taste. Cherry wood, on the other hand, adds a subtle sweetness that complements the beef’s natural flavors. Experimenting with wood combinations can help you find the perfect balance for your taste.
- Monitoring Smoke Levels: Keep an eye on the smoke coming out of your smoker. Thin, blue smoke indicates a clean burn and will impart the best flavor to your ribs. Thick, white smoke can give the meat a bitter taste. Adjust your smoker’s vents to ensure proper airflow and maintain that thin, blue smoke throughout the cooking process.
2 Hours Wrapped
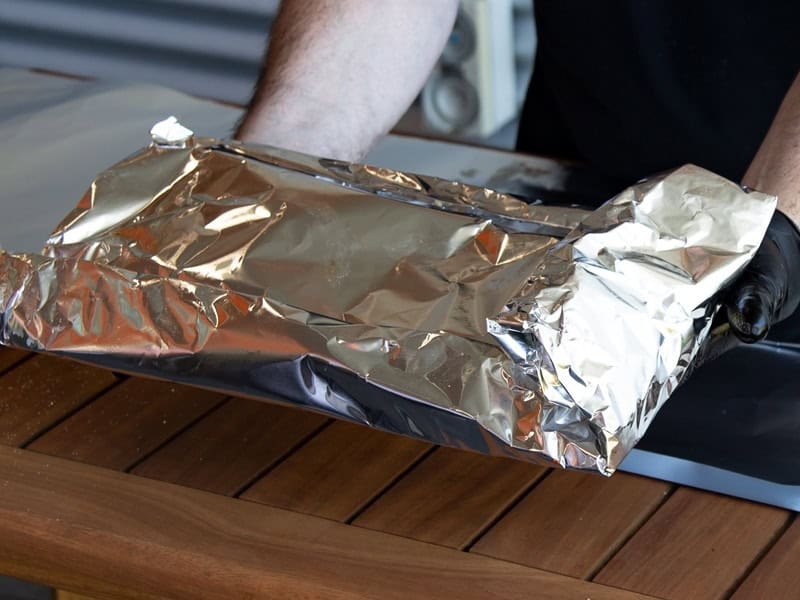
After three hours, it’s time to wrap the ribs. Remove them from the smoker and wrap them tightly in aluminum foil. Before sealing the foil, add a splash of liquid for moisture – apple juice, cider vinegar, or even beer work great. Return the wrapped ribs to the smoker for another two hours. This phase tenderizes the meat by steaming it inside the foil.

- Adding Flavorful Liquids: The choice of liquid you add to the wrap can significantly influence the final flavor of your ribs. Apple juice is a popular choice because it adds sweetness and keeps the meat moist. Cider vinegar provides a tangy flavor that cuts through the richness of the beef. Beer, especially darker varieties like stout, can add a complex depth of flavor. You can also mix these liquids with a bit of your favorite BBQ sauce for an extra layer of taste.
- Maintaining Moisture: Ensuring the foil is tightly sealed is crucial for trapping steam and maintaining moisture. If you notice any tears or holes in the foil, double wrap the ribs to prevent moisture from escaping. This step is essential for achieving that tender, fall-off-the-bone texture.
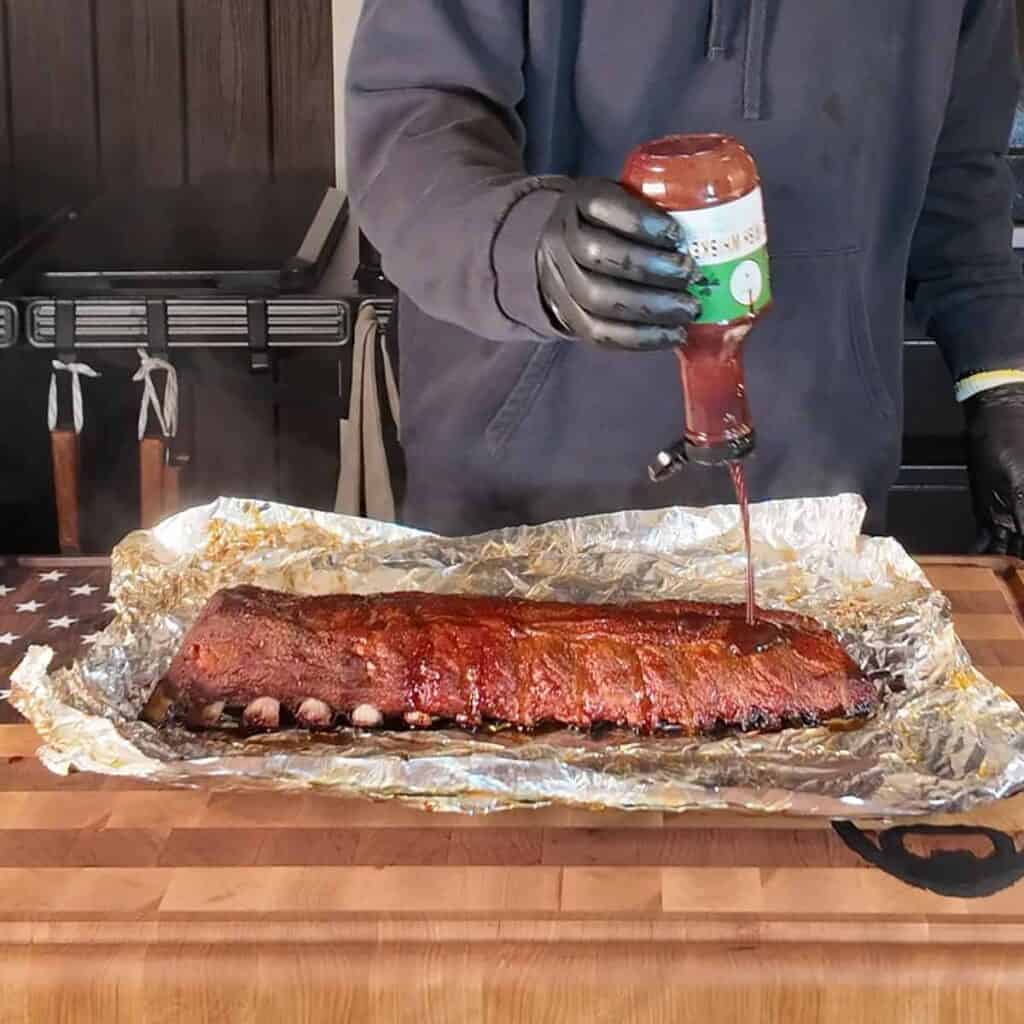
Final Hour Unwrapped
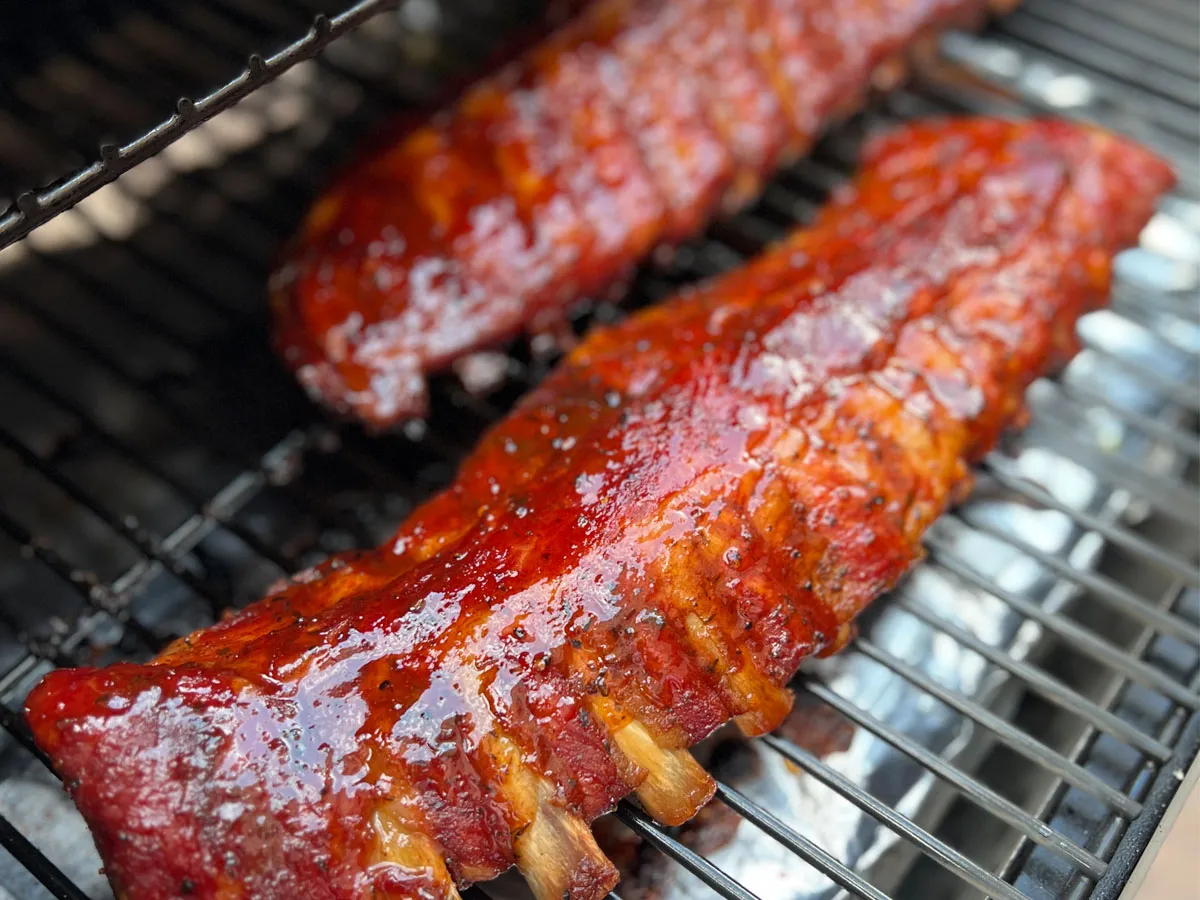
In the last hour, remove the ribs from the foil and place them back on the smoker. This phase is critical for forming a nice bark on the outside. You can also brush on your favorite BBQ sauce during this time, allowing it to caramelize and enhance the flavor further. Keep an eye on the temperature to maintain consistency.
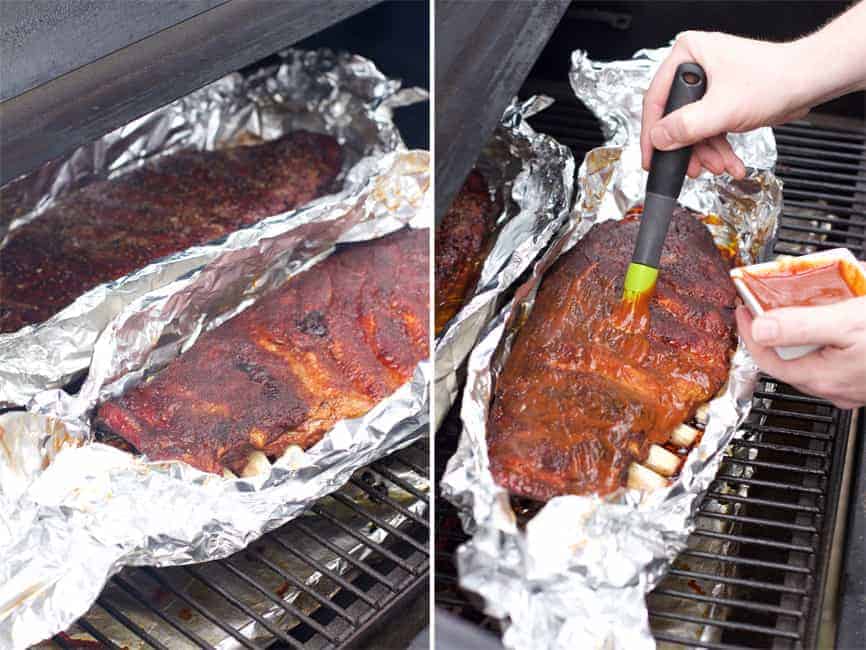
- Applying BBQ Sauce: When applying BBQ sauce, brush it on in thin layers and allow each layer to set before adding more. This technique, known as “layering,” helps build a thick, flavorful crust without the sauce becoming too thick or burning. Choose a sauce that complements the rub and wood flavors you’ve used. For instance, a tangy vinegar-based sauce pairs well with hickory-smoked ribs, while a sweet, molasses-based sauce might be better suited for cherry wood-smoked ribs.
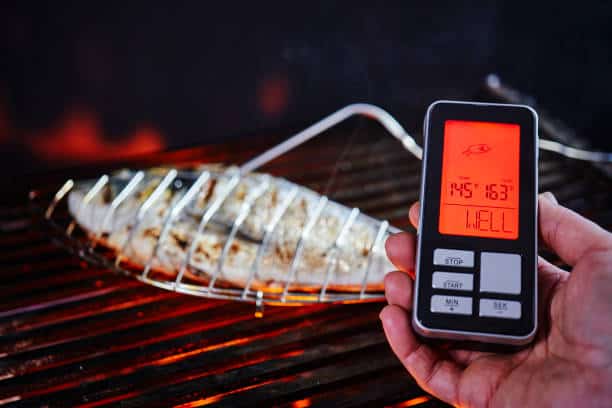
- Monitoring Internal Temperature: Use a meat thermometer to check the internal temperature of the ribs. Ideally, beef ribs should reach an internal temperature of about 200°F (93°C) for optimal tenderness. Insert the thermometer into the thickest part of the meat, avoiding bones, for an accurate reading. Once the ribs are done, let them rest for a few minutes before slicing to allow the juices to redistribute.
The 2-2-1 Method for Baby Back Ribs
For baby back ribs, a similar yet shorter method called the 2-2-1 method is often preferred. This method takes five hours in total and is tailored to the leaner and more delicate nature of baby back ribs.

First 2 Hours of Smoking
Just like with the 3-2-1 method, start by preheating your smoker to 225°F (107°C) and seasoning the ribs with a dry rub. Place the baby back ribs in the smoker for two hours. The smoking phase infuses the ribs with a robust smoky flavor.
- Selecting a Dry Rub: The dry rub is crucial for building the flavor foundation of your ribs. A basic dry rub can include brown sugar, paprika, black pepper, salt, garlic powder, onion powder, and cayenne pepper. Adjust the ratios based on your taste preferences. For instance, if you prefer a spicier kick, increase the amount of cayenne pepper. Make sure the ribs are evenly coated for consistent flavor.
- Maintaining Temperature Control: Consistent temperature is key to smoking ribs. Invest in a good quality smoker thermometer to monitor both the ambient temperature and the meat’s internal temperature. Avoid opening the smoker frequently, as it causes temperature drops and prolongs the cooking time.
2 Hours Wrapped
After two hours of smoking, remove the ribs and wrap them in aluminum foil. Add a bit of liquid to the wrap before sealing it to maintain moisture and tenderness. Place the wrapped ribs back in the smoker for another two hours. This steams the ribs, making them tender and juicy.
- Enhancing Flavor During Wrapping: Consider adding ingredients like honey, butter, or brown sugar to the foil wrap. These additions can create a richer, sweeter flavor profile and contribute to a beautiful caramelized finish. Spread these ingredients over the ribs before sealing the foil tightly.
- Ensuring an Airtight Wrap: To avoid losing steam, double-check the foil wrap for any tears or holes. Use an extra layer of foil if necessary. Keeping the wrap airtight ensures the ribs steam properly, resulting in tender meat.
Final Hour Unwrapped
For the final hour, unwrap the ribs and place them back on the smoker. This is when you can apply a BBQ sauce glaze if desired. The unwrapped phase allows the sauce to caramelize and the ribs to develop a beautiful crust.
- Final Glaze Application: During the last hour, brush a light coat of BBQ sauce onto the ribs every 15-20 minutes. This method helps build up a flavorful, sticky glaze without burning the sauce. Choose a sauce that complements the flavors of your dry rub and wood smoke.
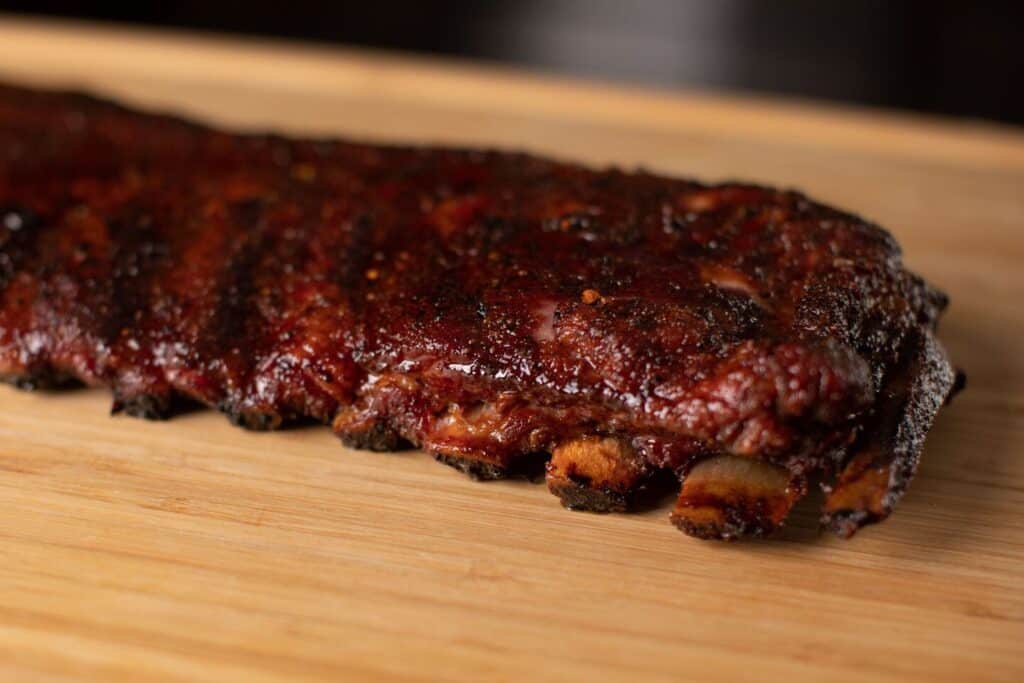
- Checking for Doneness: To ensure the ribs are perfectly cooked, look for signs like the meat pulling away from the bones and a rich, caramelized crust. The internal temperature should reach around 195°F (90°C) to 200°F (93°C) for optimal tenderness.
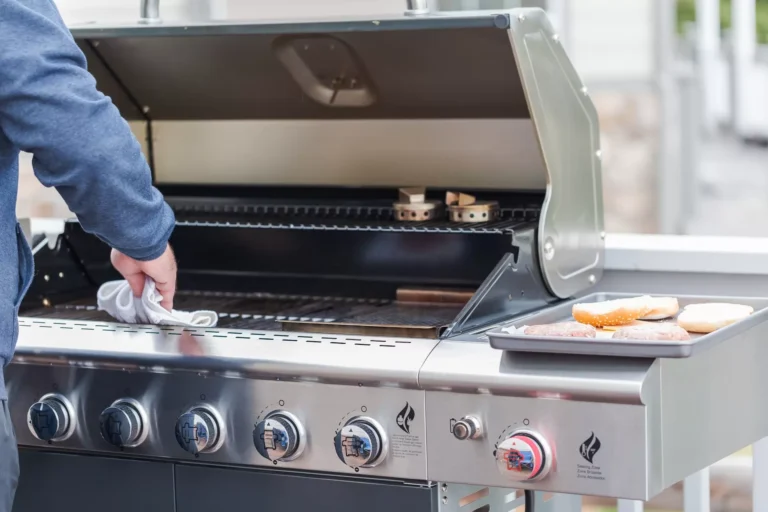
Alternatives to Smoking
While smoking is a favorite method among BBQ purists, there are several alternatives if you don’t have a smoker or prefer different cooking techniques. These methods can also produce delicious results with beef ribs.
Oven-Baking
Oven-baking is a convenient and straightforward method. Preheat your oven to 300°F (150°C). Season your ribs with a dry rub and place them on a baking sheet lined with foil. Cover the ribs with another layer of foil to create a seal. Bake for about 2.5 to 3 hours until the ribs are tender. For the final 30 minutes, remove the top foil and brush on BBQ sauce, then increase the oven temperature to 350°F (175°C) to caramelize the sauce.

- Creating an Oven Environment: To mimic the effects of a smoker, consider placing a small pan of water in the oven. This creates steam and helps keep the ribs moist. Additionally, using a roasting rack can elevate the ribs and allow even heat distribution.
- Baking with Sauce: For an extra layer of flavor, baste the ribs with BBQ sauce during the last 30 minutes of baking. This step helps create a sticky, caramelized crust similar to what you’d achieve in a smoker. Rotate the ribs halfway through to ensure even caramelization.
Slow Cooking
Slow cooking is an excellent method for hands-off cooking. Season the ribs and place them in a slow cooker. Add a bit of liquid – beef broth, beer, or BBQ sauce diluted with water. Cook on low for 6-8 hours or on high for 4-5 hours. Once done, you can finish them under the broiler with BBQ sauce for a crispy exterior.
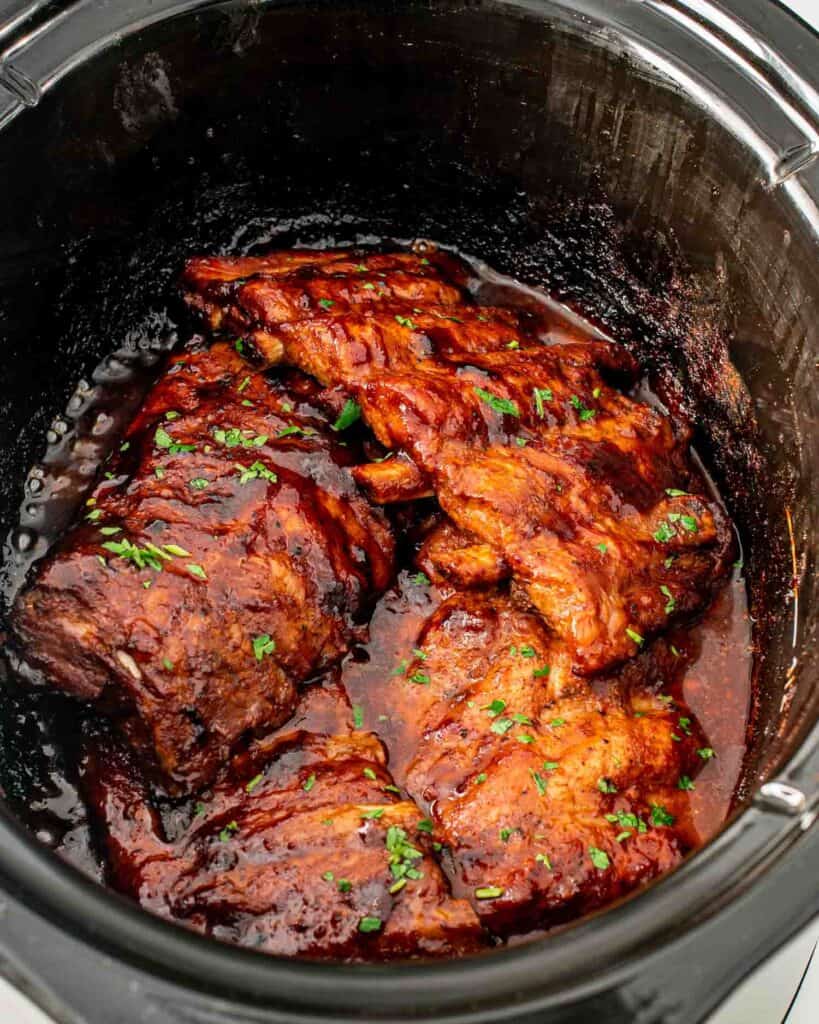
- Preparing the Slow Cooker: Before adding the ribs, consider searing them in a hot skillet for a few minutes on each side. This step helps develop a deeper flavor and a slight crust. Arrange the ribs in the slow cooker with the bone side facing down for even cooking.
- Final Broiling Step: After slow cooking, transfer the ribs to a baking sheet and brush them with BBQ sauce. Broil them in the oven for 5-10 minutes, keeping a close eye to prevent burning. This step adds a nice crispy texture to the exterior while keeping the interior moist and tender.
Pressure
Pressure cooking is perfect for those who want tender ribs in a fraction of the time. Season your ribs and place them in the pressure cooker with a cup of liquid, such as water, broth, or a mixture of water and BBQ sauce. Cook on high pressure for 25-30 minutes. After cooking, you can finish the ribs on the grill or under the broiler with BBQ sauce to add a smoky flavor and caramelize the sauce.
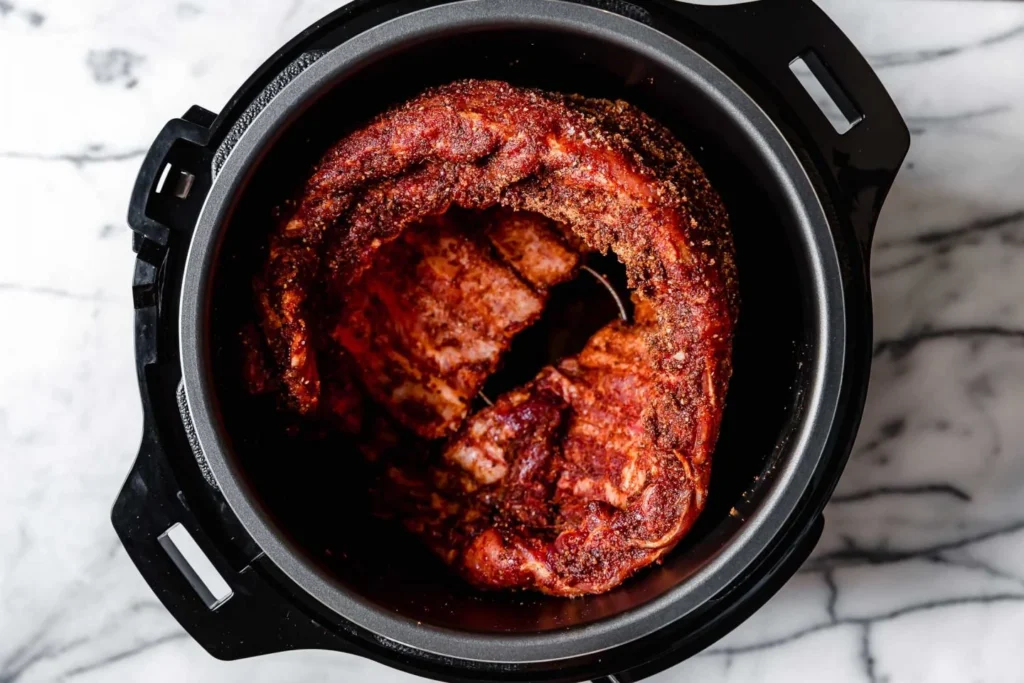
- Using the Pressure Cooker: Follow the manufacturer’s instructions for your pressure cooker. Ensure the lid is securely locked and the valve is set to the correct position. Once the cooking time is up, allow the pressure to release naturally for about 10 minutes before using the quick release to finish.
- Finishing Touches: For the final touch, transfer the ribs to a hot grill or broiler. Brush them with BBQ sauce and cook for a few minutes on each side until the sauce is caramelized and the ribs are nicely charred. This step adds an authentic BBQ flavor to the ribs.
Choosing the Right Cut of Ribs
Understanding the different cuts of beef ribs can help you select the best option for your BBQ. The two most common types are back ribs and short ribs.
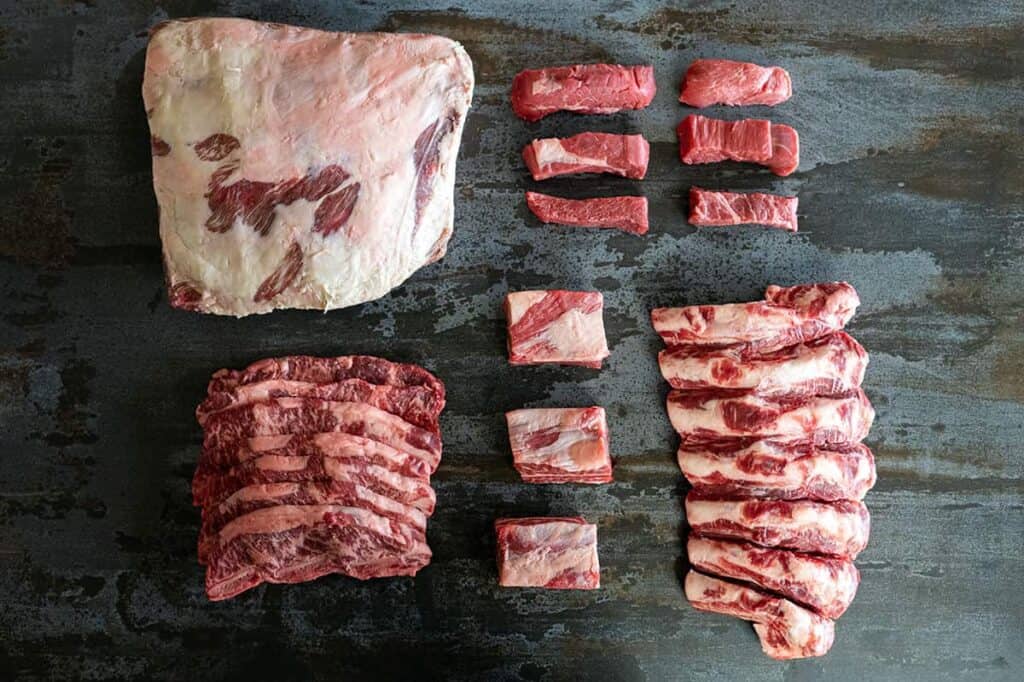
- Back Ribs: Back ribs come from the upper part of the cow’s ribcage, close to the spine. They are typically longer and have more meat between the bones. These ribs are well-suited for smoking and grilling due to their size and meatiness.
- Short Ribs: Short ribs are cut from the lower part of the ribcage and are shorter and meatier than back ribs. They have a higher fat content, which makes them incredibly flavorful and tender when cooked slowly. Short ribs are often used in braising, slow cooking, and pressure cooking.
Preparing the Ribs
Proper preparation is key to achieving the best results with BBQ beef ribs. Here are some essential steps to follow:

Trimming the Ribs
Before seasoning, it’s important to trim the ribs. Remove any excess fat and the silver skin (a tough membrane) on the bone side of the ribs. The silver skin can prevent flavors from penetrating the meat and make the ribs tougher to chew. Use a sharp knife to carefully trim away these unwanted parts.
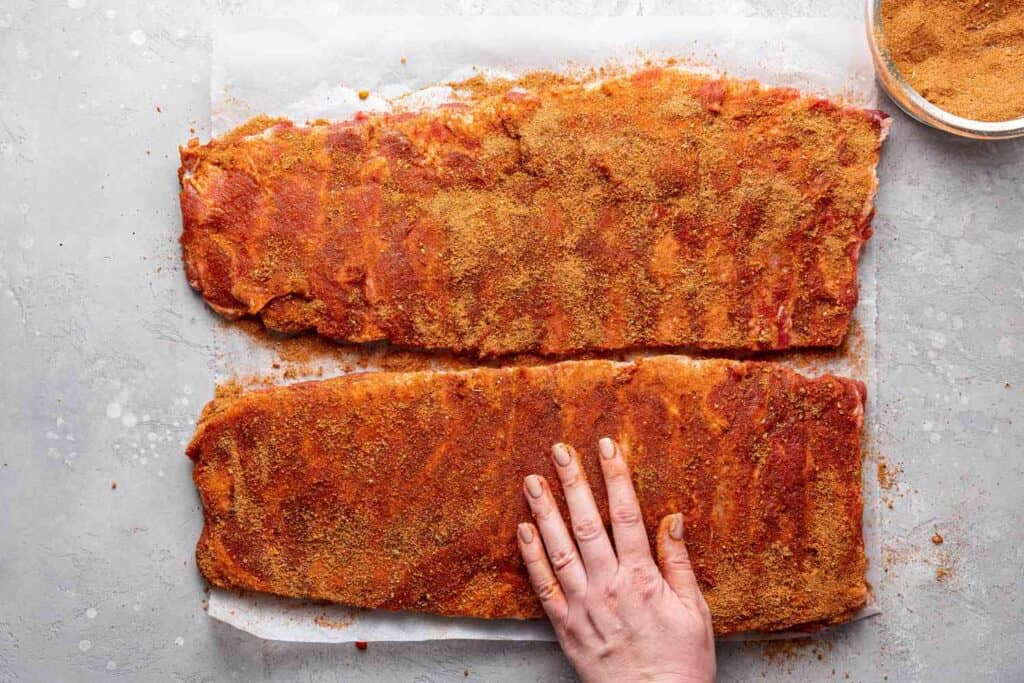
Seasoning the Ribs
Seasoning is crucial for flavor development. Use a generous amount of dry rub, covering all sides of the ribs. Let the seasoned ribs sit for at least 30 minutes before cooking to allow the flavors to penetrate. For an even deeper flavor, you can let them sit in the refrigerator overnight.
- Creating Your Own Dry Rub: Making your own dry rub allows you to customize the flavor profile to your liking. Start with a base of brown sugar for sweetness and add spices like paprika, black pepper, garlic powder, onion powder, and cayenne pepper. Experiment with additional ingredients like mustard powder, chili powder, or even coffee grounds for unique flavors.
Cooking Tips and Techniques
Here are some additional tips and techniques to help you achieve the best results with your BBQ beef ribs:
- Maintaining Consistent Temperature One of the biggest challenges in BBQ is maintaining a consistent temperature. Whether you’re using a smoker, oven, or slow cooker, keep an eye on the temperature and make adjustments as needed. Investing in a quality thermometer can help you monitor both the ambient temperature and the internal temperature of the meat.
- Using a Water Pan Adding a water pan to your smoker or oven can help maintain moisture and stabilize the temperature. The water pan acts as a heat sink, absorbing heat and releasing it slowly, which helps prevent temperature fluctuations. It also adds humidity to the cooking environment, keeping the meat moist.
- Resting the Ribs After cooking, let the ribs rest for at least 10-15 minutes before cutting into them. Resting allows the juices to redistribute throughout the meat, resulting in more flavorful and tender ribs. Cover the ribs loosely with foil during the resting period to keep them warm.
Serving Suggestions
Presentation and accompaniments can enhance the BBQ experience. Here are some ideas for serving your BBQ beef ribs:
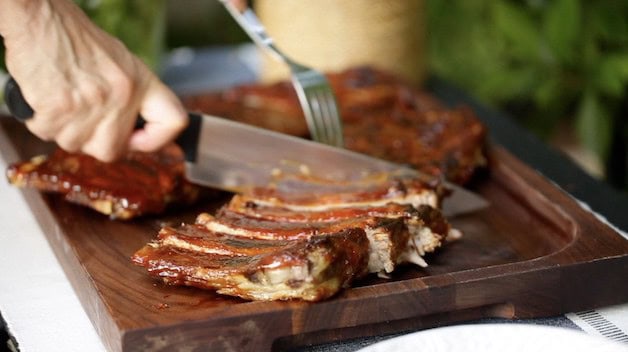
Slicing the Ribs
To slice the ribs, use a sharp knife and cut between the bones. For a cleaner cut, turn the ribs meat-side down so you can see the bones clearly. Slice through the meat in one smooth motion to avoid tearing the meat.
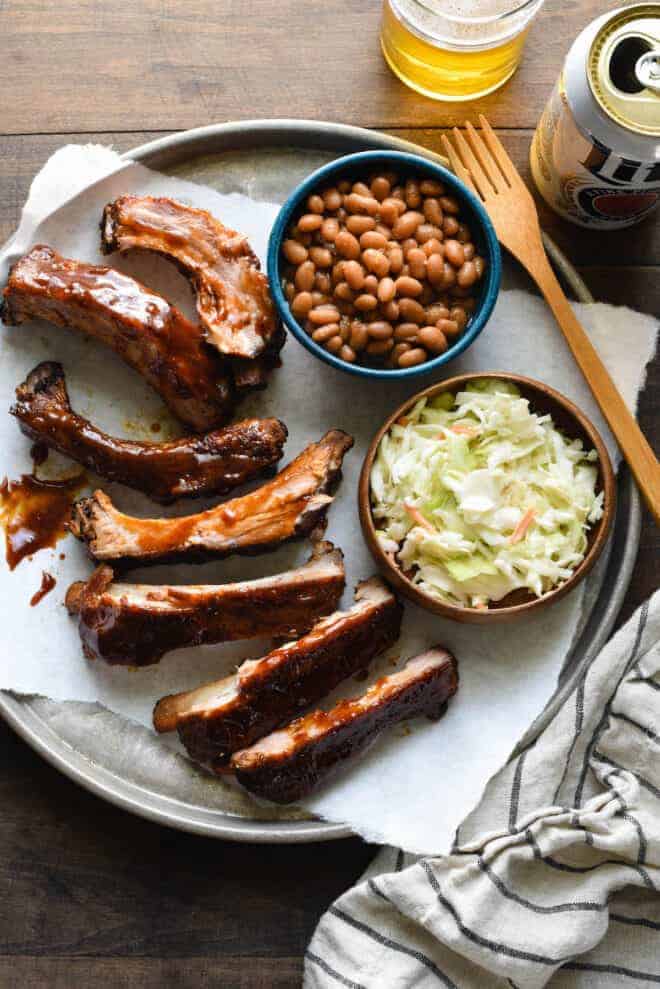
Side Dishes
BBQ ribs pair well with a variety of side dishes. Some classic options include:
- Coleslaw: A tangy, creamy coleslaw provides a refreshing contrast to the rich, smoky ribs.
- Cornbread: Sweet, buttery cornbread is a Southern staple that complements the savory flavors of BBQ.
- Baked Beans: Smoky, sweet baked beans are a hearty side dish that pairs perfectly with ribs.
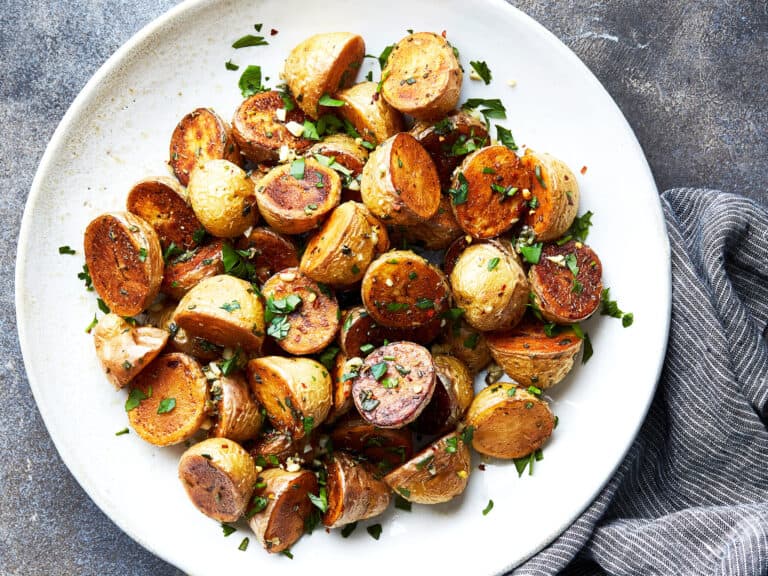
- Potato Salad: A creamy potato salad adds a comforting touch to your BBQ spread.
Sauces
Offering a variety of sauces allows your guests to customize their ribs. Some popular BBQ sauces include:

- Kansas City Style: A thick, sweet sauce with a tomato base and a hint of molasses.
- Carolina Style: A tangy, vinegar-based sauce with a bit of heat.
- Texas Style: A bold, spicy sauce with a tomato and chili base.
Storing and Reheating Leftovers
If you have leftover ribs, store them properly to maintain their flavor and texture. Wrap the ribs tightly in aluminum foil or place them in an airtight container and refrigerate for up to 3-4 days.
Reheating: To reheat, preheat your oven to 250°F (120°C). Place the ribs on a baking sheet, cover with foil, and heat for about 20-30 minutes until warmed through. You can also reheat them on the grill or under the broiler for a few minutes to restore some of the original crispiness.
By understanding these various cooking methods, you can choose the one that best fits your equipment and time constraints while still achieving delicious BBQ beef ribs. Whether you opt for the 3-2-1 method, the 2-2-1 method, or an alternative like oven-baking, slow cooking, or pressure cooking, you’re on your way to mastering the art of BBQ beef ribs. Happy grilling!
Disclosure: Our blog contains affiliate links to products. We may receive a commission for purchases made through these links. However, this does not impact our reviews and comparisons. We try our best to keep things fair and balanced, in order to help you make the best choice for you.
4 Comments