How to Clean a Grill Brush (And When to Replace It)
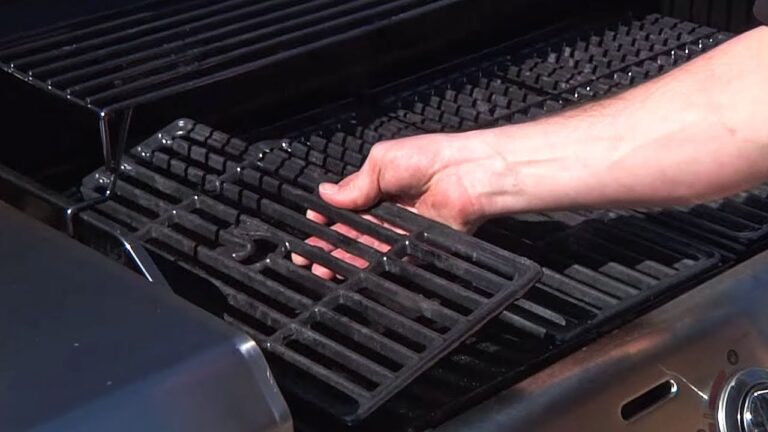
Grill brushes are the unsung heroes of BBQ enthusiasts. They keep your grill grates clean, ensuring that your food tastes great and cooks evenly. However, a dirty grill brush can become a breeding ground for bacteria and even pose a safety hazard. In this guide, we’ll dive into the importance of maintaining your grill brush, the best cleaning methods, and how to know when it’s time to replace it.
Maintaining a clean grill brush is crucial not only for the longevity of your grill but also for the health and safety of your food. Over time, grill brushes can accumulate grease, food particles, and even bacteria, which can transfer back onto your grill and your food.
This not only affects the taste but can also pose serious health risks. By knowing how to clean a grill brush regularly, you ensure a safer grilling experience and extend the life of your brush and grill.
Why Cleaning Your Grill Brush Matters
Ignoring the cleanliness of your grill brush can lead to more than just a dirty grill. Here’s why keeping your grill brush clean is so crucial:

- Hygiene and Health Risks: A dirty grill brush can harbor harmful bacteria, which can transfer to your grill and, ultimately, your food. This can cause foodborne illnesses, making regular cleaning essential for safe cooking.
- Contamination: Old food particles and grease can build up on your grill brush, potentially contaminating the fresh food you’re preparing. This not only affects the taste but also the safety of your meals.
- Brush Integrity: Grease and grime can degrade the bristles of your grill brush over time, reducing its effectiveness and lifespan. A clean brush maintains its scrubbing power and lasts longer.
- Fire Hazard: Built-up grease and debris on your grill brush can ignite, posing a fire risk during your next grilling session. Regular cleaning helps prevent such hazards.
Types of Grill Brushes and Materials
Grill brushes come in various types and materials, each with its own cleaning needs and benefits:

- Wire Bristle Brushes:
- Material: Typically made of stainless steel or brass.
- Cleaning: Effective at removing tough grime but require regular cleaning to prevent bristle breakage and rust.
- Nylon Bristle Brushes:
- Material: Nylon bristles.
- Cleaning: Safe for use on all grill types and easier to clean, but not as effective on high-heat grills.
- Scraper Brushes:
- Material: Often combined with metal or plastic scrapers.
- Cleaning: Great for removing stuck-on food but the scrapers need to be kept clean to avoid scratching the grill surface.
- Grill Stones:
- Material: Made from pumice or other abrasive materials.
- Cleaning: Non-toxic and effective, but they wear down with use and need to be replaced more frequently.
- Bristle-Free Brushes:
- Material: Coiled metal or mesh.
- Cleaning: Safer alternative with no bristles to break off, but they can still accumulate grease and need thorough cleaning.
Understanding the type of grill brush you have will help you determine the best cleaning method and frequency. Each material and design has its own strengths and weaknesses, so choose the one that best fits your grilling habits and maintenance preferences. You can also consider these grill brush alternatives if you’re looking for safer options.
Step-by-Step Guide to Cleaning Your Grill Brush
Properly cleaning your grill brush ensures it remains effective and safe to use. Here’s a detailed guide tailored to different types of grill brushes.
Cleaning After Every Use
- Wire Bristle Brushes:
- Shake Off Debris: Tap the brush against a hard surface to dislodge loose debris.
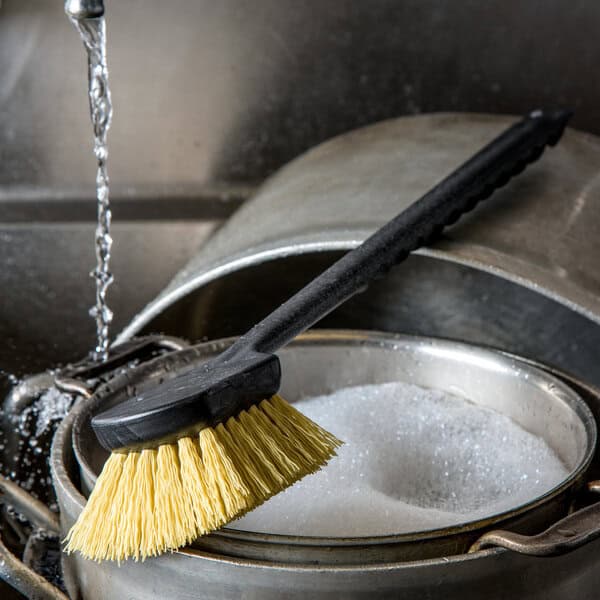
- Soak in Hot Water: Fill a bucket with hot, soapy water and soak the brush for 10-15 minutes.
- Scrub and Rinse: Use a second brush or a sponge to scrub off any remaining grease and grime. Rinse thoroughly with water.
- Nylon Bristle Brushes:
- Cool Down First: Ensure the grill and brush have cooled down to prevent bristle melting.
- Wipe with Soapy Water: Dip the brush in warm, soapy water and scrub gently with a sponge or cloth.
- Rinse and Dry: Rinse the brush under running water and let it air dry completely.
- Scraper Brushes:
- Remove Loose Debris: Use the scraper edge to remove large food particles from the grill.
- Soak and Scrub: Soak the brush in soapy water and scrub with a second brush or a sponge.
- Rinse and Dry: Rinse thoroughly and let it air dry.
- Grill Stones:
- Brush Off Residue: After use, brush off any loose particles.
- Wipe Down: Use a damp cloth to wipe off remaining debris.
- Dry: Ensure the stone is completely dry before storing.
- Bristle-Free Brushes:
- Tap to Remove Debris: Tap the brush to shake off any loose food particles.
- Soak and Scrub: Soak in hot, soapy water, then scrub with a second brush or sponge.
- Rinse and Dry: Rinse thoroughly and dry completely.
Deep Cleaning Monthly
- Wire Bristle Brushes:
- Soak in Vinegar Solution: Mix equal parts vinegar and water in a bucket. Soak the brush for an hour to break down tough grease.
- Scrub with a Second Brush: Use another brush to scrub the bristles thoroughly.
- Rinse and Inspect: Rinse with water, checking for any broken or loose bristles. Replace if necessary.
- Nylon Bristle Brushes:
- Deep Soak in Soapy Water: Soak the brush in hot, soapy water for 30 minutes.
- Scrub with a Soft Brush: Use a soft brush or sponge to clean between the bristles.
- Rinse and Dry: Rinse thoroughly and let it air dry.
- Scraper Brushes:
- Disassemble if Possible: If the scraper can be removed, separate it for a more thorough clean.
- Soak in Hot Soapy Water: Soak all parts in hot, soapy water.
- Scrub and Rinse: Scrub each part individually, rinse, and dry completely before reassembling.
- Grill Stones:
- Rinse Under Water: Rinse the stone thoroughly under running water.
- Use a Brush: Use a soft brush to clean off any remaining debris.
- Dry Completely: Ensure the stone is dry before storing to prevent mold growth.
- Bristle-Free Brushes:
- Soak in Soapy Water: Soak the brush in hot, soapy water for 30 minutes.
- Scrub Thoroughly: Use a second brush to clean all surfaces and coils.
- Rinse and Inspect: Rinse thoroughly, checking for any damage or wear. Replace if necessary.
Regularly cleaning your grill brush, both after each use and with a deep clean monthly, ensures it remains effective and safe. A well-maintained grill brush not only prolongs the life of your grill but also ensures that your food remains uncontaminated and delicious. By following these steps, you can keep your grill brush in top shape and ready for your next BBQ session.
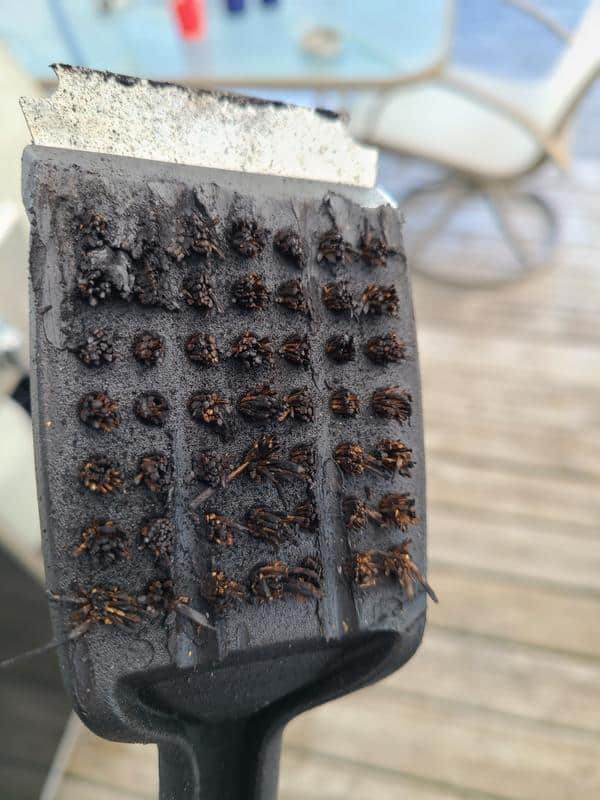
Recognizing Signs of Wear and When to Replace Your Brush
Even with regular cleaning, grill brushes don’t last forever. It’s essential to recognize the signs of wear and know when it’s time to replace your brush to avoid safety hazards and maintain effective cleaning.
Indicators Your Grill Brush Needs Replacing
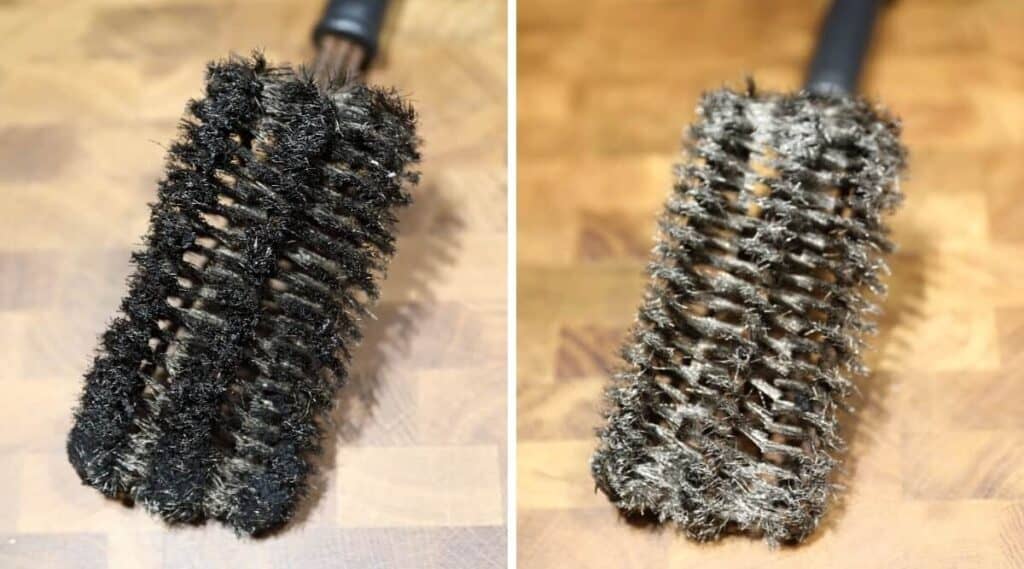
- Worn or Missing Bristles:
- Safety Concern: Missing or loose bristles can fall off and get stuck on the grill, potentially ending up in your food. This poses a choking hazard and can cause serious injury.
- Replacement Sign: If you notice bristles falling out or significant wear on the bristles, it’s time for a new brush.
- Bent or Damaged Bris
- Effectiveness Issue: Bent or frayed bristles are less effective at cleaning your grill, leaving behind debris and buildup.
- Replacement Sign: When bristles are no longer straight and firm, replace the brush to ensure thorough cleaning.
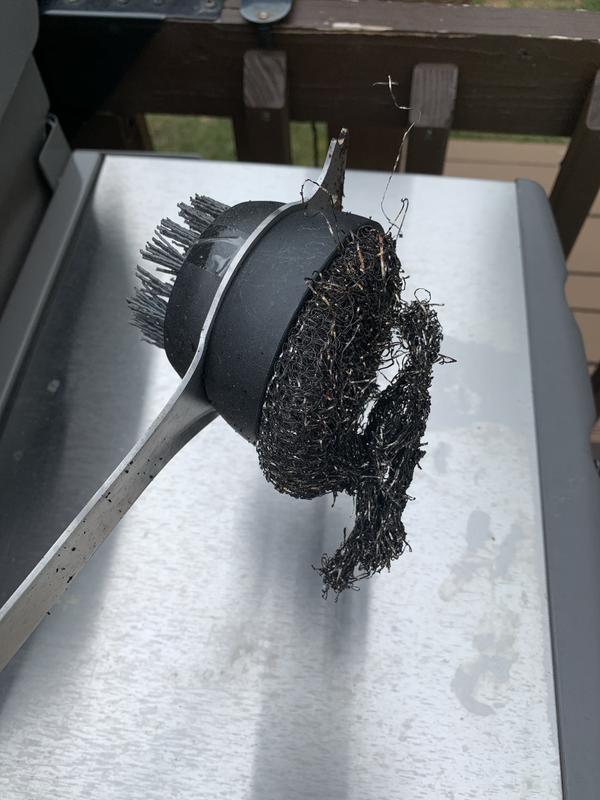
- Rust and Corrosion:
- Hygiene Concern: Rusty or corroded brushes can transfer harmful particles to your grill and food.
- Replacement Sign: If your brush shows signs of rust or corrosion, especially on the bristles or handle, it’s time to get a new one.
- Worn Scraper:
- Cleaning Inefficiency: A dull or damaged scraper edge won’t effectively remove tough grime and stuck-on food.
- Replacement Sign: When the scraper becomes ineffective, consider replacing the brush or the scraper component if possible.
- Handle Damage:
- Safety Risk: Cracks or breaks in the handle can make the brush difficult to use and potentially cause injury.
- Replacement Sign: If the handle is damaged, replace the brush to ensure safe and easy handling.

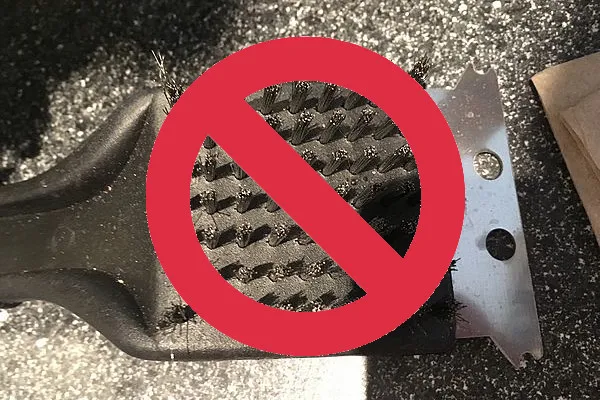
Tired of replacing your grill brushes every time? Alternatively, you can clean your grill without a brush using these methods.
How Often Should You Replace Your Grill Brush?
The lifespan of a grill brush varies depending on the frequency of use and the type of brush. Here are some general guidelines:
- Frequent Users (Weekly Grilling):
- Replacement Interval: Every 3 to 4 months.
- Reason: Heavy use accelerates wear and tear, making more frequent replacement necessary to maintain effectiveness and safety.
- Moderate Users (Monthly Grilling):
- Replacement Interval: Every 6 to 12 months.
- Reason: Less frequent use means the brush endures less wear, allowing for a longer lifespan before replacement is needed.
- Occasional Users (Few Times a Year):
- Replacement Interval: Every 1 to 2 years.
- Reason: Infrequent use results in minimal wear, extending the brush’s usable life. However, inspect the brush before each use to ensure it’s still in good condition.
- Material Considerations:
- Wire Bristle Brushes: Typically need more frequent replacement due to bristle wear and potential rust.
- Nylon Bristle Brushes: Generally last longer but should be replaced if they show signs of melting or fraying.
- Grill Stones and Bristle-Free Brushes: These can last longer but still need regular inspection and occasional replacement based on wear and effectiveness.
Regular inspection and timely replacement of your grill brush are crucial for maintaining a safe and effective grilling experience. By recognizing the signs of wear and following recommended replacement intervals, you ensure your grill brush remains a reliable tool for keeping your grill in top condition.
Safe Disposal of Old Grill Brushes
Proper disposal of old grill brushes is essential for environmental safety and to prevent any potential hazards. Here are some environmentally friendly and safe methods for disposing of your old grill brushes.
Environmentally Friendly Disposal Methods
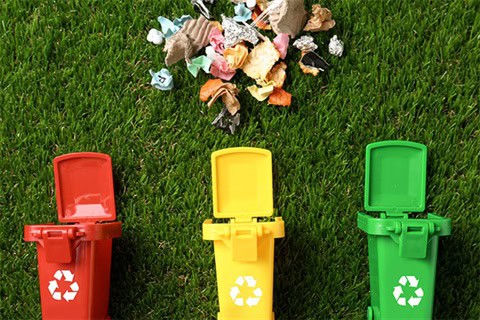
- Recycle the Metal Parts:
- Separate Metal Components: If your grill brush has metal bristles or a metal scraper, separate these parts from the plastic handle.
- Take to a Recycling Center: Many recycling centers accept metal parts. Check with your local recycling facility to see if they accept metal bristles and scrapers.
- Repurpose for Other Cleaning Tasks:
- Non-Food Cleaning: Use the brush for non-food cleaning tasks, such as scrubbing garden tools, cleaning outdoor furniture, or other tough cleaning jobs where a worn brush can still be useful.
- Avoid Cross-Contamination: Ensure the repurposed brush is not used for anything related to food to prevent contamination.
- Check for Recycling Programs:
- Manufacturer Programs: Some manufacturers have recycling programs for their products. Check the brand of your grill brush to see if they offer any recycling or take-back programs.
- Community Recycling Events: Look for local community recycling events that accept small metal and plastic items for proper disposal.
Safe Disposal Methods
- Secure Disposal:
- Wrap the Brush: To prevent the sharp bristles from causing harm, wrap the old grill brush in newspaper or place it in a cardboard box before disposing of it.
- Mark as Hazardous: Clearly label the package to indicate that it contains sharp objects, making it safer for waste management workers to handle.
- Household Hazardous Waste Collection:
- Contact Local Waste Management: Check with your local waste management facility to see if they accept grill brushes as part of their household hazardous waste collection.
- Follow Guidelines: Adhere to any specific guidelines provided by the waste management facility for disposing of items with metal parts.
- Landfill Disposal:
- Prepare the Brush: If no other disposal options are available, prepare the brush by securely wrapping it as mentioned earlier.
- Place in Regular Trash: Place the wrapped brush in your regular trash bin, ensuring it is securely contained to prevent injury or damage during trash collection.
Disposing of old grill brushes properly is vital for both environmental sustainability and safety. By recycling metal parts, repurposing the brush, or using safe disposal methods, you can ensure your old grill brush is handled responsibly. Always check with local facilities for the best disposal options in your area.
Alternatives to Traditional Grill Brushes
If traditional grill brushes aren’t your style or you’re looking for safer, bristle-free options, there are plenty of alternative cleaning tools and methods to keep your grill spotless.
Alternative Cleaning Tools
- Grill Scrapers:
- Features: Made from metal or heat-resistant plastic, grill scrapers are great for removing stuck-on food without the risk of bristle contamination.
- Use: Simply scrape the grill grates to remove debris after cooking.
- Grill Stones:
- Features: Pumice stones designed for grill cleaning can effectively remove tough grease and grime without damaging the grill surface.
- Use: Rub the stone across the grates while they’re still warm to scrub away residue.
- Coiled Wire Brushes:
- Features: These bristle-free brushes use tightly wound metal coils to scrub the grill, reducing the risk of metal fragments.
- Use: Scrub the grates with the wire coils to remove buildup.
- Steam Cleaners:
- Features: Handheld steam cleaners use high-temperature steam to loosen and remove grime from grill grates.
- Use: Apply steam directly to the grates and wipe clean with a cloth.
- Onion or Lemon Scrubs:
- Features: Using half an onion or lemon can be a natural, chemical-free way to clean your grill.
- Use: Rub the cut side of an onion or lemon across the hot grill grates to loosen and clean residue.
Using Natural Cleaning Solutions
For those who prefer eco-friendly cleaning methods, household items and natural solutions can effectively maintain your grill without harsh chemicals.
Vinegar and Baking Soda
- Preparation: Mix equal parts white vinegar and water in a spray bottle. Sprinkle baking soda on the grill grates.
- Application: Spray the vinegar solution over the baking soda, causing it to fizz. Let it sit for a few minutes, then scrub with a brush or sponge.
- Rinse: Rinse thoroughly with water and wipe dry.

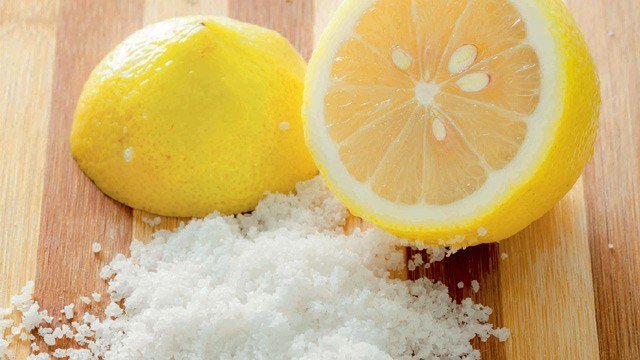
Lemon Juice and Salt
- Preparation: Cut a lemon in half and dip the cut side in coarse salt.
- Application: Scrub the grill grates with the lemon and salt mixture, using the acidity and abrasiveness to clean the surface.
- Rinse: Rinse with water and dry the grates.
Baking Soda Paste
- Preparation: Mix baking soda with water to create a thick paste.
- Application: Apply the paste to the grill grates and let it sit for 15-20 minutes.
- Scrub and Rinse: Scrub with a brush or sponge, rinse with water, and dry.
Coffee
- Preparation: Brew a pot of strong coffee and let it cool.
- Application: Soak the grill grates in the coffee for an hour. The acidity in the coffee helps break down grease and grime.
- Scrub and Rinse: Scrub the grates with a brush, rinse with water, and dry.

FAQ on Maintaining and Replacing Grill Brushes
Disclosure: Our blog contains affiliate links to products. We may receive a commission for purchases made through these links. However, this does not impact our reviews and comparisons. We try our best to keep things fair and balanced, in order to help you make the best choice for you.