The Complete Guide on How to Smoke Ribs
Picture this: A summer afternoon, the smell of smoke wafting through the air, and a platter of perfectly smoked ribs ready to be devoured. It’s the kind of scene that makes you want to grab a cold drink and dive in, isn’t it?
This guide will walk you through everything you need to know to smoke ribs like a pro. Whether you’re a seasoned pitmaster or a weekend warrior looking to impress your friends and family, we’ve got you covered.
We’ll cover all the essentials, from preparation to seasoning, smoking, and the all-important finishing touches. So, grab your apron and let’s get smoking!
What is Smoking Ribs?
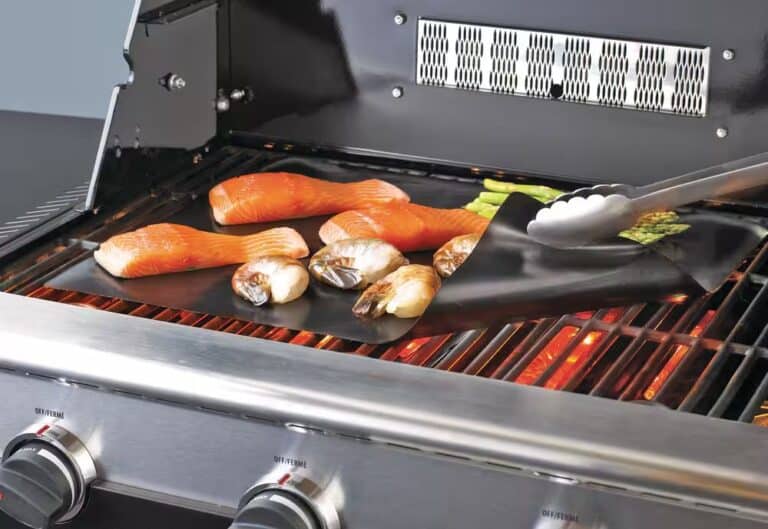
Smoking ribs is a culinary technique often used in barbecue, where the meat is cooked at a low temperature over a long period of time in a smoker or a grill. This method uses indirect heat and smoke to slowly break down the connective tissues in the ribs, making them tender and flavorful.
The smoke, usually from specific types of wood like hickory, apple, or mesquite, adds a unique, smoky flavor to the ribs. It’s a technique beloved by many BBQ enthusiasts and a delicious way to prepare ribs, regardless of the size of your grill.
Reasons You Need to Know How to Smoke Ribs
Sure, you can cook ribs using different methods, but nothing quite matches the distinct flavor and tenderness achieved by smoking.
- Unparalleled Flavor: Smoking imparts a unique, rich flavor to the ribs that cannot be matched by other cooking methods.
- Tender Goodness: The slow, low-temperature cooking process makes the ribs incredibly tender.
- Impressive Skill: It’s a culinary skill that’s sure to impress your friends and family at gatherings.
- Versatility: You can experiment with different types of wood for the smoke, creating a range of flavors.
- Culinary Creativity: Smoking ribs allows for endless marinating, rubbing, and sauce options, further enhancing the flavor profile.
Smoking ribs on a small grill may seem challenging, but with the right knowledge, it’s quite feasible. Our method, designed specifically for small grills, will help you navigate the smoking process. You’ll be cooking up those tender, flavorful ribs you’ve been craving, regardless of the size of your grill. So, let’s stoke the fire and get started!
Choosing Your Ribs
Baby Back Ribs:
- Size: Smaller and leaner than spare ribs.
- Flavor: Mild and slightly sweeter due to less fat.
- Cooking Time: Cooks faster, typically taking around 4-5 hours.
- Best For: Those who prefer tender, less fatty meat.
Spare Ribs:
- Size: Larger and meatier with more fat content.
- Flavor: Richer, more intense flavor thanks to the extra fat.
- Cooking Time: Takes longer, usually around 5-6 hours.
- Best For: Those who enjoy a heartier, more flavorful rib experience.
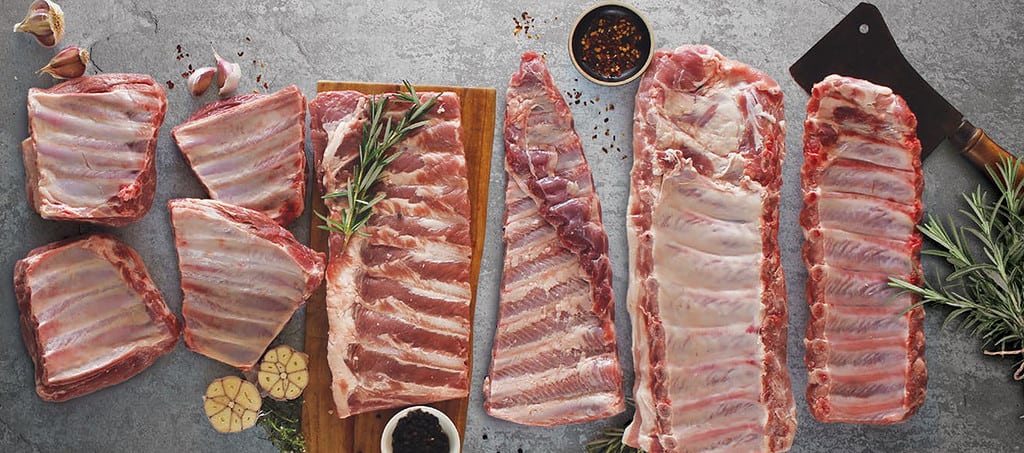
What to Look For: Freshness, Marbling, and Size
Freshness:
- Color: Look for ribs with a pinkish-red color. Avoid those with a dull or grayish hue.
- Smell: Fresh ribs should have a mild scent. A strong, unpleasant odor is a red flag.
- Packaging: Ensure the packaging is intact with no leaks or excessive liquid.
Marbling:
- Fat Distribution: Opt for ribs with even marbling throughout. This ensures a juicy, flavorful result.
- Avoid Excessive Fat: While some fat is good, too much can cause flare-ups and make the ribs overly greasy.
Size:
- Consistency: Choose ribs that are uniform in size for even cooking.
- Meatiness: Check for a good amount of meat on the bones. Thin, scrawny ribs won’t be as satisfying.
Preparation
Trimming: Removing the Membrane and Excess Fat
Removing the Membrane:
- Why: The membrane (or silverskin) on the back of the ribs can become tough and chewy when cooked. Removing it allows better smoke and flavor penetration.
- How: Use a butter knife to loosen the edge of the membrane at one end of the rack. Grab the membrane with a paper towel for better grip and peel it off slowly. It should come off in one piece with a bit of patience.
Trimming Excess Fat:
- Why: Excess fat can cause flare-ups and make the ribs greasy. Trimming helps in achieving a better texture and flavor.
- How: Use a sharp knife to carefully trim off any large, visible chunks of fat. Don’t go overboard; a little fat is good for flavor and moisture.
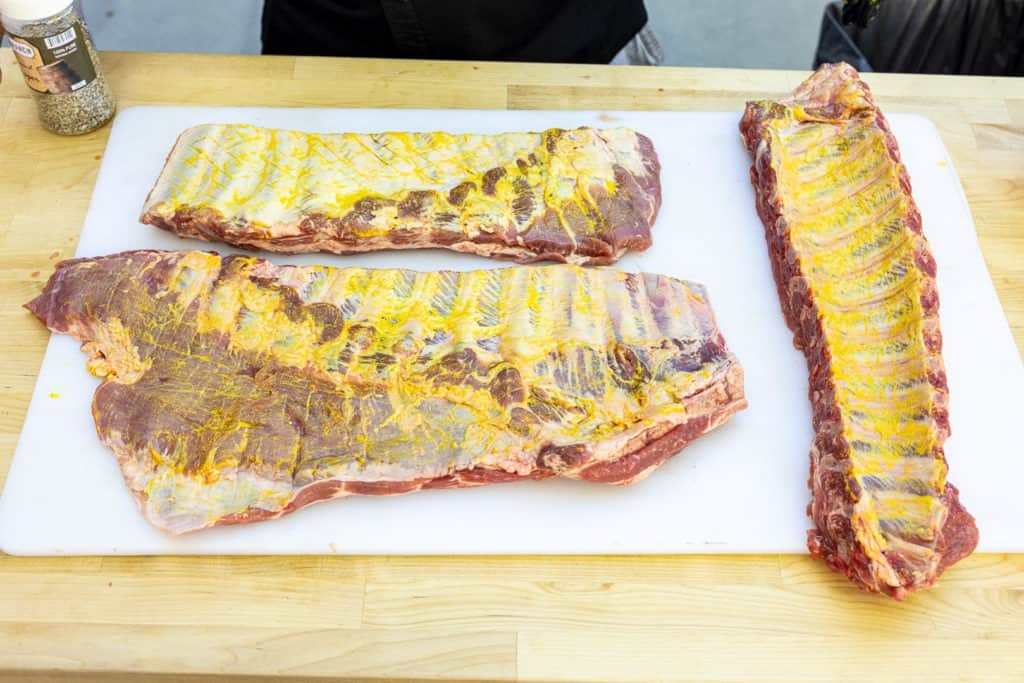
Seasoning: Using Mustard as a Binder
Why Use a Binder:
- Purpose: A binder like mustard helps the dry rub adhere to the ribs better, ensuring a more even coating and flavor.
- Flavor: Don’t worry about the mustard flavor; it cooks off, leaving behind just a flavorful crust.
How to Apply:
- Step 1: Pat the ribs dry with paper towels.
- Step 2: Apply a thin layer of yellow mustard on all sides of the ribs. Use your hands to rub it in evenly.
- Step 3: Immediately follow with your dry rub.
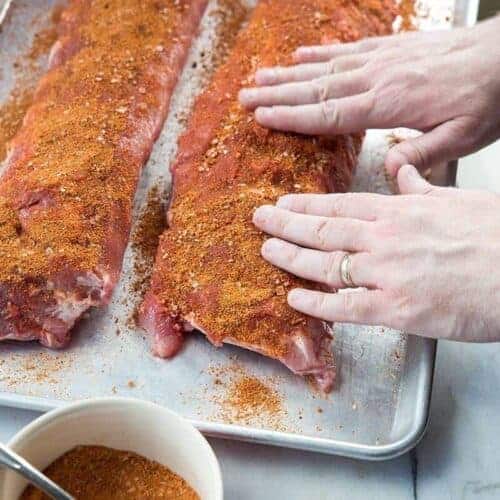
Dry Rub Recipe: Ingredients and Proportions
Ingredients:
- Brown Sugar: 1/2 cup (for sweetness and caramelization)
- Smoked Paprika: 1/4 cup (for a smoky depth)
- Garlic Powder: 2 tablespoons (for savory flavor)
- Onion Powder: 2 tablespoons (adds a sweet-savory balance)
- Salt: 2 tablespoons (enhances all the flavors)
- Black Pepper: 1 tablespoon (for a bit of heat)
- Cayenne Pepper: 1 teaspoon (optional, for a spicy kick)
- Mustard Powder: 1 tablespoon (for a tangy undertone)
- Chili Powder: 2 tablespoons (for complexity and color)
How to Apply the Rub:
- Step 1: Mix all the ingredients thoroughly in a bowl.
- Step 2: Generously sprinkle the rub over the mustard-coated ribs.
- Step 3: Pat the rub into the meat to ensure it sticks well. Don’t rub it in too hard; just a gentle pat will do.
- Step 4: Let the ribs sit for at least 30 minutes to absorb the flavors. For best results, cover and refrigerate overnight.
With the ribs trimmed, seasoned, and ready to go, you’re well on your way to BBQ glory. The next step: the all-important smoking process!
Smoking Process
Setting Up the Smoker
Choosing Your Wood:
- Apple Wood: Offers a sweet, mild flavor that pairs well with pork. Ideal for those who prefer a subtle smokiness.
- Cherry Wood: Adds a slightly fruity flavor and gives the ribs a beautiful dark red color.
- Hickory: Provides a strong, robust smoky flavor. It’s a classic choice for ribs but be careful not to overuse it as it can become overpowering.
Combining Woods:
- Balanced Flavor: Many pitmasters mix woods to balance flavors. A popular combination is apple and hickory, offering a blend of sweet and strong smoky notes.
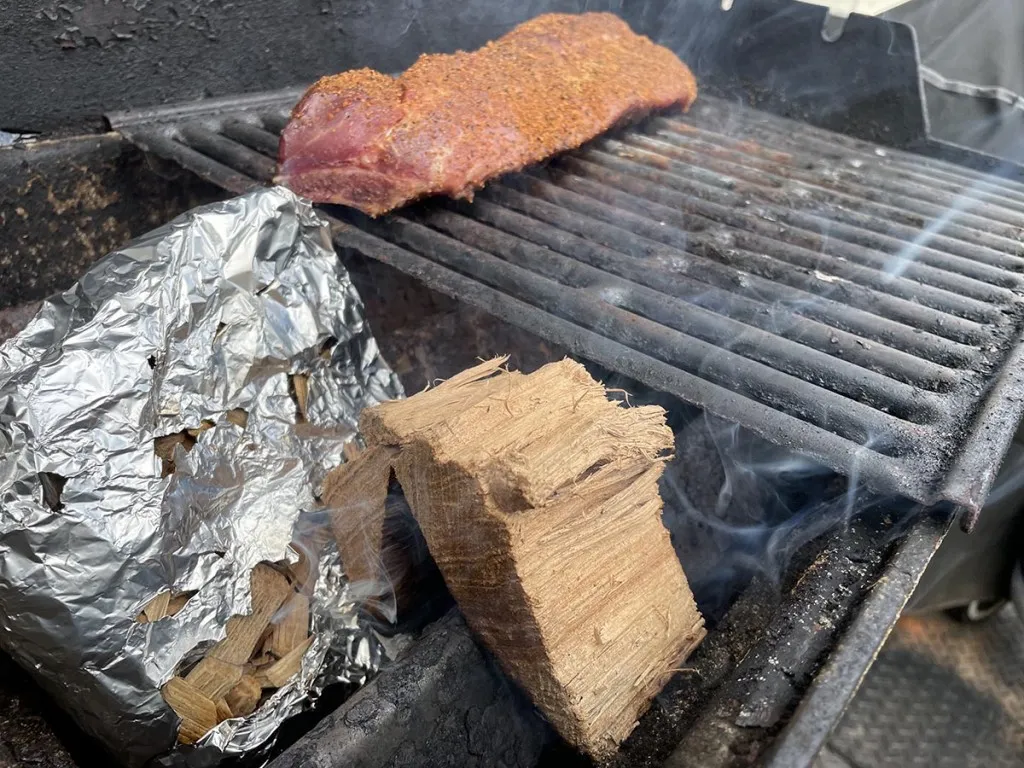
Temperature Control
Importance of Maintaining 225°F:
- Why 225°F: This temperature is ideal for breaking down the connective tissues in the ribs without drying them out, resulting in tender, juicy meat.
- Consistency: Maintaining a steady temperature ensures even cooking and prevents the ribs from becoming tough or overcooked.
How to Maintain Temperature:
- Use a Reliable Thermometer: Invest in a good smoker thermometer to monitor the internal temperature accurately.
- Adjust Vents: Control the smoker’s temperature by adjusting the intake and exhaust vents. More air increases the temperature; less air decreases it.
- Fuel Management: Add wood or charcoal as needed to maintain a steady heat.
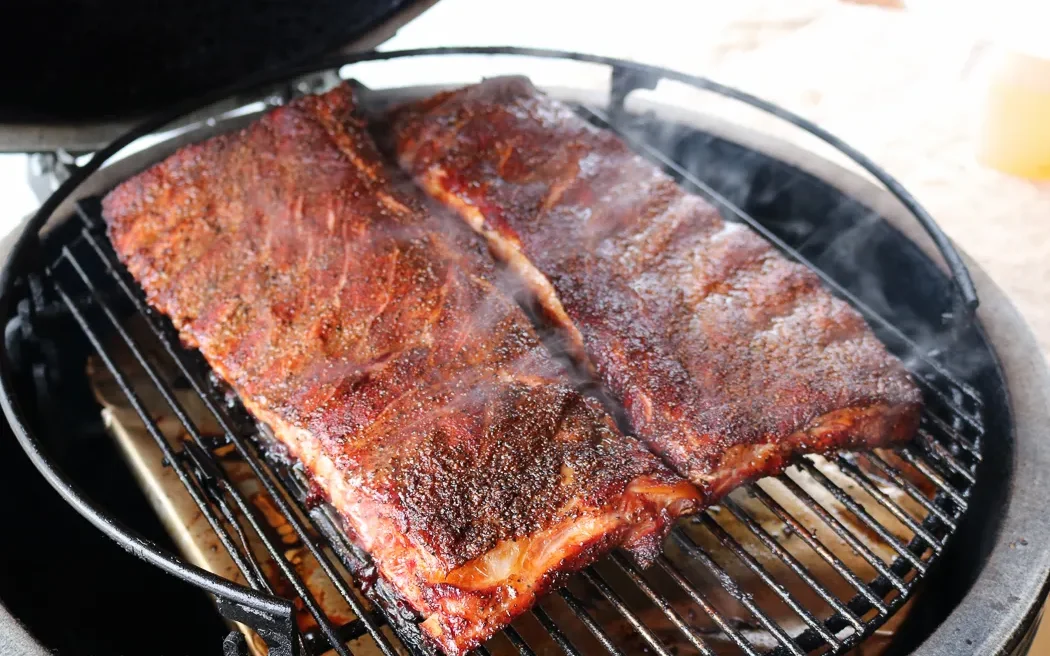
Smoking
Placing the Ribs:
- Bone-Side Down: Place the ribs bone-side down on the smoker grates. This position allows the fat to render through the meat, keeping it moist.
- Spacing: Ensure there’s enough space between the racks for the smoke to circulate evenly.
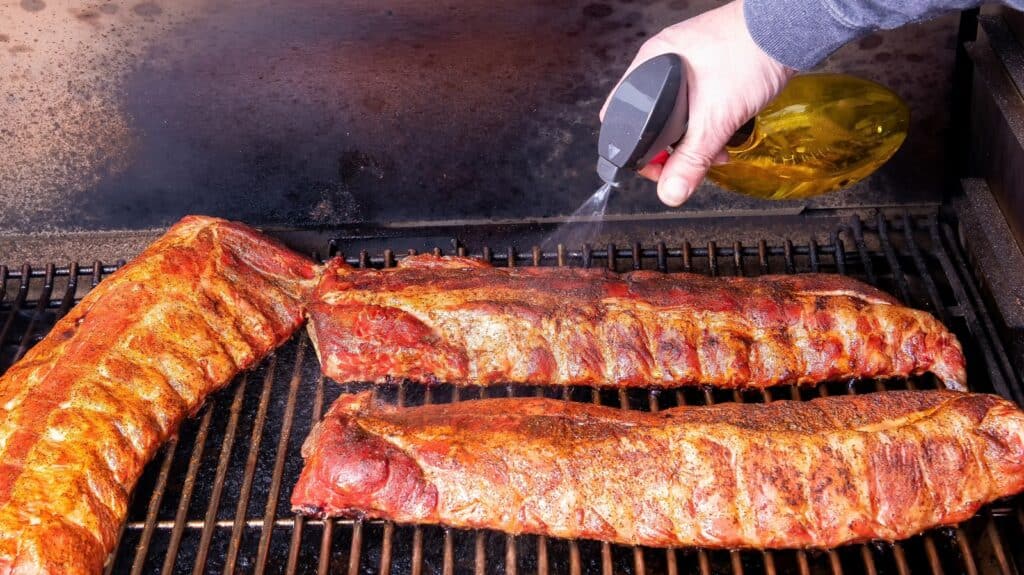
Spritzing:
- Why Spritz: Spritzing helps keep the ribs moist and enhances the flavor. It also helps develop a beautiful bark on the ribs.
- Spritz Recipe: Mix apple juice, apple cider vinegar, and a touch of water in a spray bottle.
- How Often: Spritz the ribs every 45 minutes to an hour, starting after the first hour of smoking.
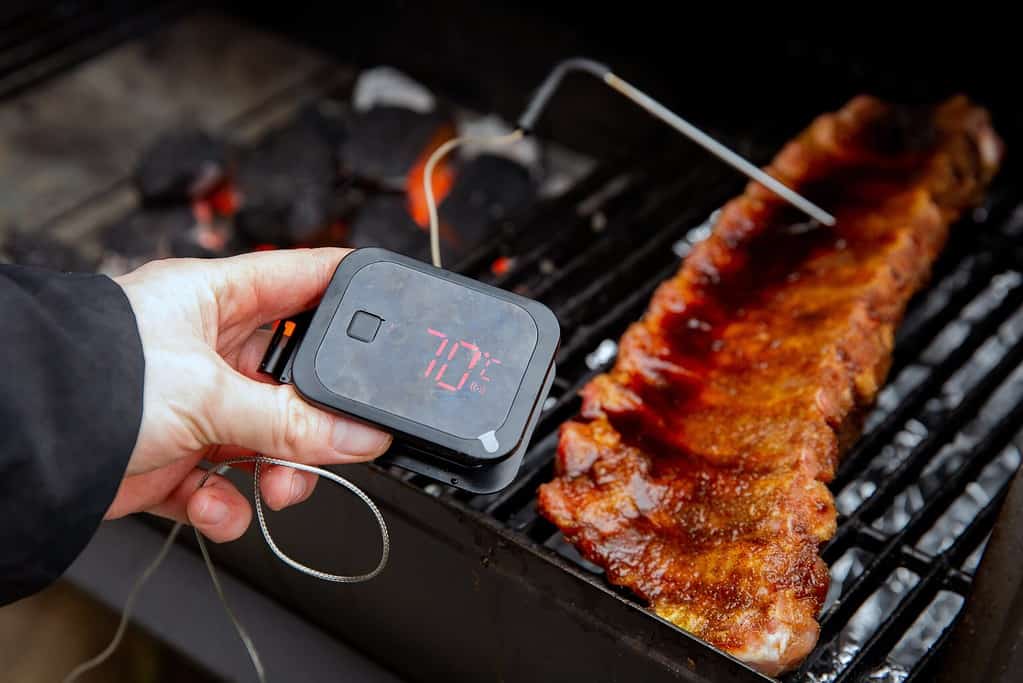
Monitoring:
- Internal Temperature: Use a meat thermometer to check the internal temperature of the ribs. They’re done when they reach around 190-203°F.
- Visual Cues: Look for meat pulling back from the bones and a nice, dark bark on the surface.
- Timing: Generally, ribs take about 5-6 hours to smoke at 225°F, but always rely on internal temperature and visual cues over exact timing.
The Wrapping Debate
What is the 3-2-1 Method?
- Overview: This popular method breaks down the smoking process into three stages, totaling six hours. It’s primarily used for spare ribs.
- Step-by-Step:
- 3 Hours of Smoking: Place the ribs directly on the smoker grates, bone-side down. Smoke at 225°F for 3 hours.
- 2 Hours Wrapped: After 3 hours, wrap the ribs tightly in aluminum foil with a splash of apple juice, beer, or another liquid of your choice. Return to the smoker for another 2 hours. This step tenderizes the meat.
- 1 Hour Unwrapped: Unwrap the ribs and place them back on the smoker for the final hour. During this time, you can brush on your BBQ sauce to create a sticky glaze.
2-2-1 Method: Alternative for Baby Back Ribs
- Overview: This method is a variation of the 3-2-1 method, tailored for the smaller and leaner baby back ribs. It shortens the total cooking time to five hours.
- Step-by-Step:
- 2 Hours of Smoking: Place the baby back ribs on the smoker grates, bone-side down, and smoke at 225°F for 2 hours.
- 2 Hours Wrapped: Wrap the ribs in foil with a liquid of your choice, and return them to the smoker for another 2 hours.
- 1 Hour Unwrapped: Unwrap the ribs, place them back on the smoker, and brush with BBQ sauce during the last hour to develop a nice glaze.
Unwrapped Method: Pros and Cons
Pros:
- Maintaining Bark: Smoking ribs unwrapped allows the rub to form a crusty, flavorful bark on the outside. This is often preferred by those who love a crunchy exterior.
- Avoiding Mushiness: Wrapping ribs can sometimes lead to a texture that some find too soft or mushy. Keeping them unwrapped maintains a firmer bite.
Cons:
- Longer Cooking Time: Without the foil to speed up the process, unwrapped ribs can take longer to reach the desired tenderness.
- Risk of Drying Out: There’s a higher risk of the ribs drying out without the added moisture from wrapping. Regular spritzing is crucial to keep them moist.
Best Practices for Unwrapped Ribs:
- Spritz Frequently: To avoid drying out, spritz the ribs every 30-45 minutes with a mixture of apple juice and apple cider vinegar.
- Monitor Closely: Keep a close eye on the internal temperature and appearance. Ribs are ready when they reach an internal temperature of around 190-203°F and have a dark, caramelized bark.
Choosing the right method depends on your personal preference and the type of ribs you’re smoking. Experiment with these techniques to find your perfect rib-smoking routine. Now, let’s move on to the final touches that will make your ribs truly spectacular!
Finishing Touches
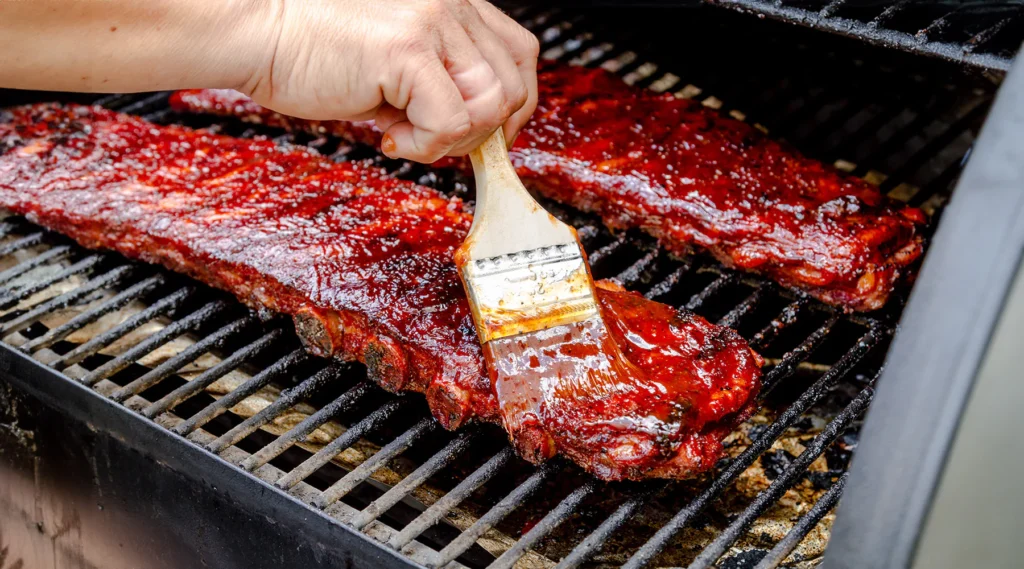
When to Sauce:
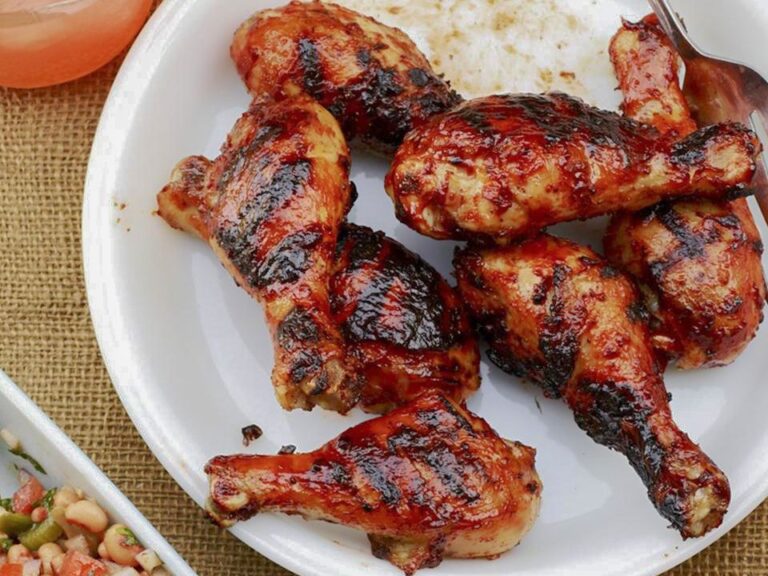
- Timing: The best time to apply BBQ sauce is during the last hour of smoking. Applying it too early can cause the sugars in the sauce to burn.
How to Apply:
- Brush It On: Use a basting brush to apply a thin, even layer of your favorite BBQ sauce on both sides of the ribs.
- Multiple Layers: For a richer, more flavorful glaze, apply multiple layers of sauce. Start with one coat, let it set for about 15 minutes, and then apply another. Repeat until you have the desired thickness.
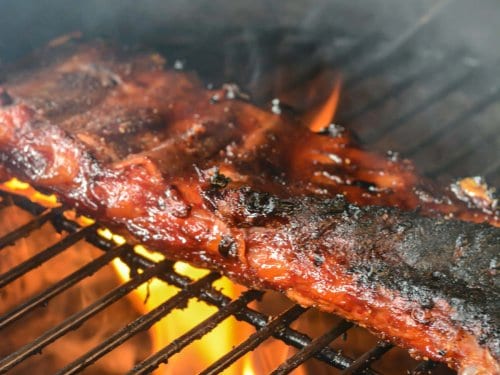
Final Smoke: Setting the Sauce and Achieving the Perfect Glaze
Why Final Smoke:
- Caramelization: The final smoke allows the sauce to caramelize, creating a sticky, flavorful glaze that clings to the ribs.
- Flavor Integration: This step ensures that the sauce integrates well with the smoky flavors of the ribs.
How to Achieve the Perfect Glaze:
- Unwrapped: Keep the ribs unwrapped during the final hour of smoking to let the sauce set properly.
- Temperature: Maintain the smoker temperature at 225°F. Higher temperatures can cause the sauce to burn.
- Observation: Keep a close eye on the ribs to avoid burning the sauce. You want a glossy, caramelized finish, not a charred one.
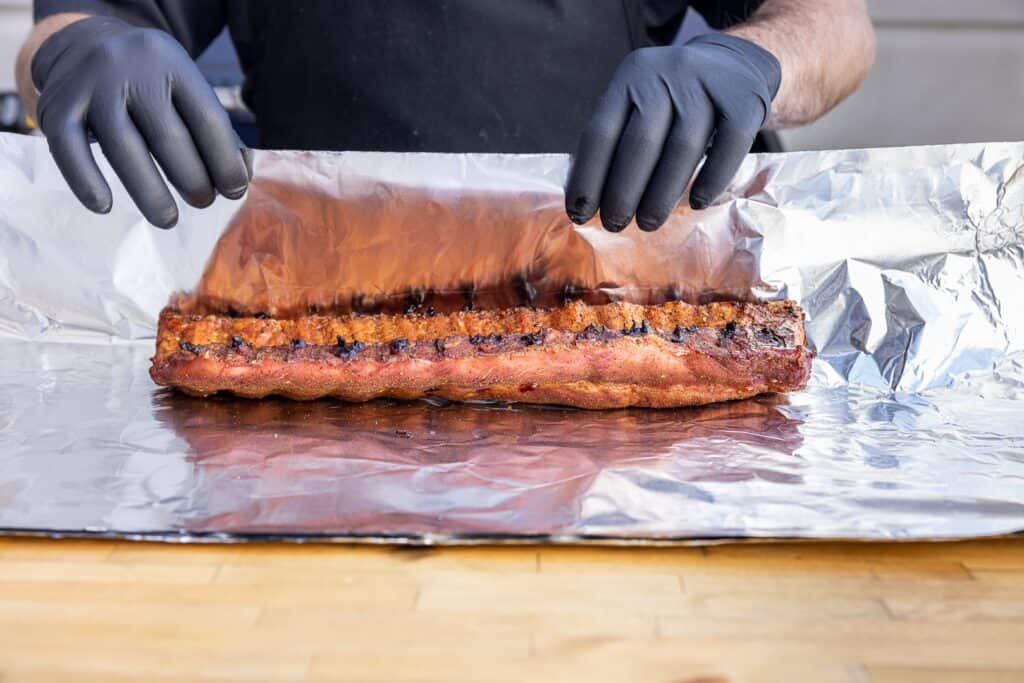
Resting: Importance of Letting the Ribs Rest
Why Resting Matters:
- Juice Redistribution: Resting allows the juices to redistribute throughout the meat, ensuring every bite is moist and flavorful.
- Temperature Stabilization: It helps the ribs reach an optimal eating temperature without losing too much heat.
How to Rest the Ribs:
- Foil Wrap: After removing the ribs from the smoker, wrap them loosely in aluminum foil. This helps retain heat and moisture.
- Rest Time: Let the ribs rest for at least 10-15 minutes. This short period is enough to enhance the overall texture and flavor of the ribs.
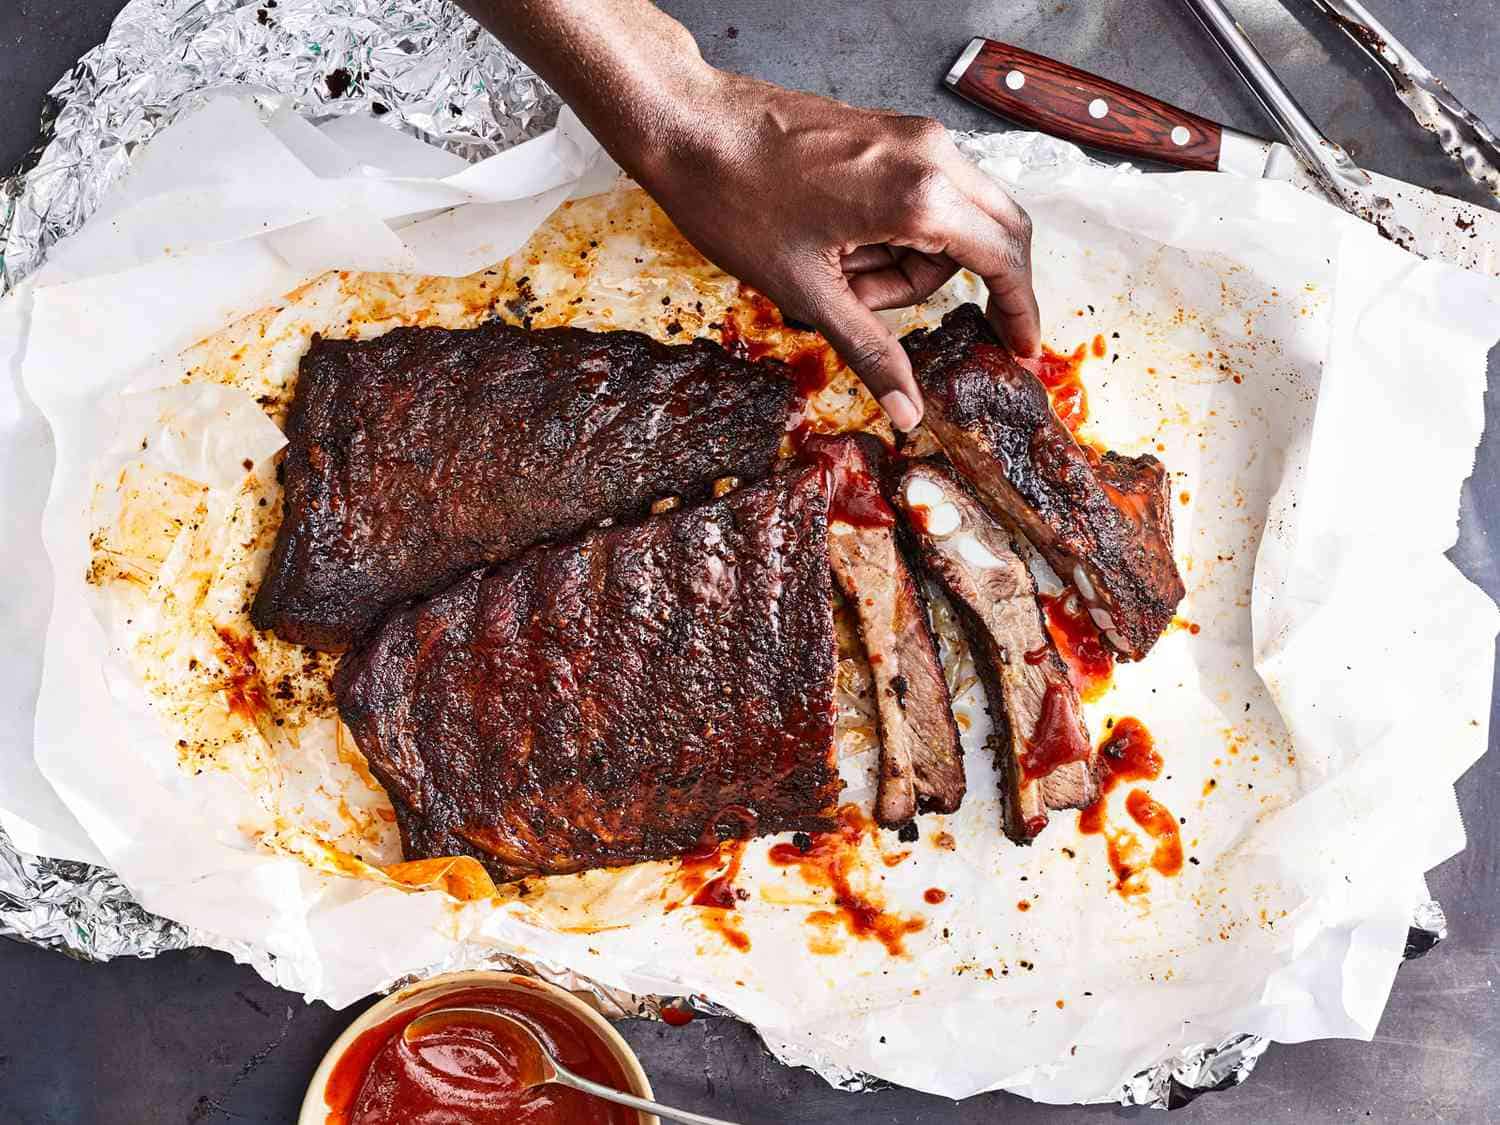
Serving:
- Cutting: Use a sharp knife to cut between the bones, ensuring each piece has a good amount of meat.
- Presentation: Arrange the ribs on a platter, brush with a little extra sauce if desired, and serve with your favorite sides.

Tips and Tricks
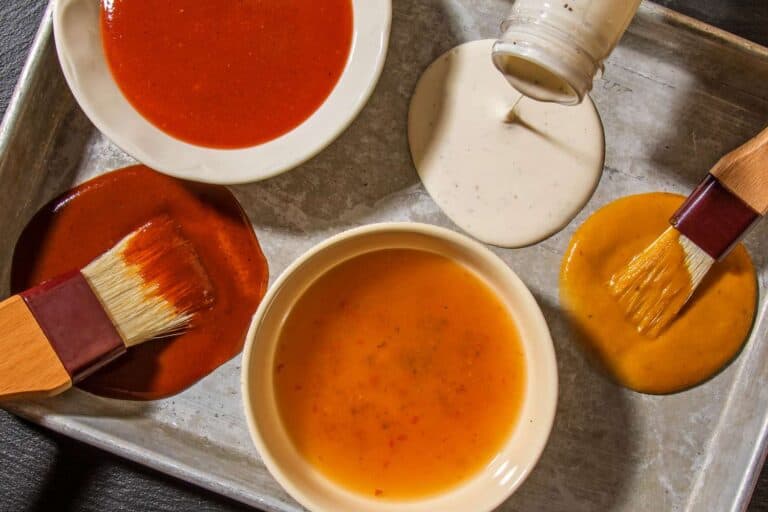
Spritzing Mixtures
Apple Cider Vinegar and Water:
- Basic Mix: A simple and effective spritzing mixture is equal parts apple cider vinegar and water. This helps maintain moisture and adds a subtle tangy flavor.
- Enhanced Mix: For added complexity, mix apple cider vinegar, water, and a bit of apple juice. This combination keeps the ribs moist and enhances their natural sweetness.
How to Spritz:
- Frequency: Spritz the ribs every 45 minutes to an hour after the first hour of smoking.
- Technique: Use a spray bottle to apply the mixture evenly across the ribs. Avoid over-spritzing, as too much liquid can wash away the rub.
Maintaining Moisture
Using a Water Pan in the Smoker:
- Why: A water pan helps regulate the temperature and adds humidity to the smoking environment, preventing the ribs from drying out.
- How: Place a pan filled with water in the smoker, preferably near the heat source. Refill the water as needed throughout the smoking process.
Checking for Doneness
Bend Test:
- What: The bend test is a reliable method to check if ribs are done.
- How: Pick up the ribs with tongs at one end and gently bounce them. If the meat cracks and begins to break away from the bones, the ribs are done.
Internal Temperature:
- What: For precise doneness, use a meat thermometer.
- Target Temperature: Ribs are done when the internal temperature reaches 190-203°F. This range ensures the collagen has broken down, making the ribs tender.
Troubleshooting Common Issues
Causes and Solutions:
- Cause: Smoking at too high a temperature.
- Solution: Maintain a consistent 225°F temperature and use a water pan to keep the environment humid.
- Cause: Overcooking.
- Solution: Monitor internal temperature and use the bend test to check for doneness.
Adjusting Cooking Times and Temperatures:
- Cause: Undercooking or cooking at too low a temperature.
- Solution: Ensure the ribs reach an internal temperature of 190-203°F. Use the 3-2-1 or 2-2-1 method to achieve the right texture.
- Cause: Not removing the membrane.
- Solution: Always remove the membrane before seasoning and smoking the ribs.
Enhancing the Smokiness:
- Wood Choice: Use a mix of hickory and fruit woods like apple or cherry for a balanced smoky flavor.
- Avoid Over-Smoking: Too much smoke can make the ribs bitter. Use wood chunks or chips sparingly.
Seasoning Balance:
- Rub Balance: Ensure your rub has a good mix of sweet, salty, and spicy elements. Adjust the proportions to suit your taste.
- Sauce Application: Apply sauce during the last hour of smoking to avoid burning and ensure a perfect glaze.
Conclusion
To wrap things up, let’s quickly recap the key steps to smoking ribs like a pro. Start by choosing your ribs, whether baby back or spare, and look for freshness, marbling, and size. Remember, smoking ribs is an art that gets better with practice, so don’t be discouraged if your first attempts aren’t perfect.
Try this recipe, share your experiences, and enjoy the journey. For visual learners, we’ve embedded helpful videos on how to remove the membrane, perfect a rib rub, use the 3-2-1 method, utilize a water pan, and perform the bend test for doneness. Dive in, and happy smoking!